Target Authentication
If your website has areas that require authentication, you may provide the DAST Scanner with credentials to log in to your website. By doing this, you’re enabling the DAST Scanner to run a scan that might reveal any vulnerabilities in deeper parts of your app.
It is recommended that you create a user for the tests since the DAST Scanner will submit forms and click buttons, which might “pollute” the account.
When a scan is started and the target has a login configuration, the first thing the crawler does is log into the application (web target) to obtain a session. Upon successful login, it will start crawling the app. While the crawler is running, it constantly verifies whether the session is still valid. Currently, this check is performed automatically based on the login configuration, but soon we will have the option to configure how the loss of session can be detected.
Web target authentication options
To enable authentication for a web target, you can go to the target’s Advanced Settings and select either Login Form or Login Sequence.
Using a Login Form
(applicable when the login form requires a username/email and password, which is a common use case)
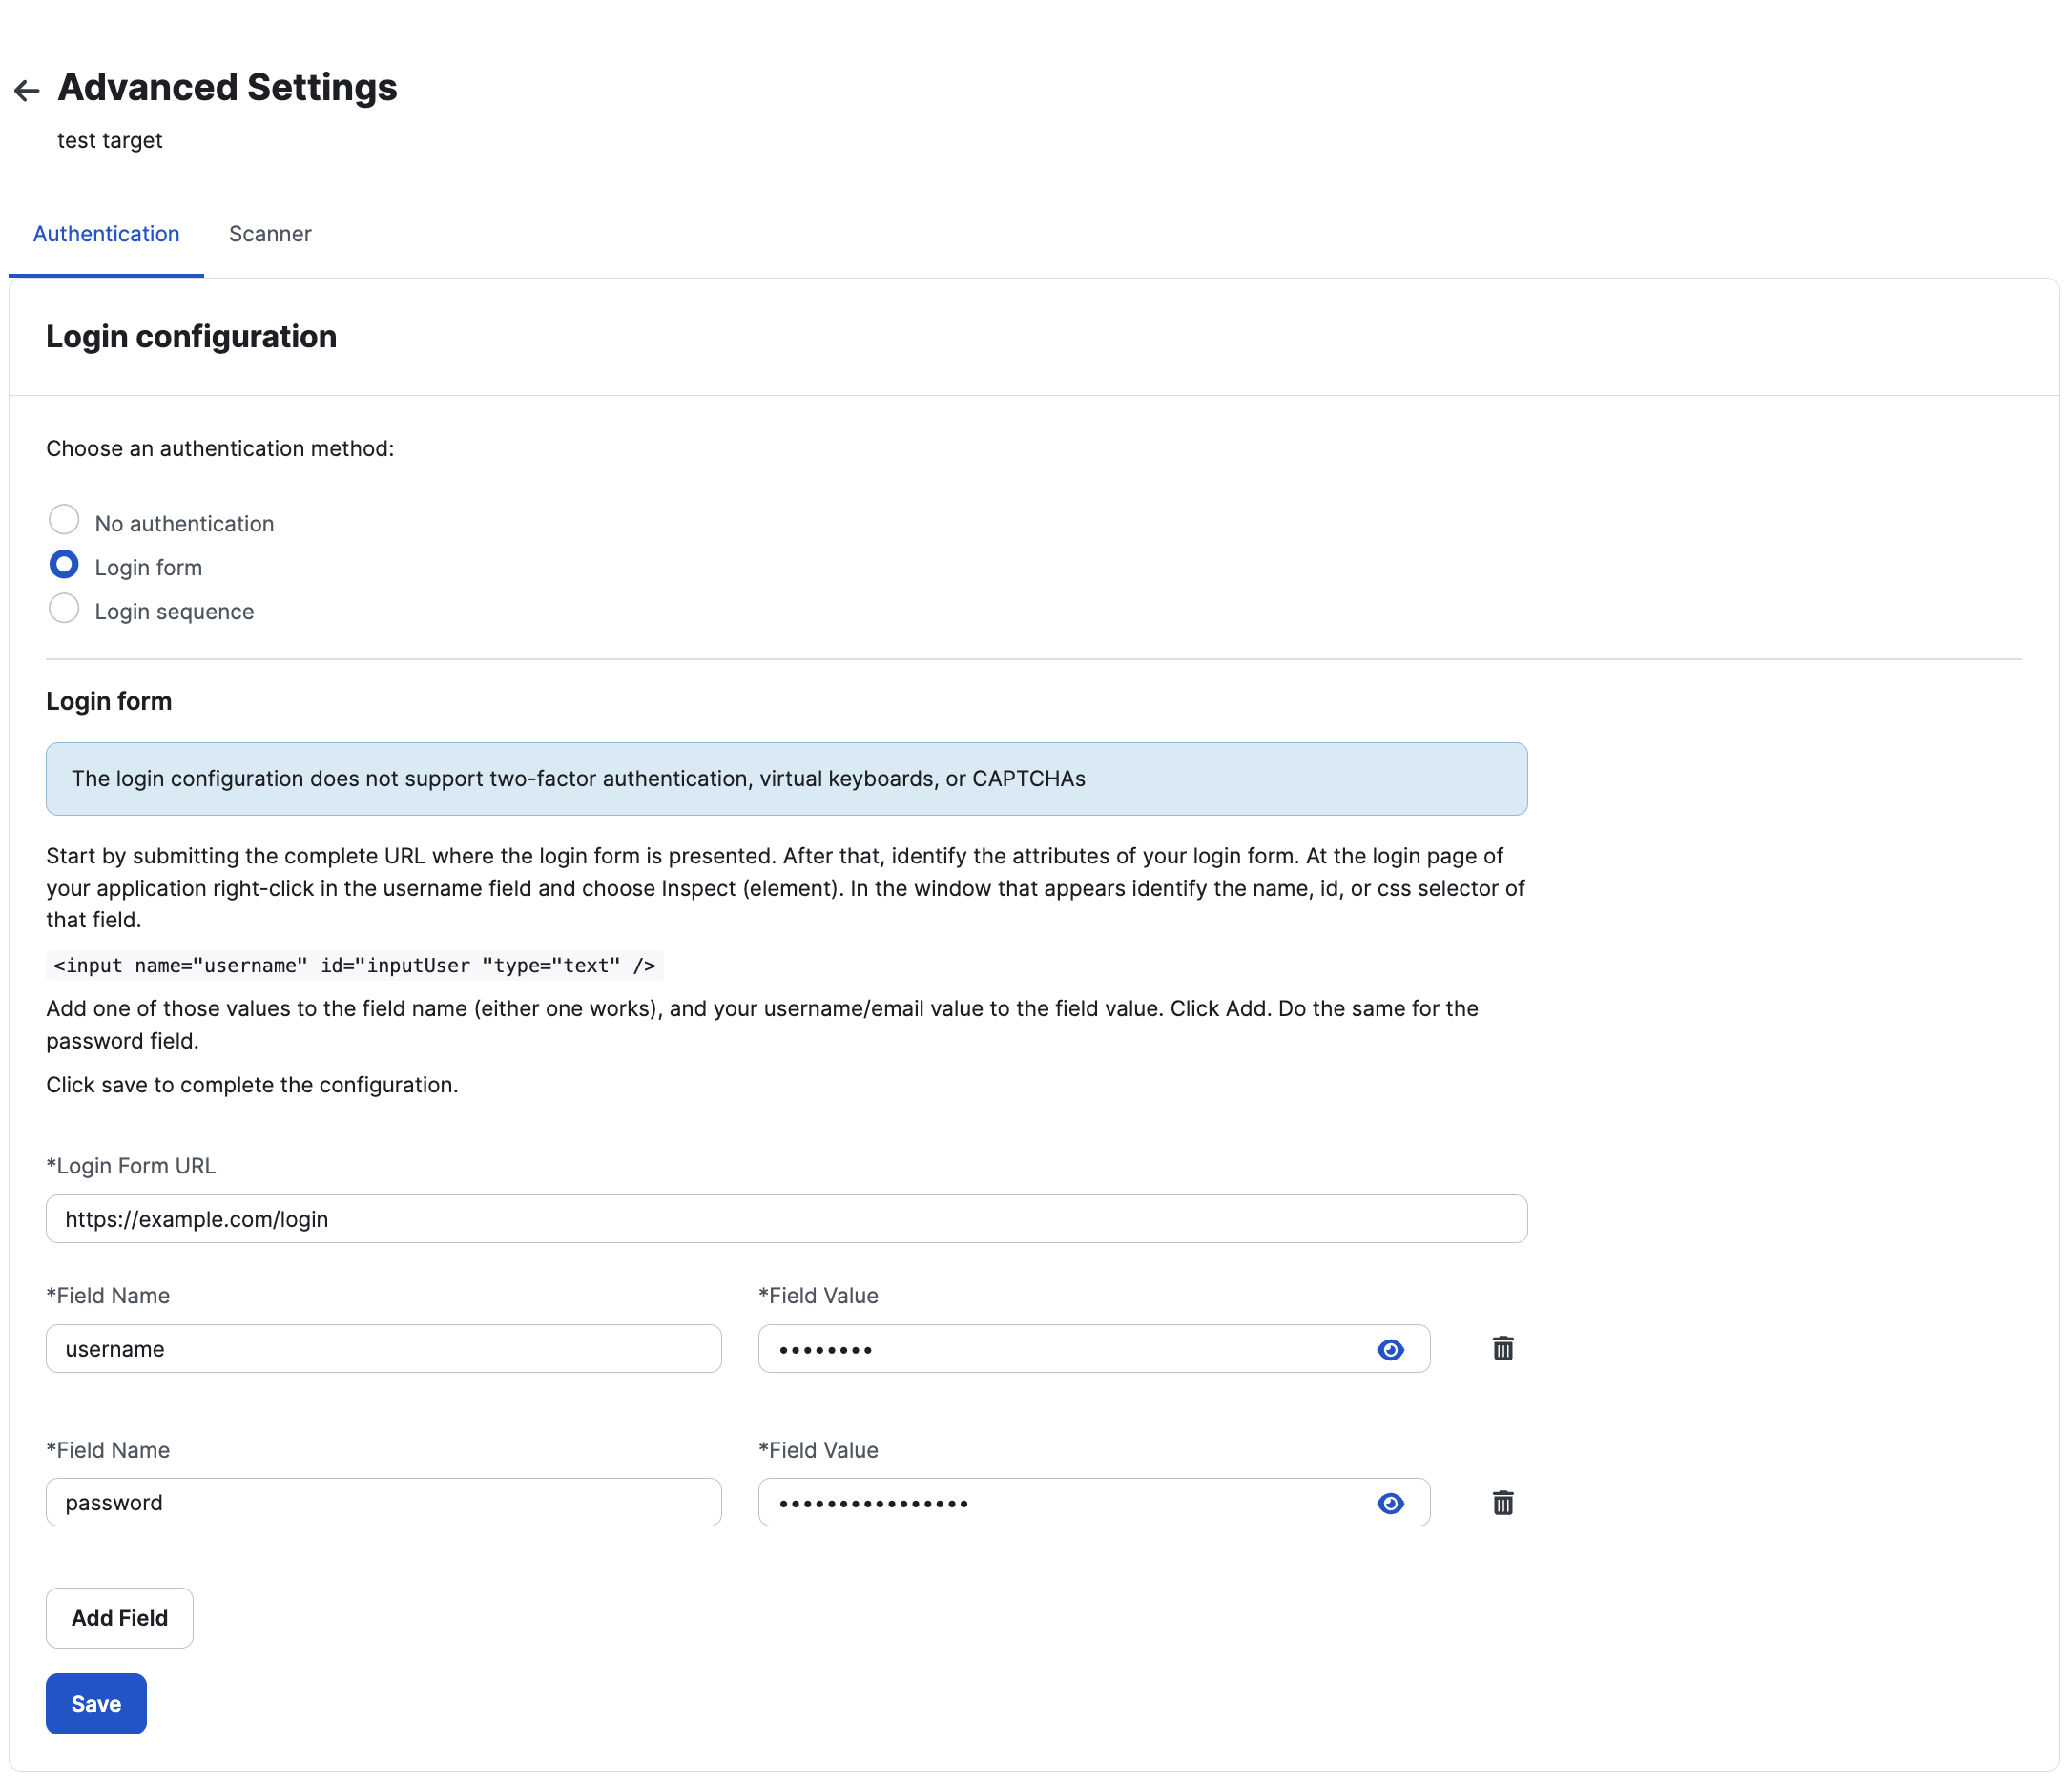
To add authentication using a simple login form, go to the target’s Advanced Settings, then toggle on the “Login form” option. To simplify the configuration, we require the Login URL and at least one field name with its respective value.

The Login URL
- The login URL may be the same as the target URL if the form is located on the root path or if it automatically redirects to the login page.
- If the root path does not contain the login form or does not redirect to the login page, a specific URL must be provided.
- If the login process involves a third-party service (such as Auth0), use the URL that redirects to the authentication provider.
For example:
- If
https://example.com/displays the login form, definehttps://example.com/as the Login URL. - If
https://example.com/redirects tohttps://example.com/login, define eitherhttps://example.com/orhttps://example.com/loginas the Login URL. - If
https://example.com/orhttps://example.com/loginredirects to a third-party authentication provider (e.g.,https://example.auth0.com/?token=xyz), definehttps://example.com/orhttps://example.com/loginas the Login URL.
The fields
We require the names and values of the fields. This refers to the value of the HTML input attribute name and the value that should be entered into the input. For example, for <input type="text" name="username" value="">, the field’s name should be username and you should provide the respective value.
It is now very common to find inputs without the name attribute; however, we also support the use of the id attribute or a CSS selector. For instance, <input type="text" id="username_id" value=""> - the field’s name can be username_id or #username_id.
Sometimes, it is only possible to use CSS selectors. For example, the app uses media queries, and there are multiple forms with the same input names and IDs:
<form name="mobile_login_form" action="/mobile_login_action">
  <p>Username: <input type="text" name="username"></p>
  <p>Password: <input type="password" name="password"></p>
</form>
<form name="login_form" action="/login_action">
  <p>Username: <input type="text" name="username"></p>
  <p>Password: <input type="password" name="password"></p>
</form>
In this case, use the CSS selector form[name="login_form"] input[name="username"].
The button to submit the login form is usually detected automatically. However, sometimes it is not clear which one should be clicked due to reasons such as:
- The login form is not inside a
<form>tag (a common scenario nowadays). - There is more than one submit button inside the form.
To address this, we offer the option to define the button that should be clicked by adding to the login configuration:
- Field name:
submit_button - Field value:
<CSS selector of the button>(this must be a CSS selector)
Extra hacks to assist in certain situations
Check for session loss:
- Field name:
check_loggedout - Field value:
<CSS selector of an element only visible when logged out>(e.g.,form.login #username) or - Field value:
["CSS selector 1", "CSS selector 2"](e.g.,["#form.login #username", "form.login #password"])
Wait for a loading login input/element
To wait for a login input/element when the target has some unusual behavior while loading the login page, or to click on a button to go to the login page without the need for a login sequence:
- Wait for an element
- Field name:
1_wait - Field value:
<CSS selector of the element to wait for>
- Click on an element
- Field name:
2_click - Field value:
<CSS selector of the element to be clicked>
(The prefixed number, specifies the order)
The most common issues when login fails
- Incorrect or non-functioning credentials (e.g., user account is blocked).
- The login URL is incorrect or does not display the login inputs for some reason. For example, the login might be through Auth0, and users may have copied the URL directly from Auth0 with a token, rendering it invalid.
- The names or IDs of the input fields are incorrect, or there are multiple inputs with the same name or ID.
- The CSS selectors are incorrect.
- The input fields are not contained within a
<form>tag, and thesubmit_buttonis not defined. - The login page exhibits unusual behavior, requiring the use of the “hack”
1_waitto wait for a specific input (this issue can be particularly difficult to identify). - The target is blocking our access, preventing us from reaching the login page.
- The login process includes a required CAPTCHA that users may not notice because the page uses “smart recaptcha,” which is only triggered when a crawler is detected.
Using a Login Sequence
If your login page does not have all the login credentials inputs in one page, for example, you have to enter an email then click next to enter the password, you can use a login sequence. It will record your actions and replay them during the scan.
To learn more about Cobalt’s Sequence Recorder browser plugin, check the Sequence Recorder page.
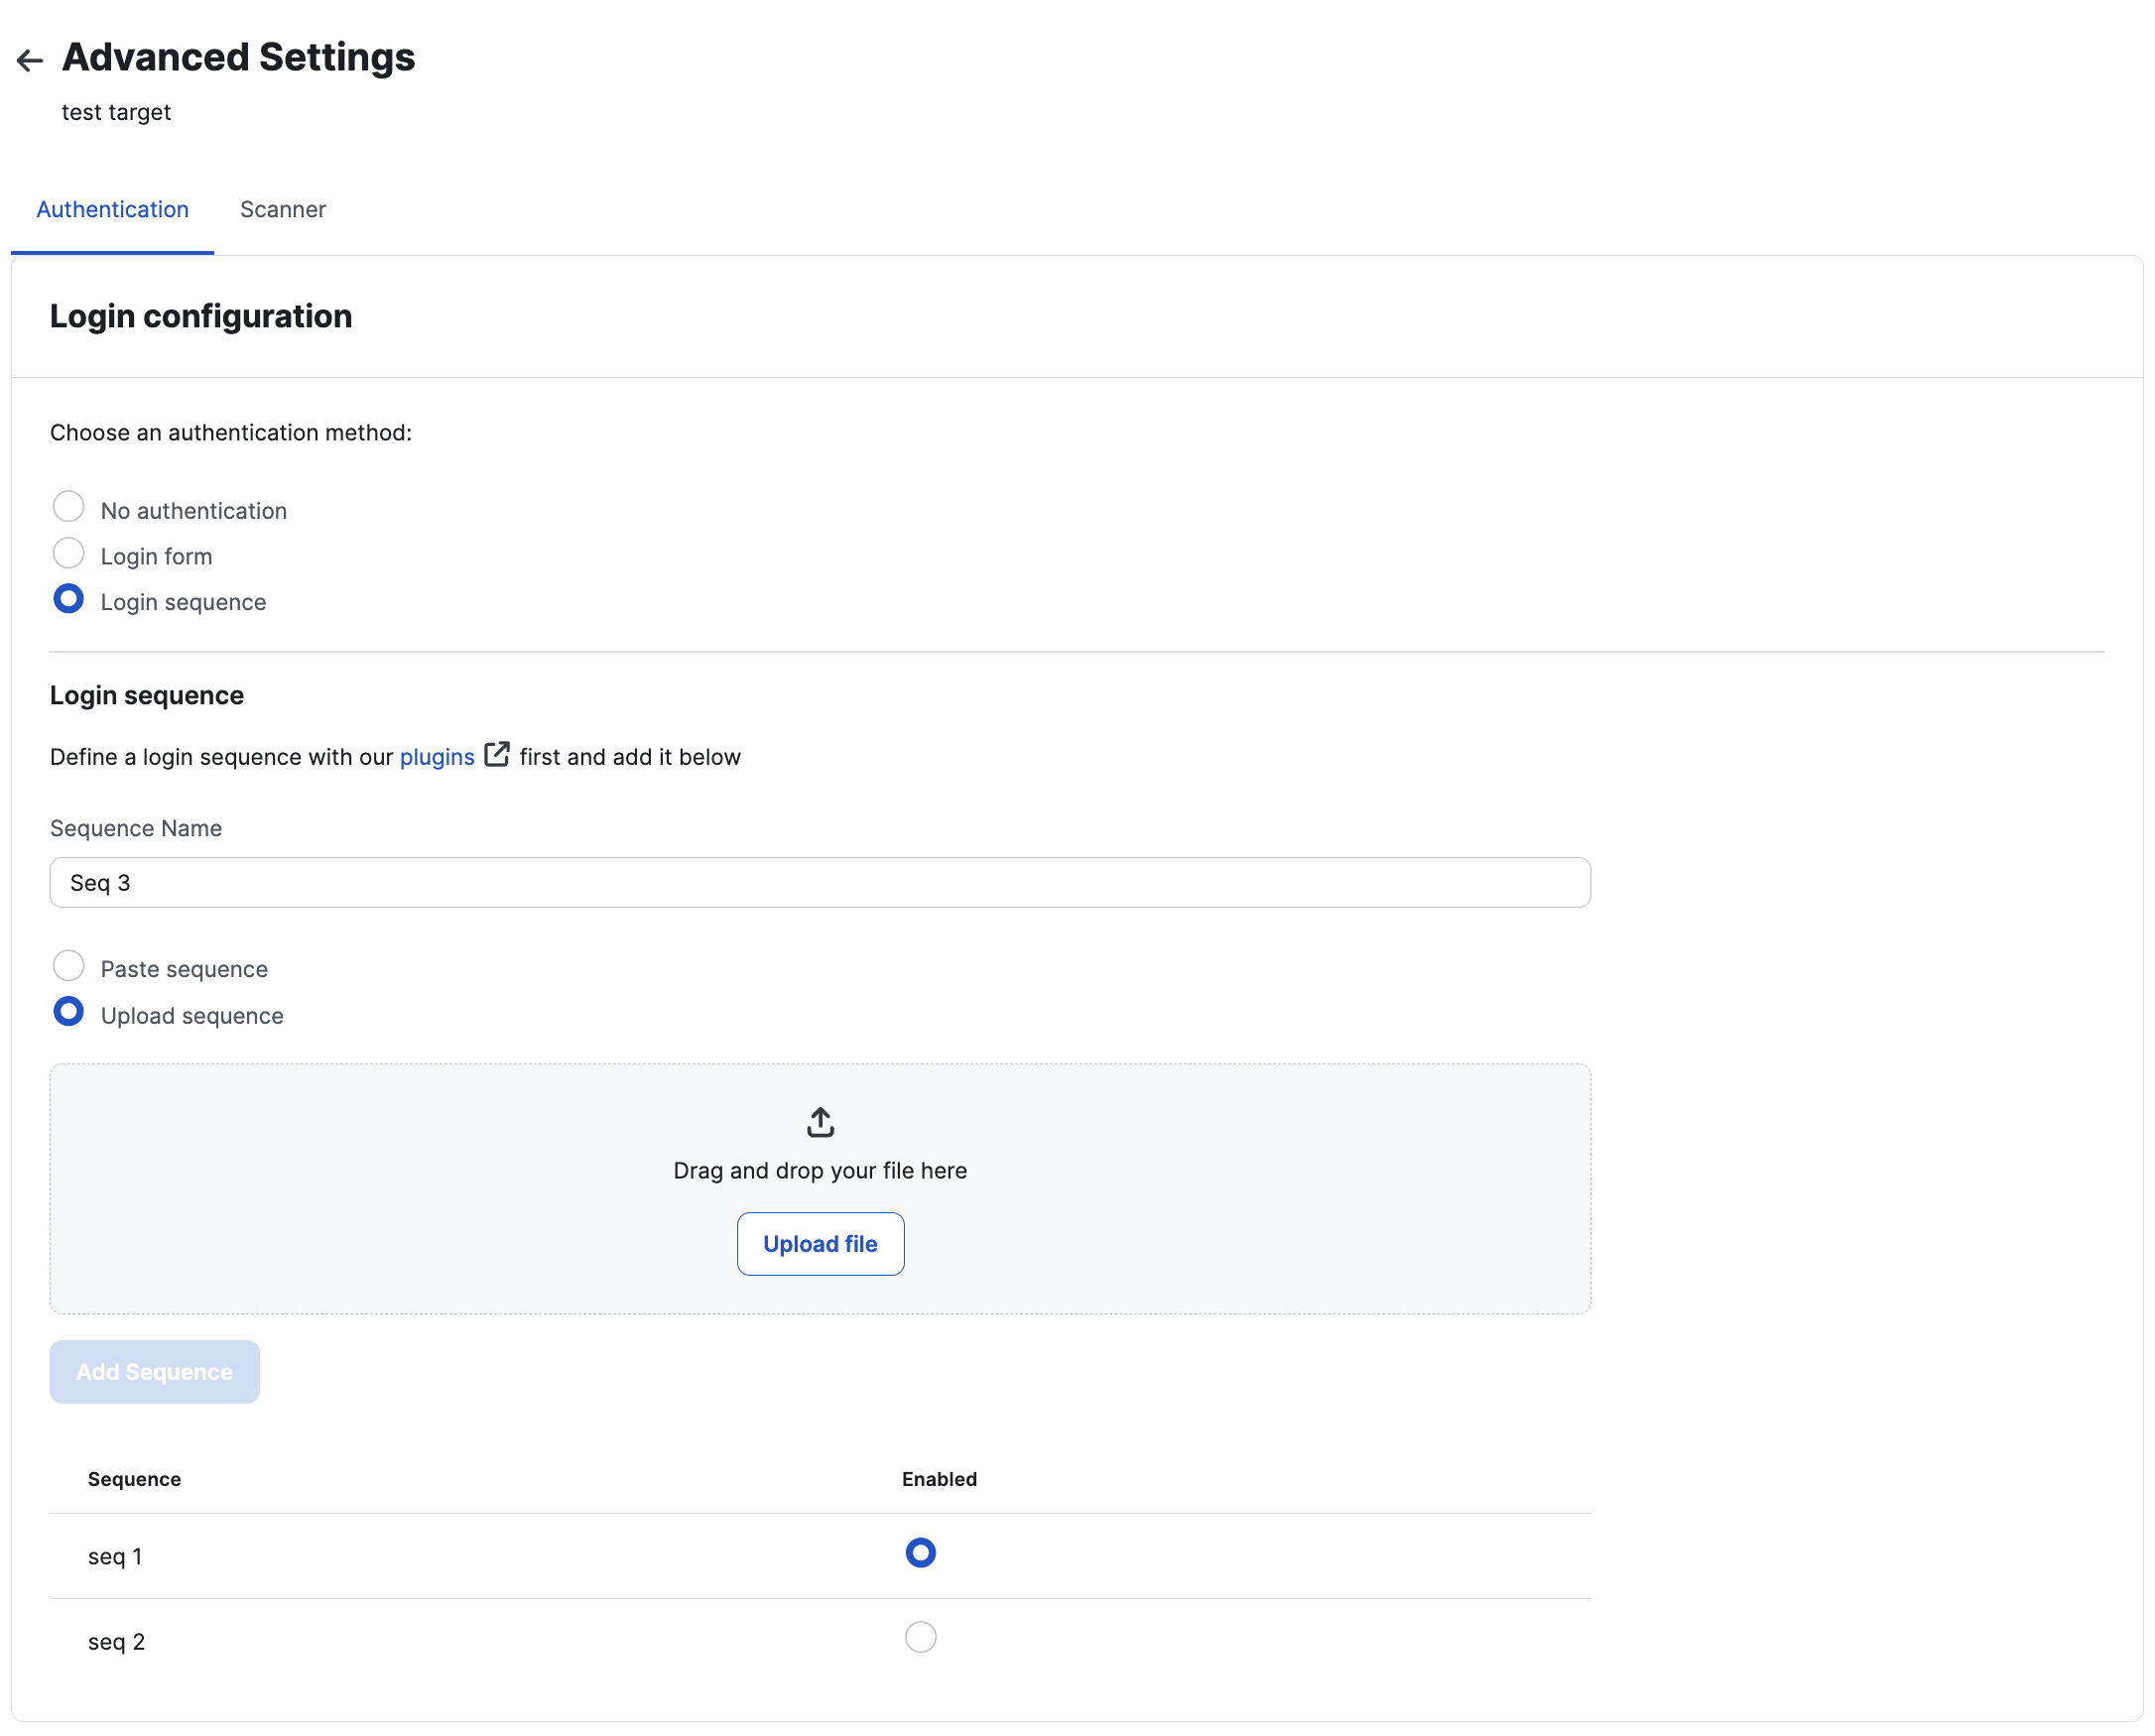
Once you have a sequence recorded, go to the target’s Advanced Settings, toggle on the “Login sequence option and then:
- Enter a name for the sequence to easily identify it later.
- Paste the sequence in the field provided, or upload the sequence file directly.
- Click on the “Add Sequence” button.
You can upload multiple sequences and enable only the one you want to use for the scan.

API Target Authentication
The DAST Scanner supports APIs with different authentication methods. You can set a fixed API key in a custom header or configure a login endpoint from which you obtain an authentication token.
You can also define custom parameter values that replace those found in the schema. This allows you to override example values or to ensure domain-specific values are properly filled.
API Authentication
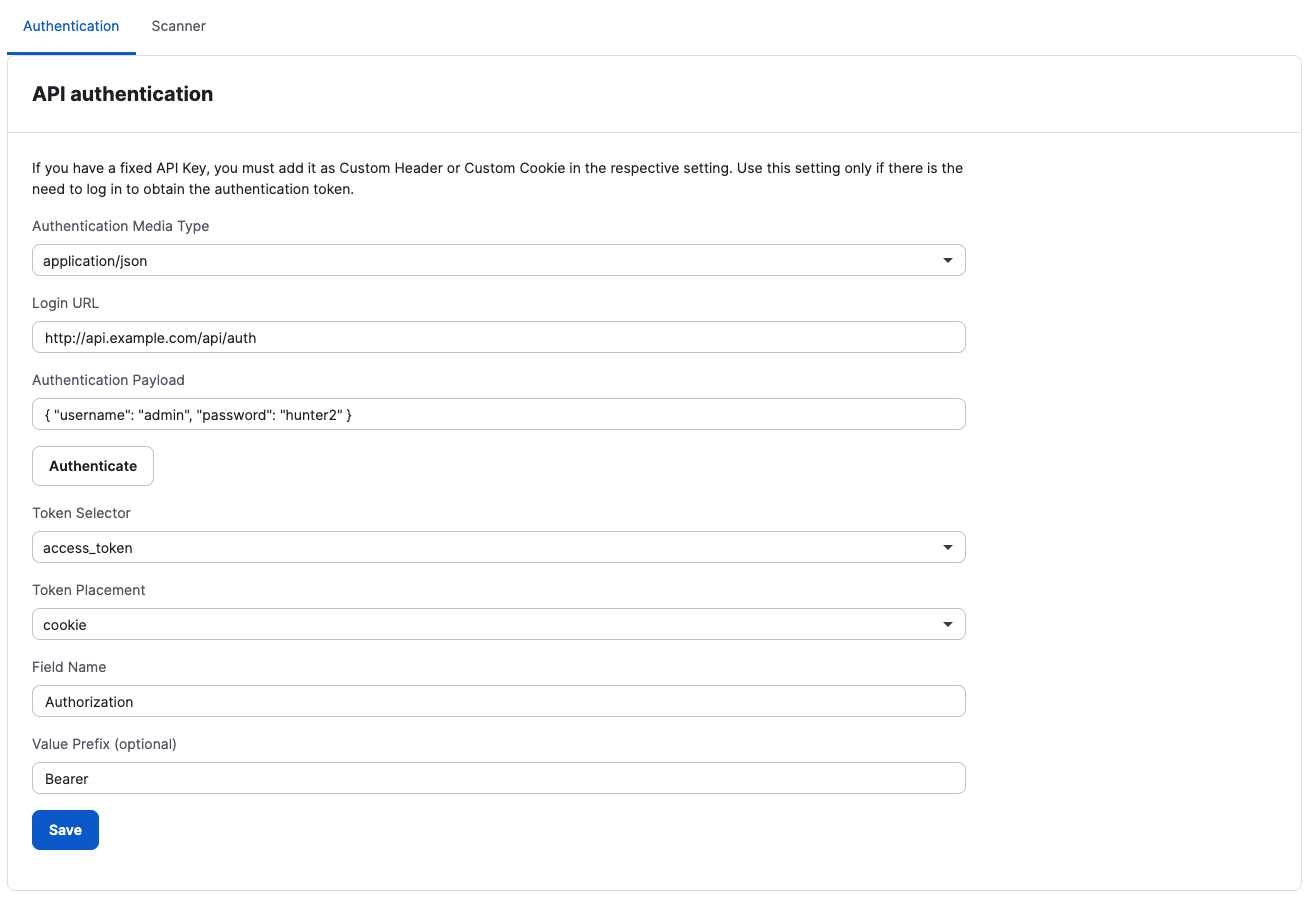
To enable API authentication, go to the API target’s Advanced Settings and follow the steps in the form.
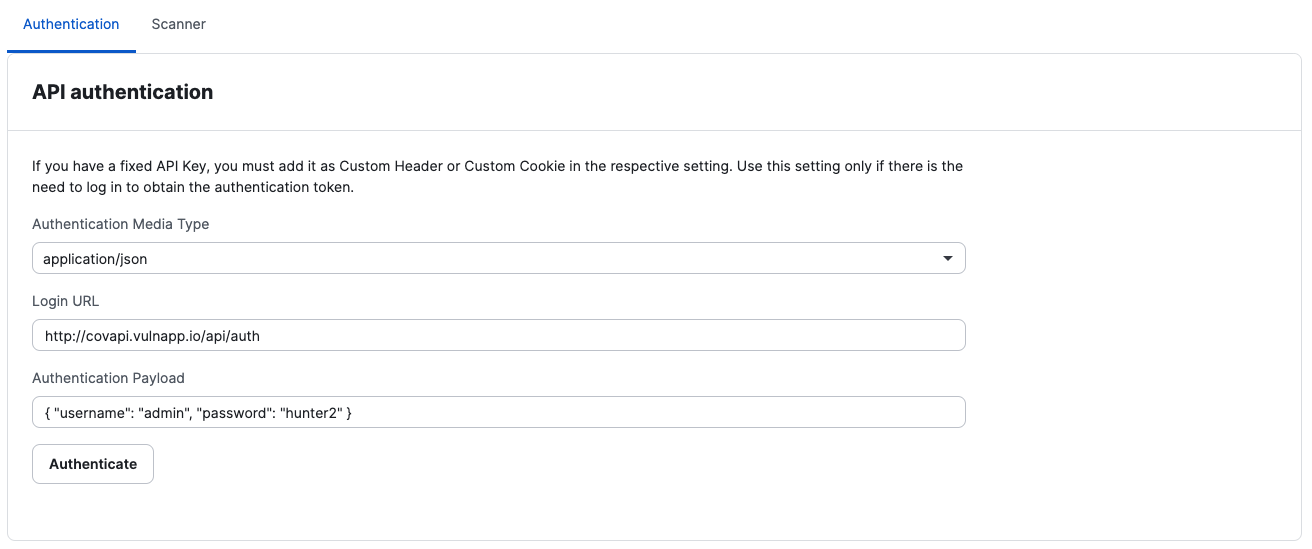
First, select the media type for the authentication method. The DAST Scanner supports the following media types:
application/jsonapplication/x-www-form-urlencoded
Next, provide the login endpoint and the payload to be sent.
Click ‘Authenticate’ to validate the configuration.

If the authentication is successful, choose the token to use from the response. The DAST Scanner will use this token in the subsequent requests.
You need then to choose where to place the token, the field name for the token, and value prefix if needed.

Custom Headers
Instead of using the authentication method, you can also define custom headers to be sent with every request. This is useful when the API requires a fixed API key or other headers.
To add custom headers, go to the target’s Advanced Settings, the Scanner tab.
Provide the header name and value.
Click ‘Add’.
You can add multiple headers if needed.

API Parameter Custom Values
In this scenario, you have a fixed API key that must be placed in a specific parameter. To configure this option, proceed as follows:
To add custom parameter, go to the target’s Advanced Settings, the Scanner tab.
Provide the parameter’s name and value.
Click ‘Add’.
You can add multiple parameters if needed.
 Last modified December 15, 2025