DAST Scanner
Scan your Web Applications and APIs to discover external vulnerabilities.
The complexity of today’s applications, combined with the constant evolution of cyber threats, makes it increasingly difficult to ensure security measures. Traditional methods of security assessment often fall short of providing continuous insights, leading to potential blind spots.
The DAST Scanner addresses these challenges head-on. By combining the power of PtaaS with DAST, you gain a comprehensive solution for continuously assessing risk.
To get started with the DAST Scanner, you will need to add a target. Every Cobalt Customer has access to one target for free unlimited scanning. Additional targets can be purchased. Learn more about targets.
Note
Our DAST Scanner makes requests from the following IP Address: 52.19.40.38
Please ensure this IP is added to your allow-list if you have a WAF or other controls in place. Additionally, if you have geo-blocking controls, our scanner runs from the EU, in Ireland. Please ensure your target is reachable from this IP and location.
How to Use the DAST Scanner
Add a Target
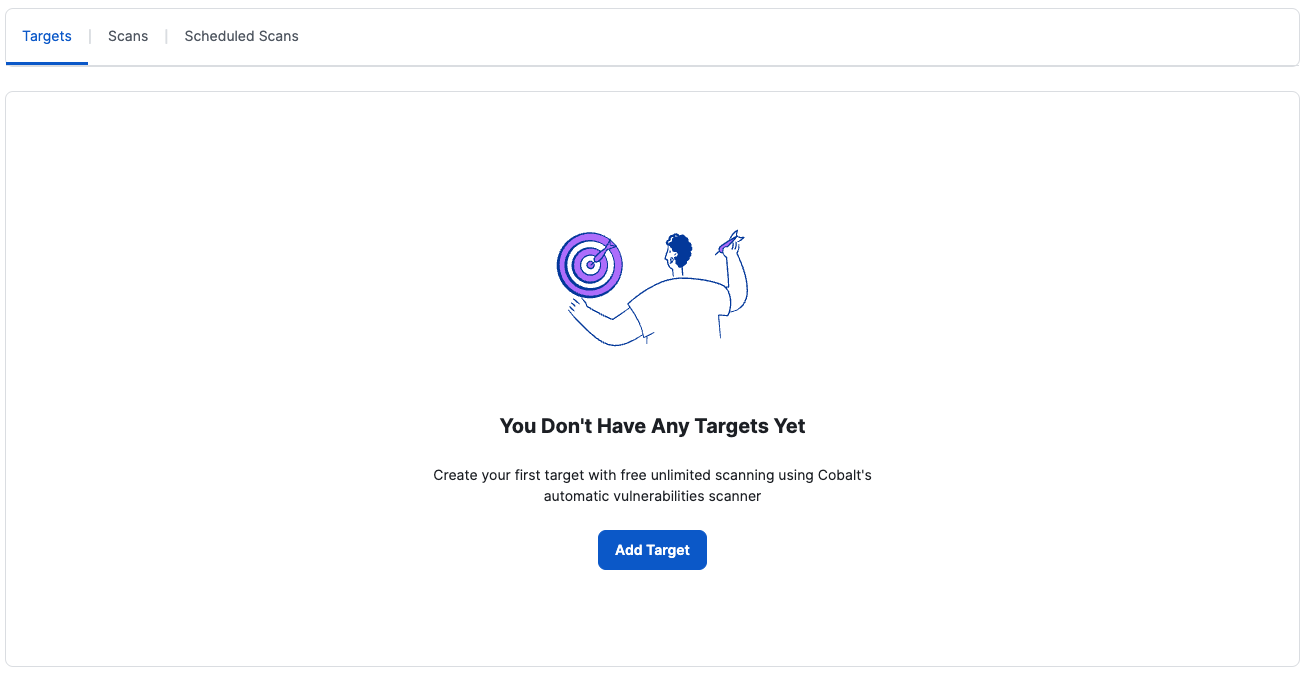
- To add a target, select the Add Target button
- Add a name for the target and the URL
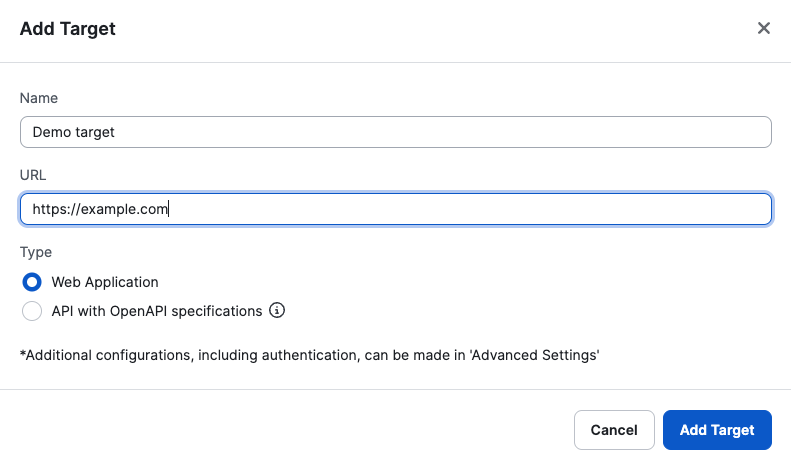
See more about how to configure a target in configuring a target
Start a Scan
- To run a scan, select “Scan Now”. This will start a scan immediately.

- Selecting “Scan Later…” allows setting a specific start date and time for the scan.
- This can also be a recurring schedule, if an option other than “None” is selected in the “Recurrence” dropdown.
- The accepted recurrences are: Hourly, daily, weekly, monthly and quarterly.
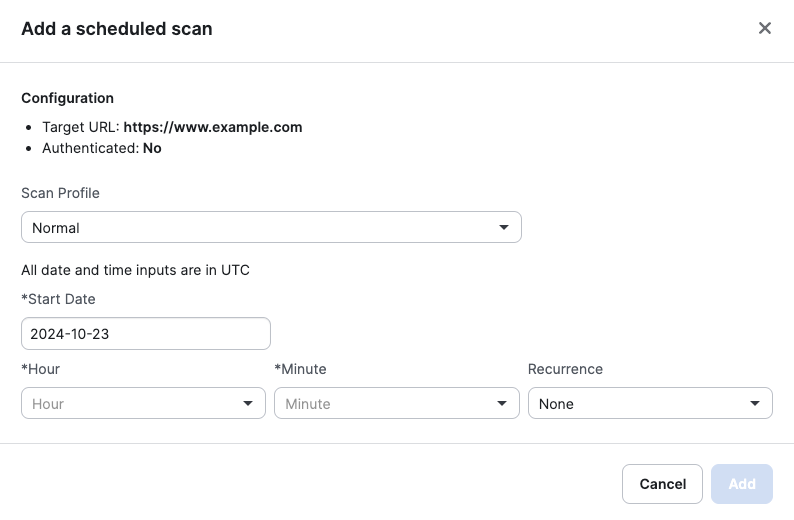
- Upcoming scheduled scans can be viewed under the “Scheduled Scans” tab.
- Recurring scheduled scans are marked with a “Recurring” label, while one-off scans don’t have any labeling.
- The “Start Date” always refers to the date of the next scheduled scan.

Further information about scan statuses, transitions, and progress tracking can be found here.
Scan Profiles
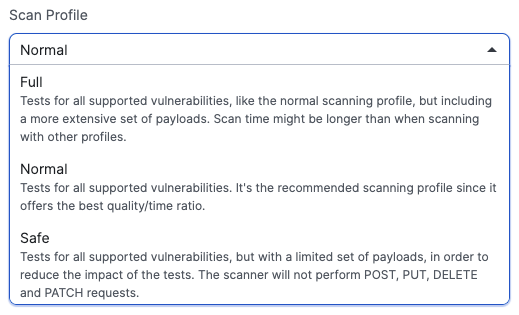
Scan profiles determine how a target is scanned and are tailored to the target type, such as a web application or an API. They balance the speed and accuracy of the scan. Detailed descriptions for each scan profile are available in the corresponding dropdown menu.
Scan Results
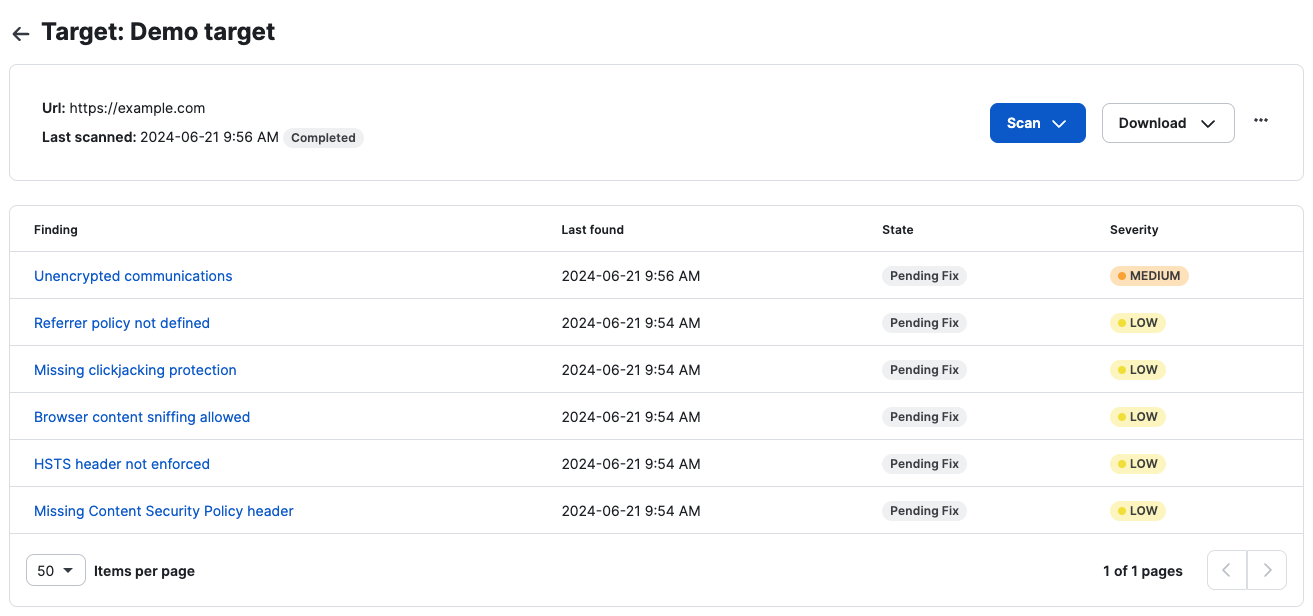
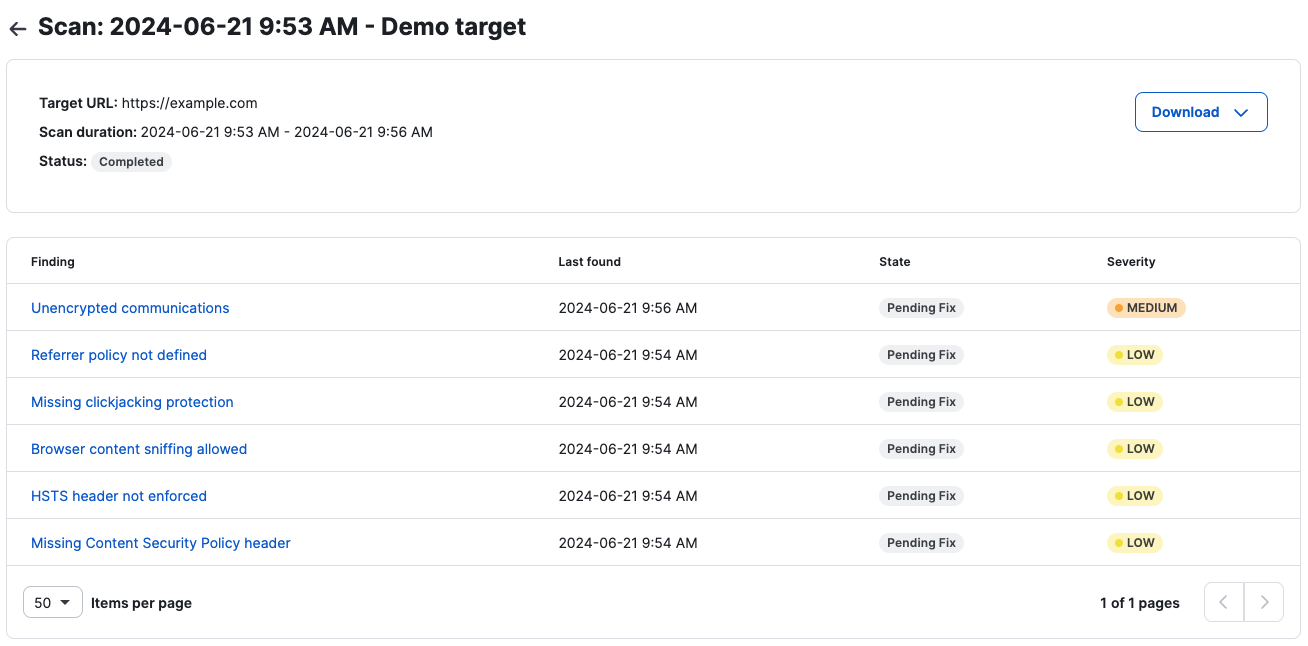
- Once a scan is complete, you have two options to View Results
You can view the results on the target
Or, navigate to the scans tab and view results for individual scans.
Failed Scans
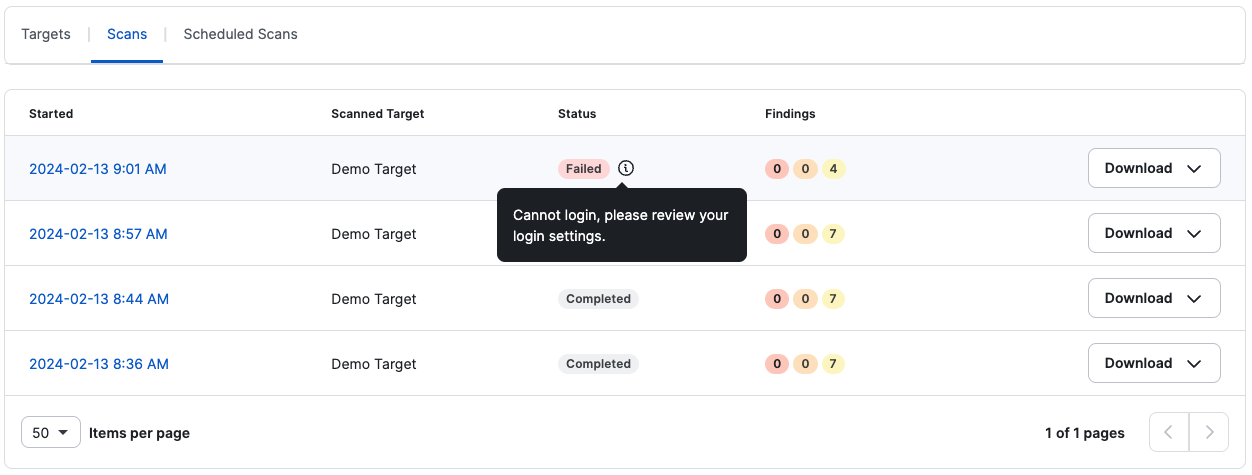
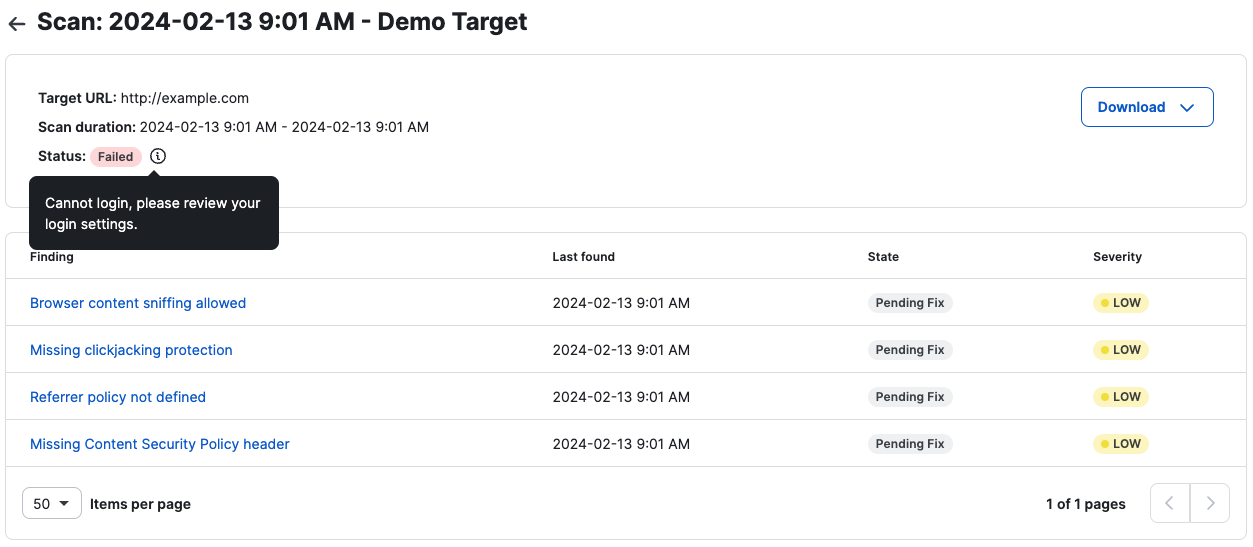
If the scan fails, navigate to the scans list or the scan details page to see the reason for the failed scan(s).
Scan List View:
Scan Details View:
Finding States
Move Finding State
- You can update the state for each finding
- Each finding has the following states:
- Pending Fix (default): A vulnerability was found in a scan and has not been remediated
- Declined: This is a false positive and not relevant to your application (Each of these gets reviewed internally by Cobalt)
- Accepted Risk: This is a known vulnerability but due to a mitigating control, the user accepts the risk.
- Re-test: The user has remediated the vulnerability and is ready to retest the finding. Submitting a retest is the only way to mark a vulnerability as “fixed”.
Retest Finding
You can retest individual findings.
Navigate to the finding you want to retest and select “retest”

If the scan engine does not find the vulnerability again it will automatically mark the finding as “Fixed”. If the issue still persists, it will move back to its previous state.
Reports
For compliance and to better understand the results of your scans, we provide different types of scans.
From Targets, click Download to select the report you want to download:
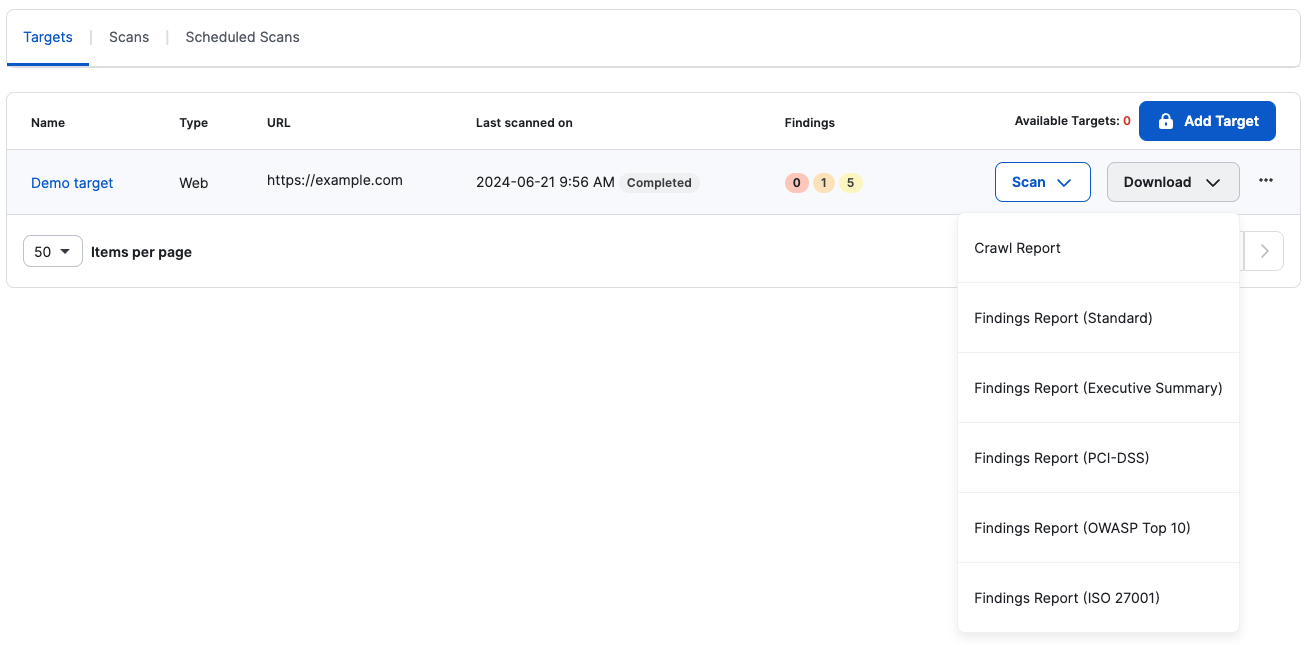
You can also do this from the scans list or the scan details page.
Report types
There are different report types that you can download from a scan. Note that for failed scans, reports are not available. Most of these reports are PDF reports, except for the crawl report, which is a CSV file.
Standard Report
It is the default report type and contains:
- A scan summary
- A settings summary
- A technical summary
- An exhaustive test list
- All findings
- Information about vulnerabilities (impact, causes, and prevention methods).
Executive Report
It is a high-level view report of the scan and only contains:
- A scan summary
- A settings summary
- A technical summary
PCI-DSS
It is a scan report specific to PCI-DSS compliance. You can use this report to verify which controls a target is passing or failing. PCI-DSS is like the Standard report but adds a section to the scan summary with the PCI-DSS requirements checklist.
The report indicates if a target was tested for the requirements checklist and if it passed each item on the list.
OWASP Top 10
It is similar to the PCI-DSS report but considers the most recent OWASP Top 10. OWASP Top 10 scan report uses a popular framework provided by OWASP that lists the top 10 security risks of web applications. Auditors often use this framework when performing a company’s security audit.
ISO 27001
It is a specific scan report on compliance with ISO/IEC 27001 (2022 revision). You can use this report to verify which controls a target is passing or failing. ISO 27001 is like the standard report but adds a section to the scan summary with the ISO 27001 requirements checklist.
The report indicates if a target was tested for the requirements checklist and if it passed each item on the list.
Crawl report
The crawl or coverage report lists URLs that were scanned along with ones that weren’t scanned. This acts as a tool for you to check if the scanner is reaching every endpoint possible and filtering them successfully. This report is a CSV file, which you can export to Excel or any similar tool that you use.
Before and while doing tests, the crawler will navigate your website to find every endpoint possible while testing every input it might find. Then those URLs are sent to the scanner to be tested for any vulnerabilities.
Coverage is a fundamental aspect of a scan, as it may be the difference between a useful, successful scan and an uninformative scan.
How to Contact Support
For support, please reach out to your CSM or email us at dast@cobalt.io.
Last modified June 12, 2025