Create GitHub tickets for Findings
How to use Integration Builder to push findings to GitHub Issues.
Push Findings to GitHub Issues
You can use Integration Builder to push pentest and/or DAST findings to GitHub Issues.
Prerequisites
To use GitHub recipes, you must have a GitHub account and a repository where you want to push findings as issues.
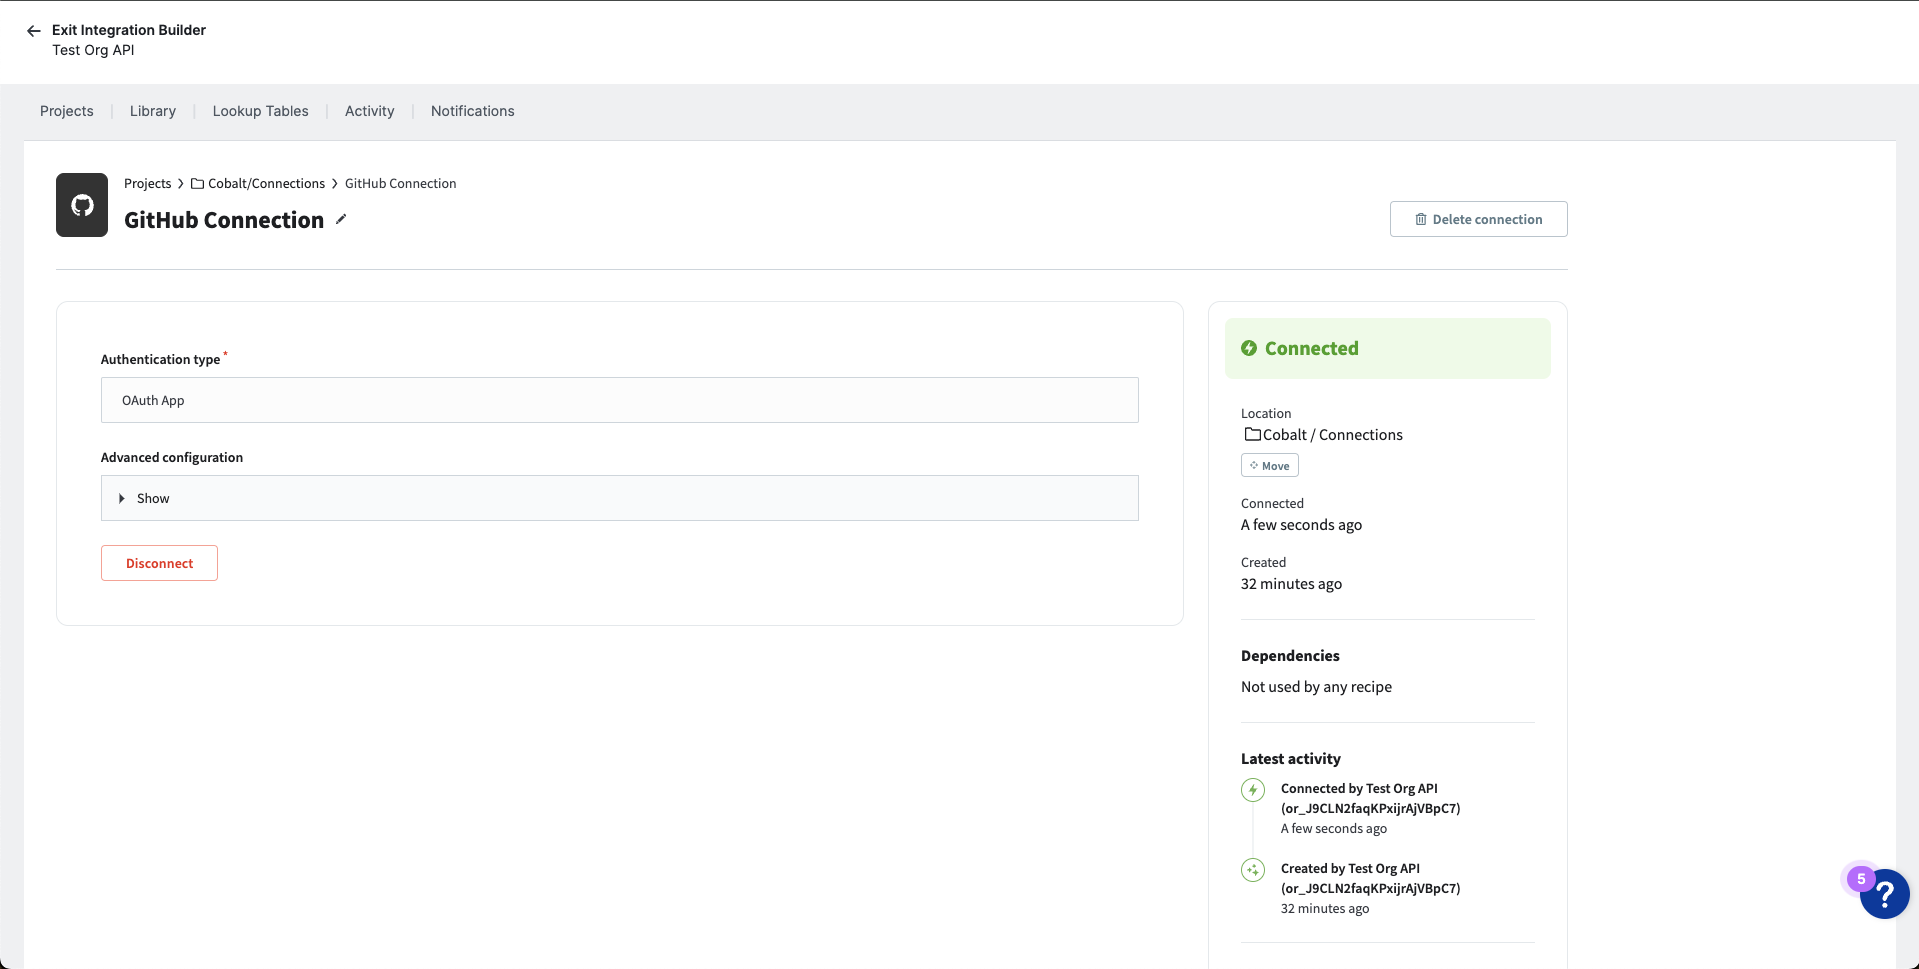
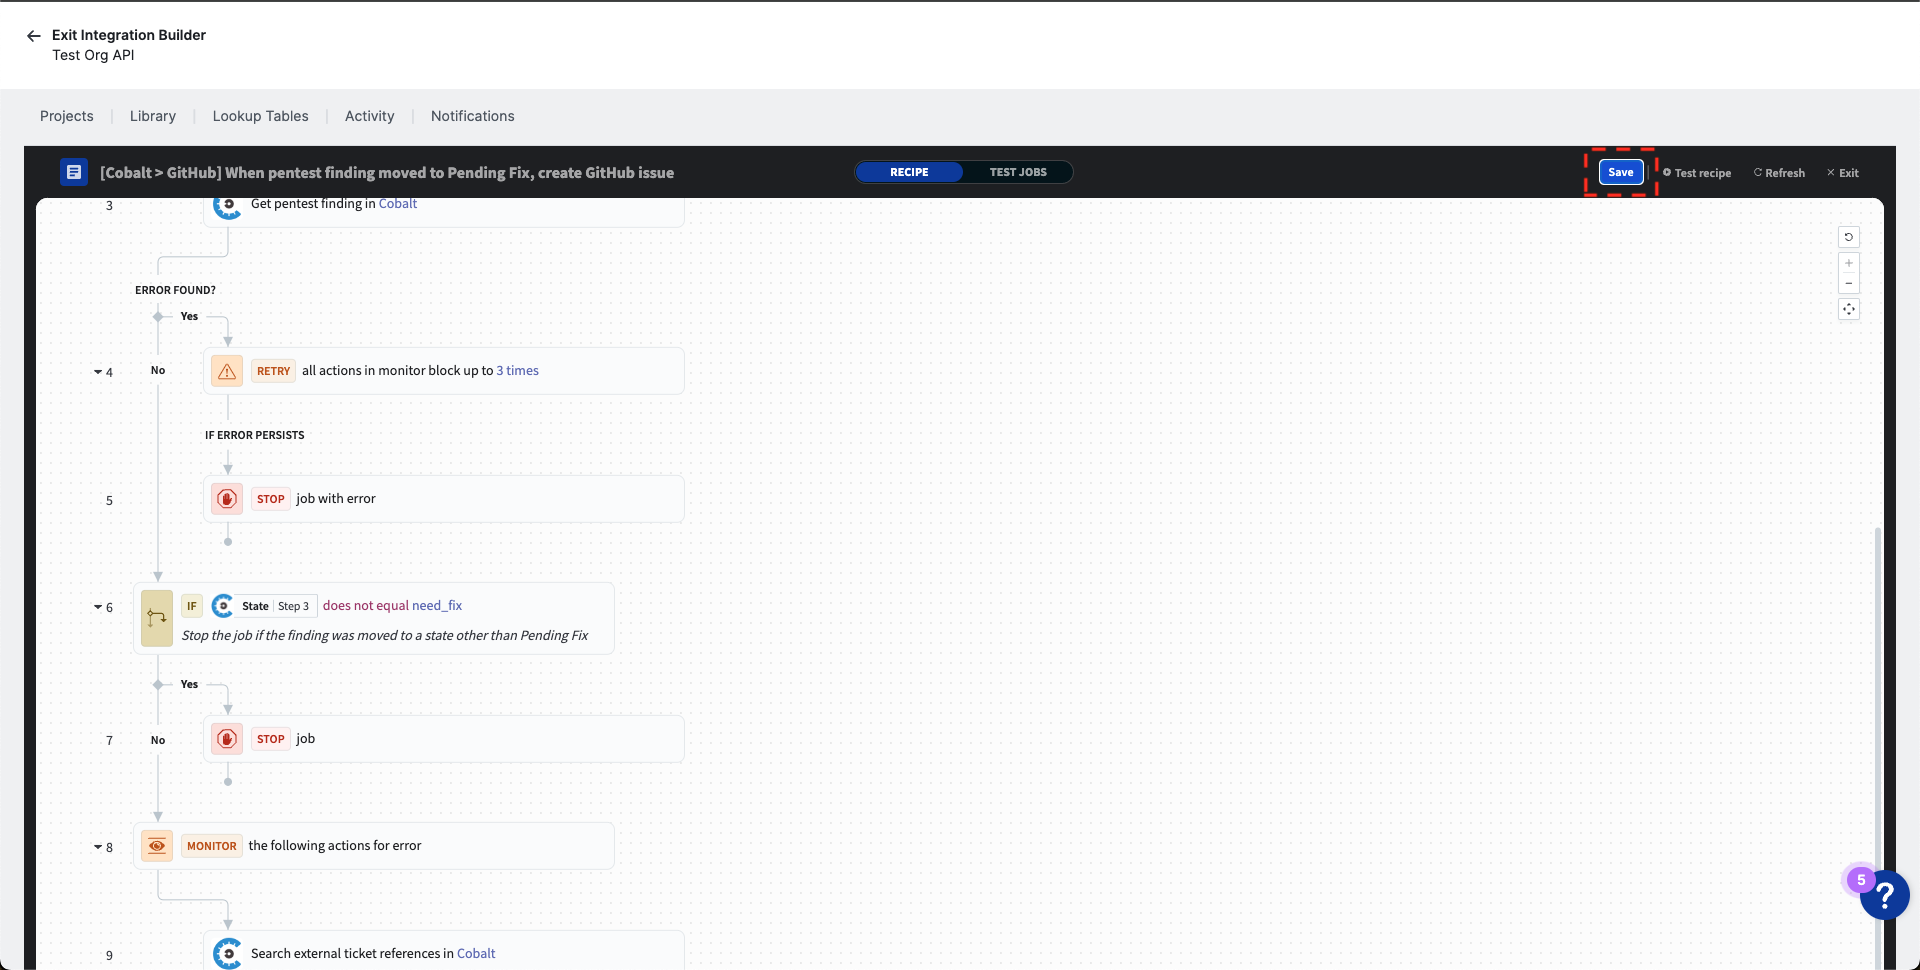
Create the GitHub connection
If you haven’t already, you need to create a connection to GitHub. If you already have a GitHub connection, you can skip this section.
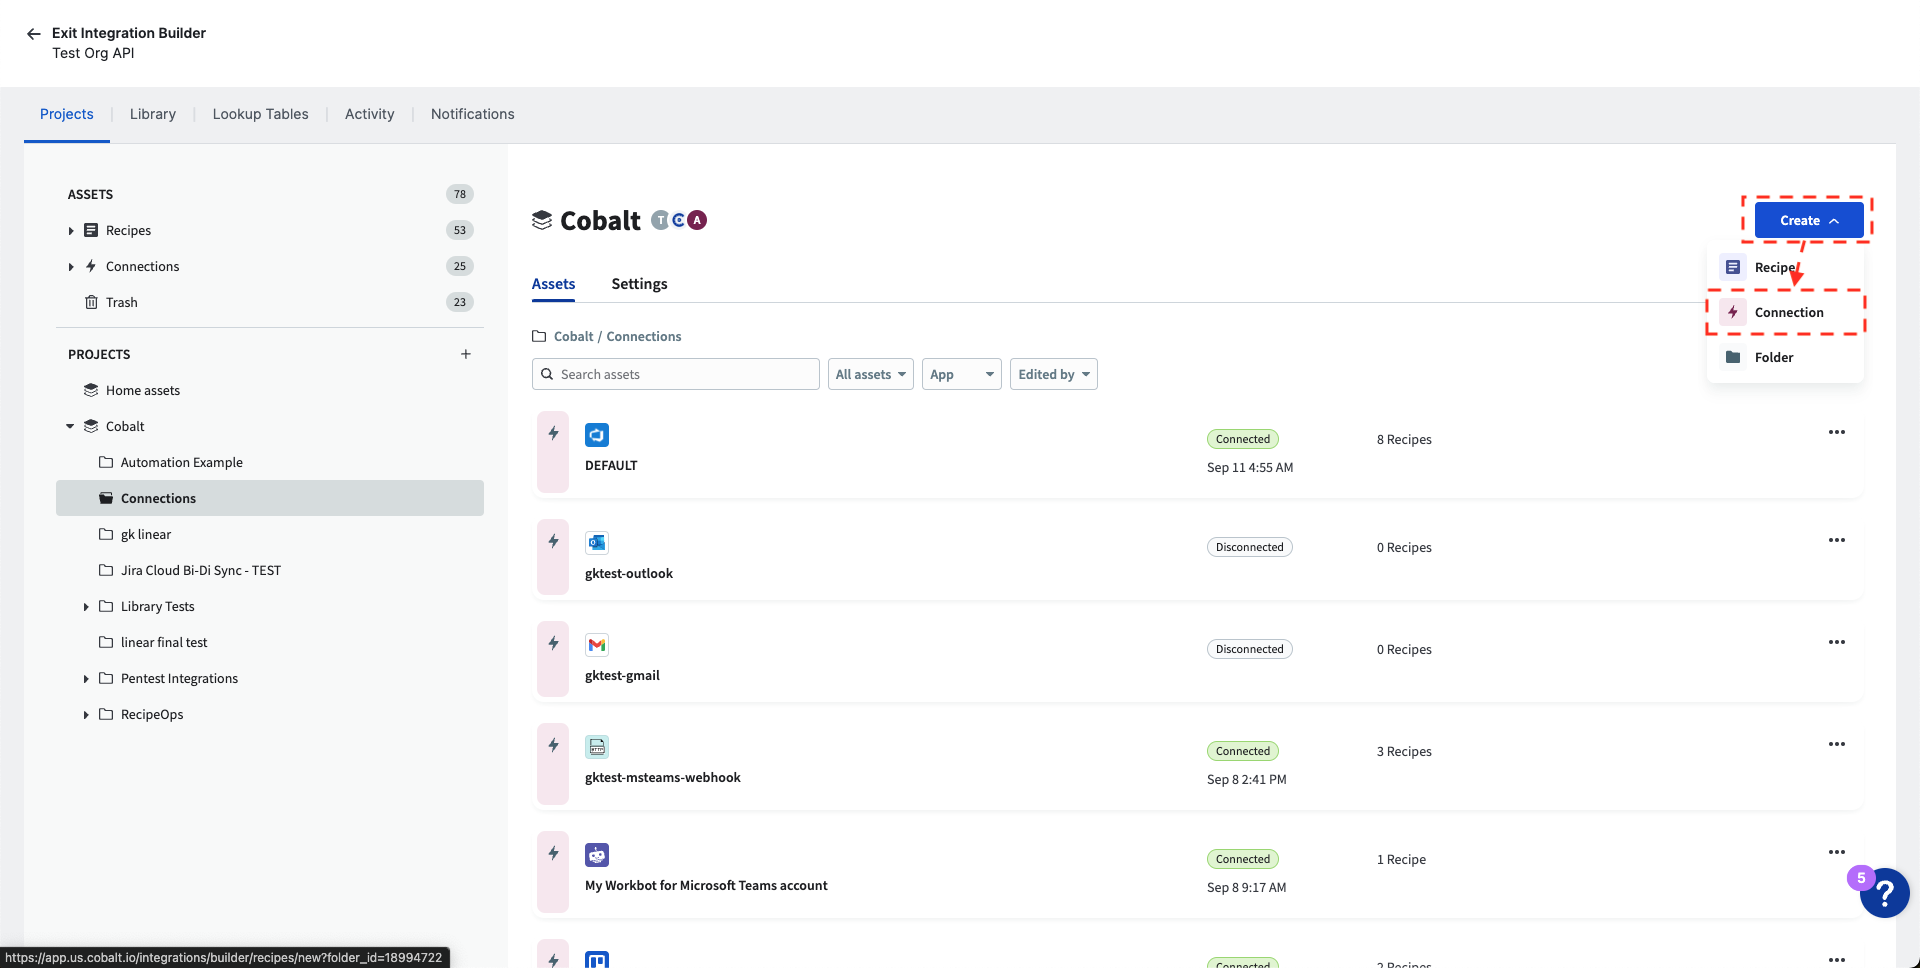
Navigate to the Projects tab of the Integration Builder.
Click the “Create” button to open the menu, then click “Connection.”
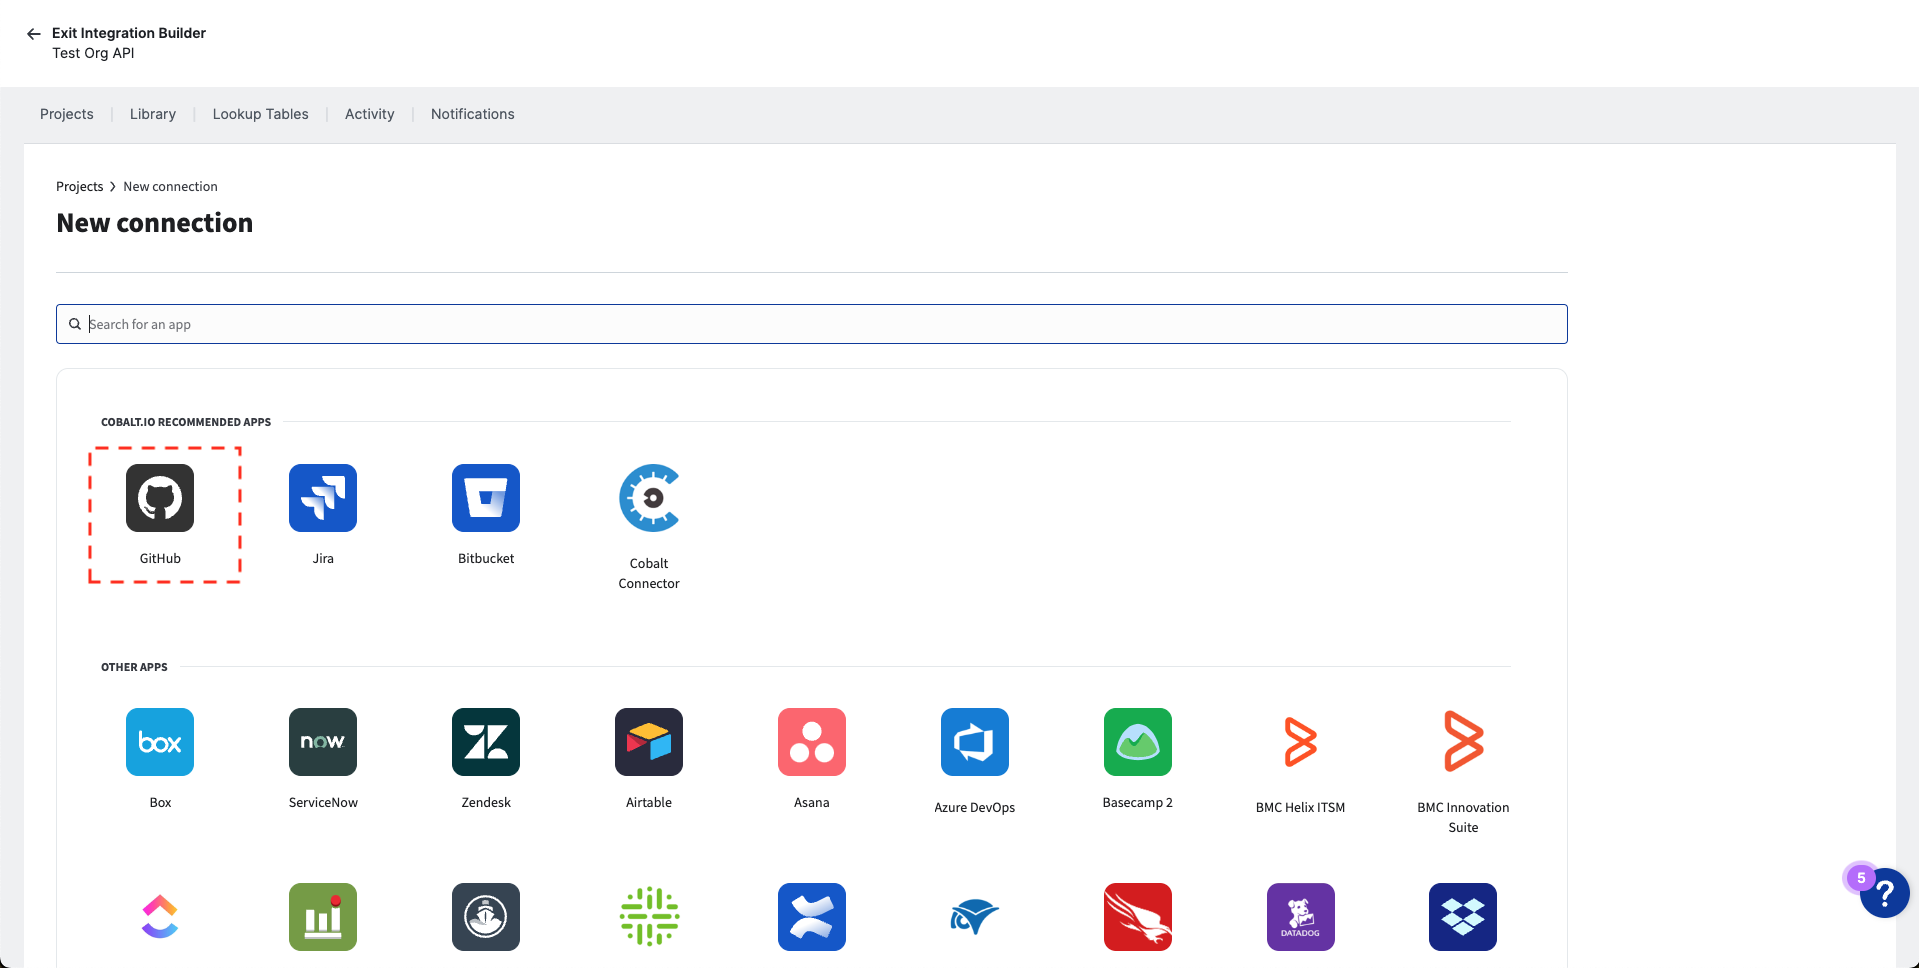
- Click on the GitHub connector.
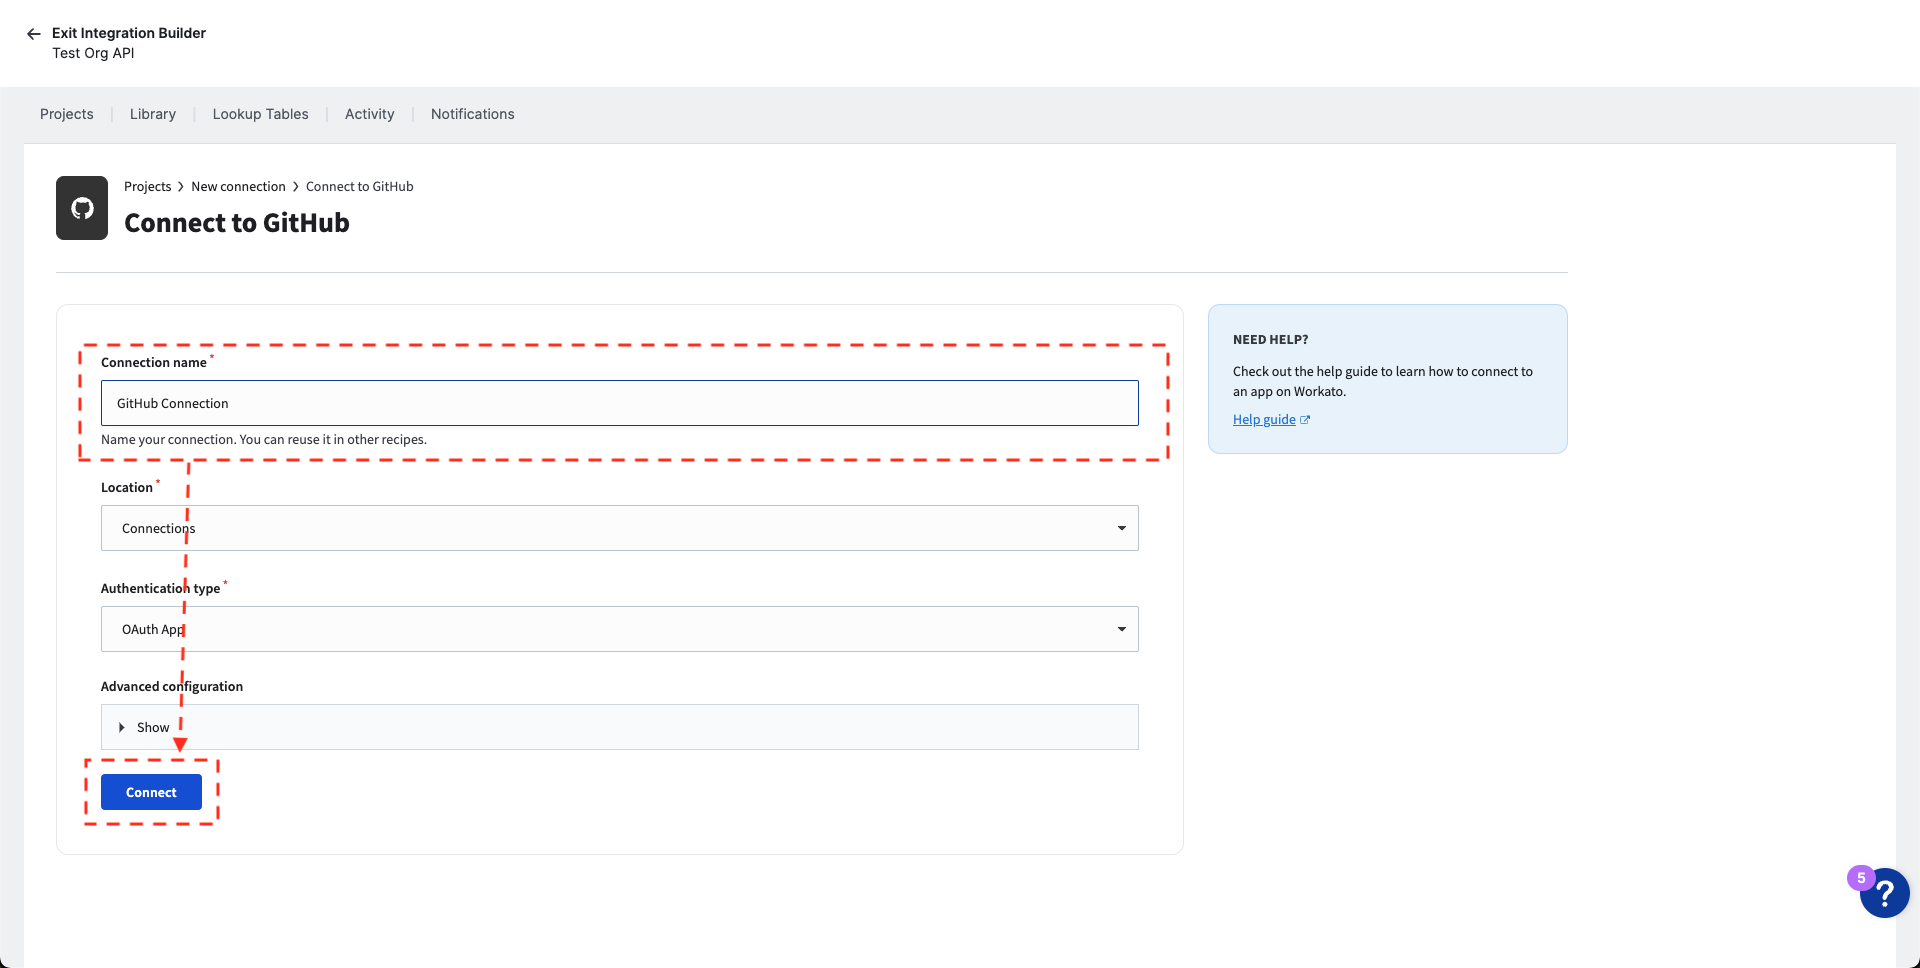
- Input a name for the connection and click the “Connect” button.
- Authorize the connection.
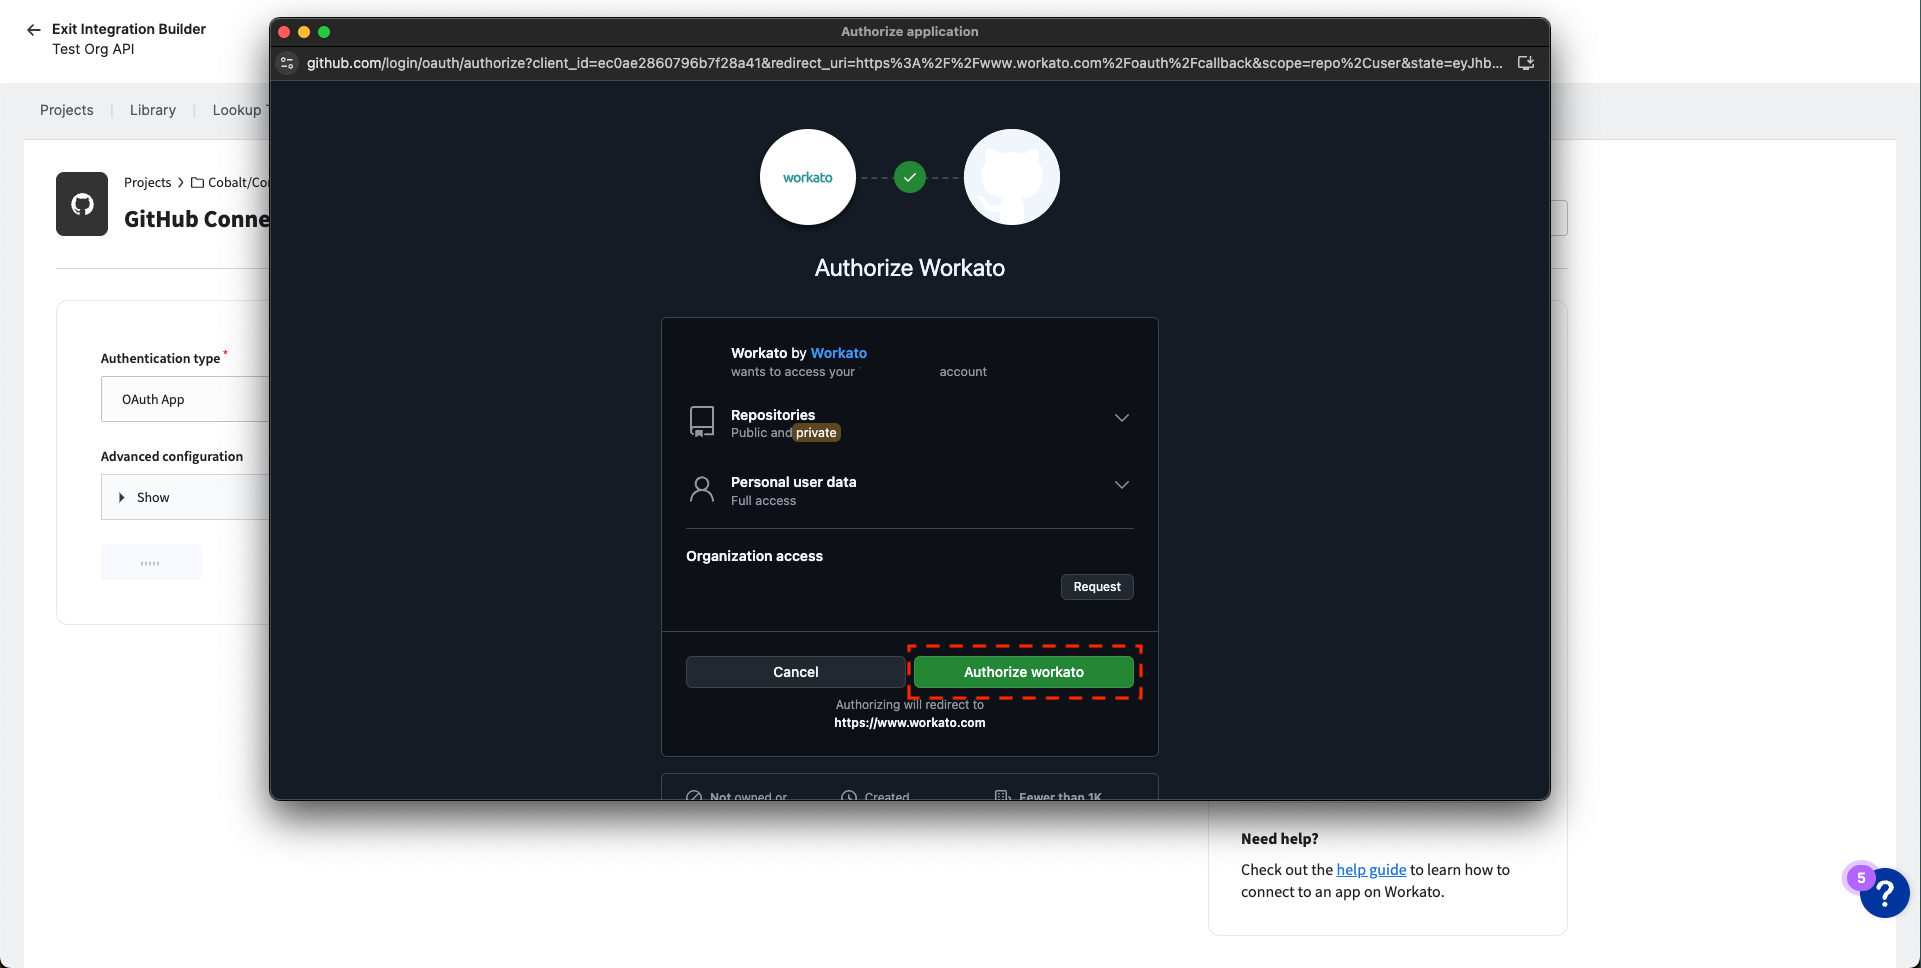
- Once the connection is authorized, you will see the “Connected” status.
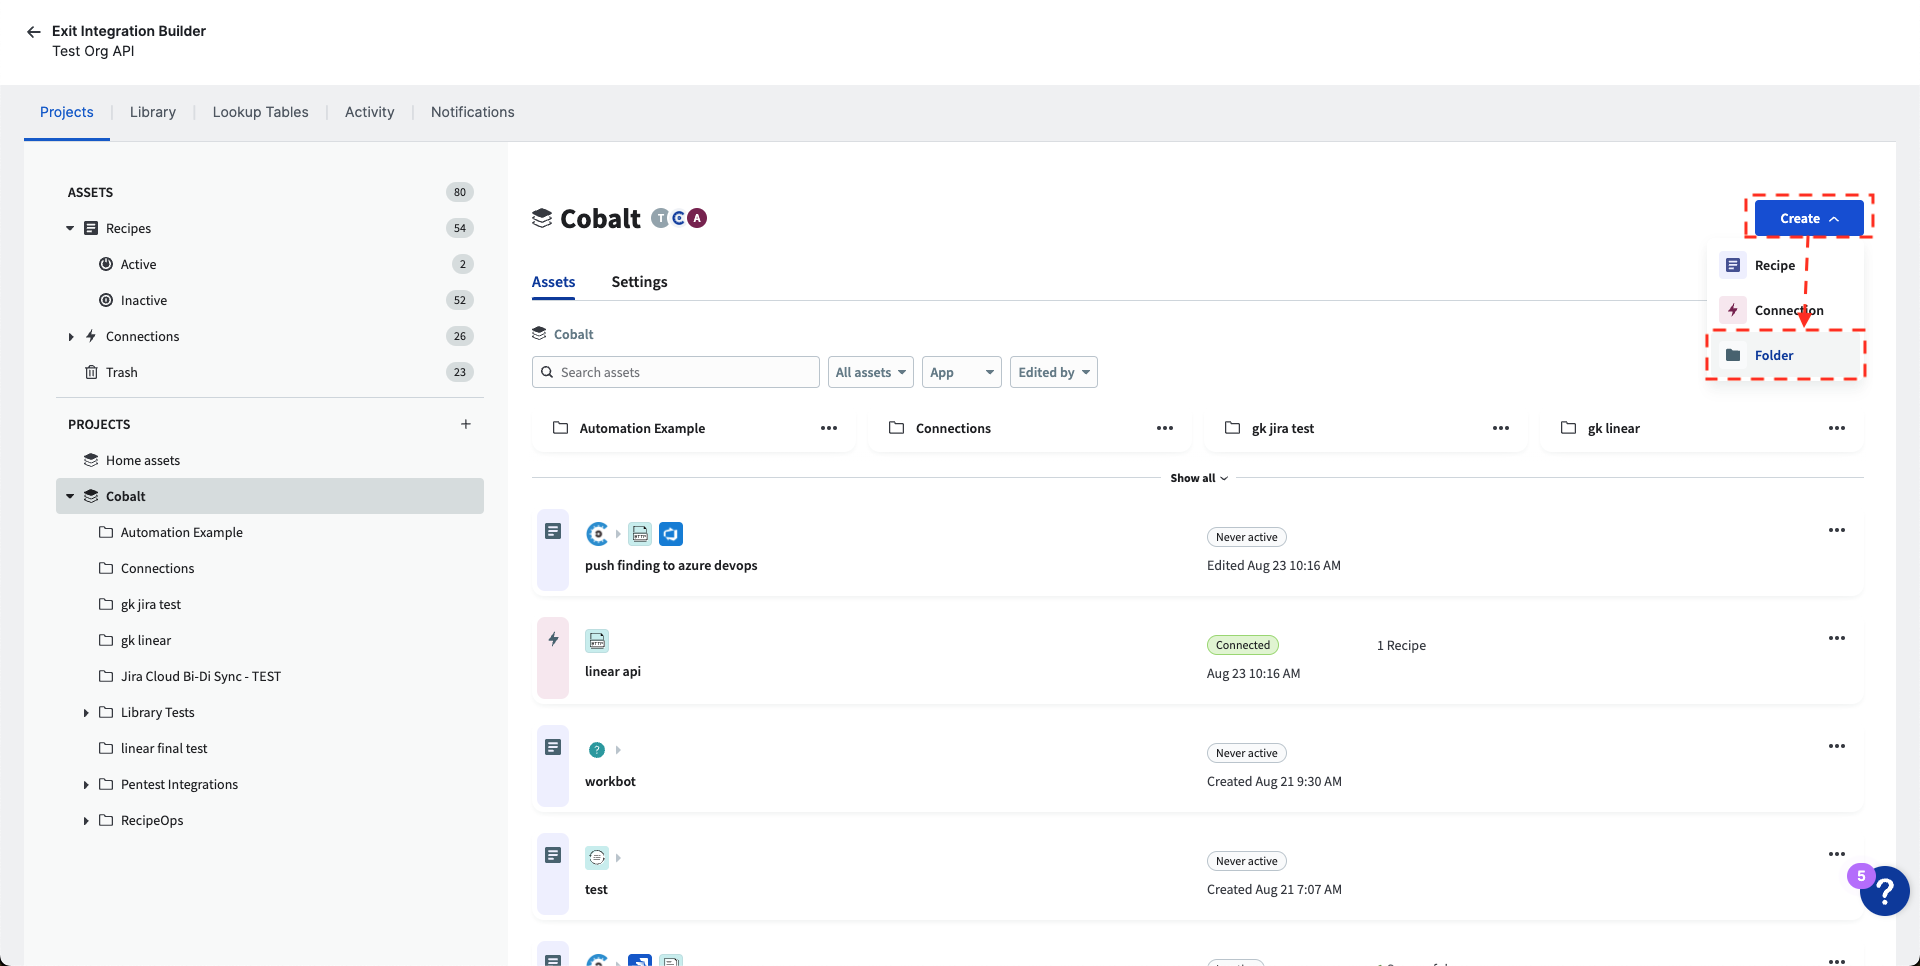
Create a folder for your GitHub recipes
Navigate to the Projects tab of the Integration Builder.
Click the “Create” button to open the menu, then click “Folder.”
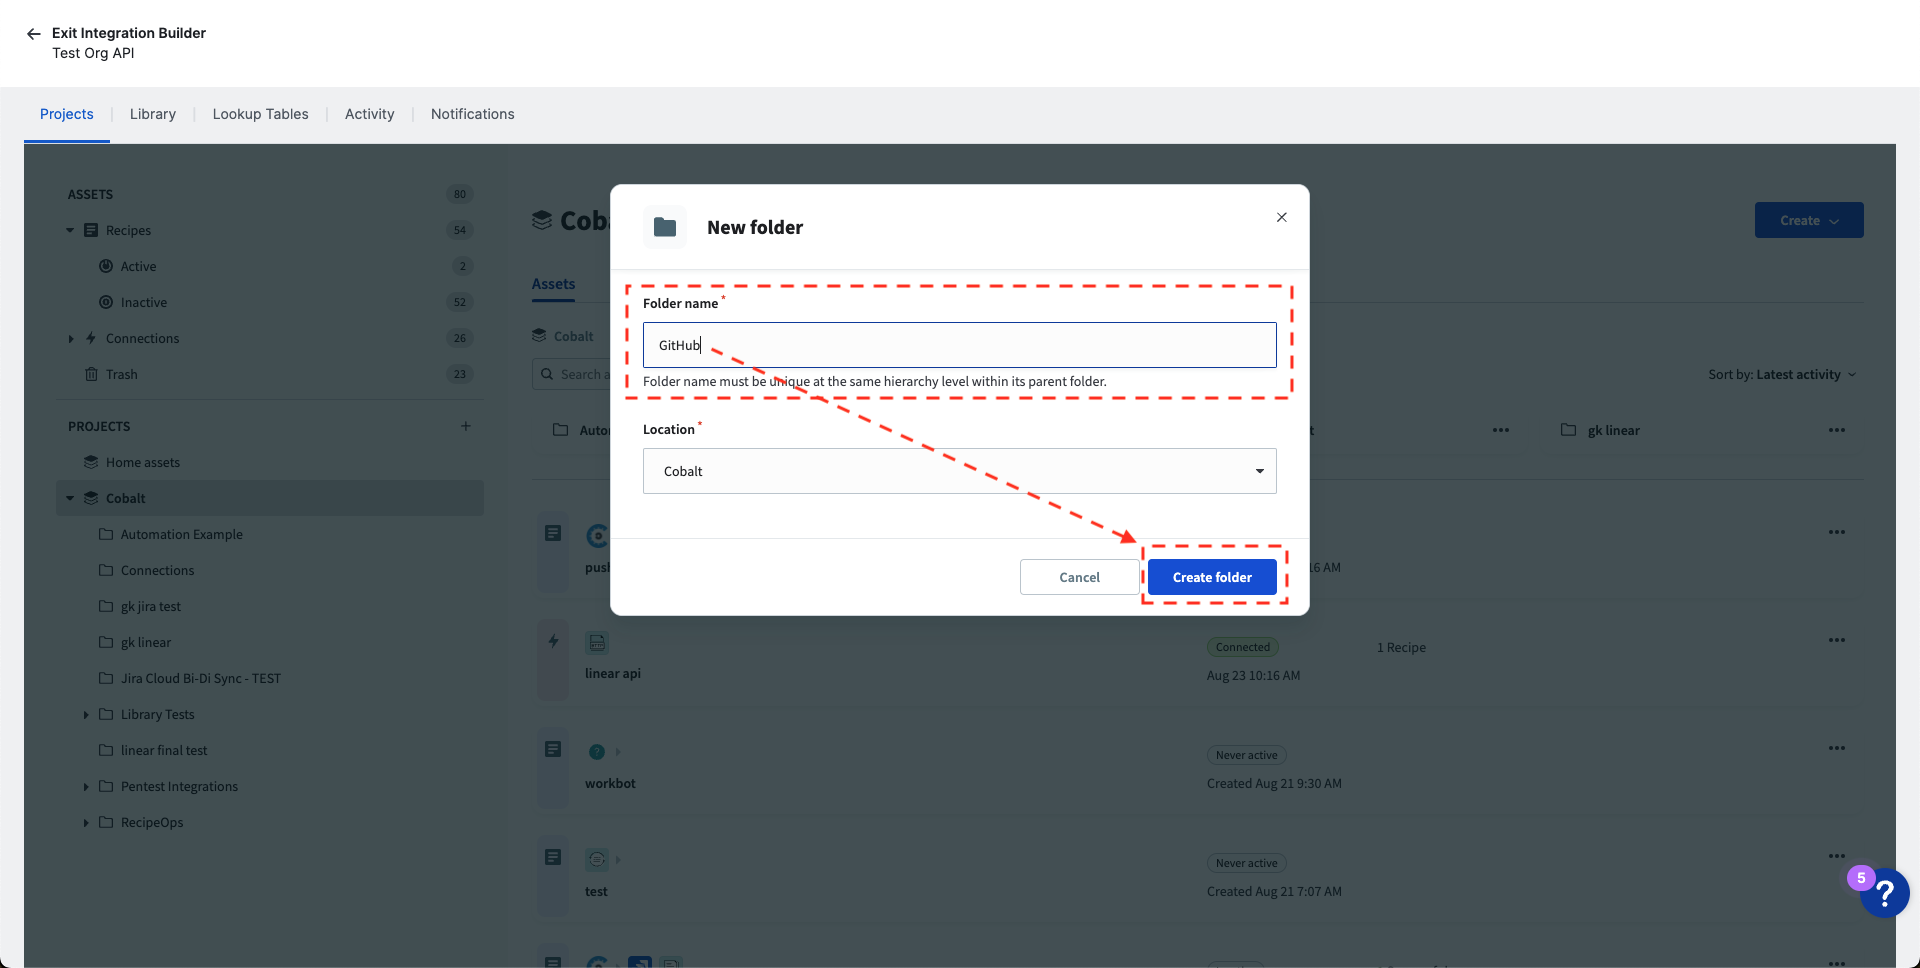
- Input the folder name and click “Create folder.” NOTE: We recommend naming the folder “GitHub” for keeping recipes organized by integrated system.
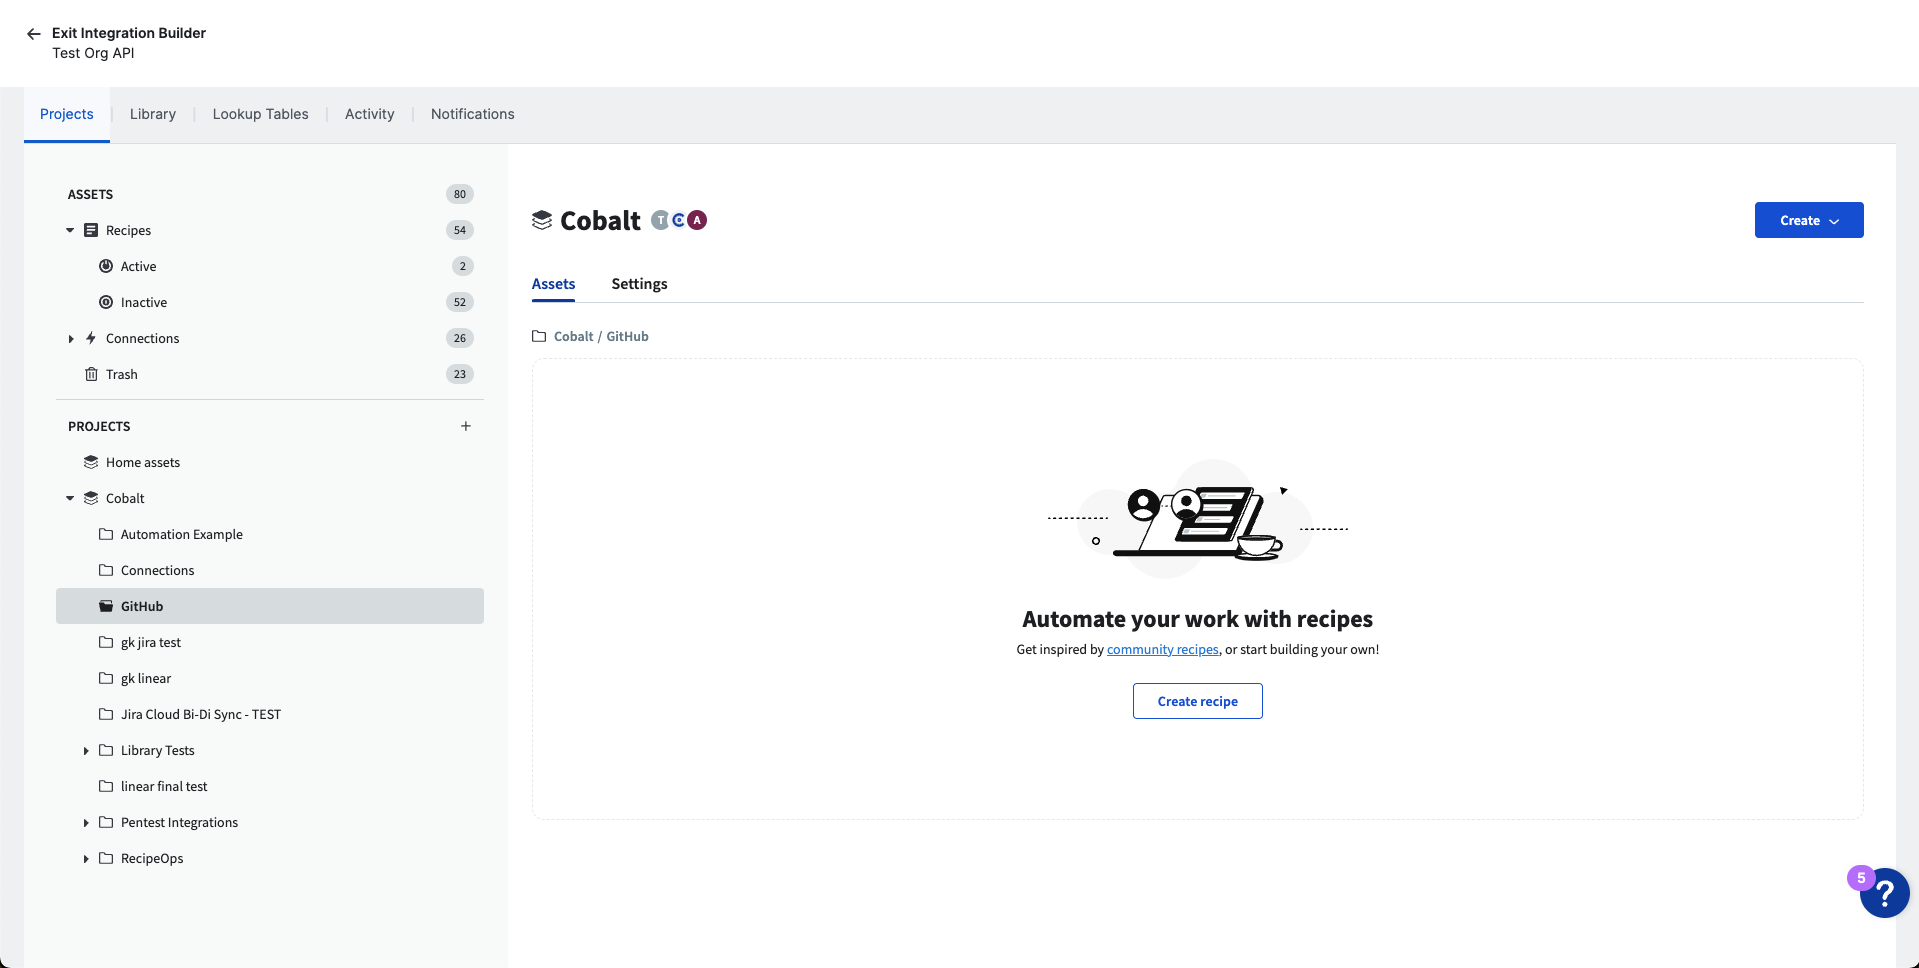
- The new folder will be empty by default.
Set up the GitHub recipe
Note: This guide uses the pentest findings recipe, but there is also a recipe for DAST findings. You should be able to use the same steps for either recipe.
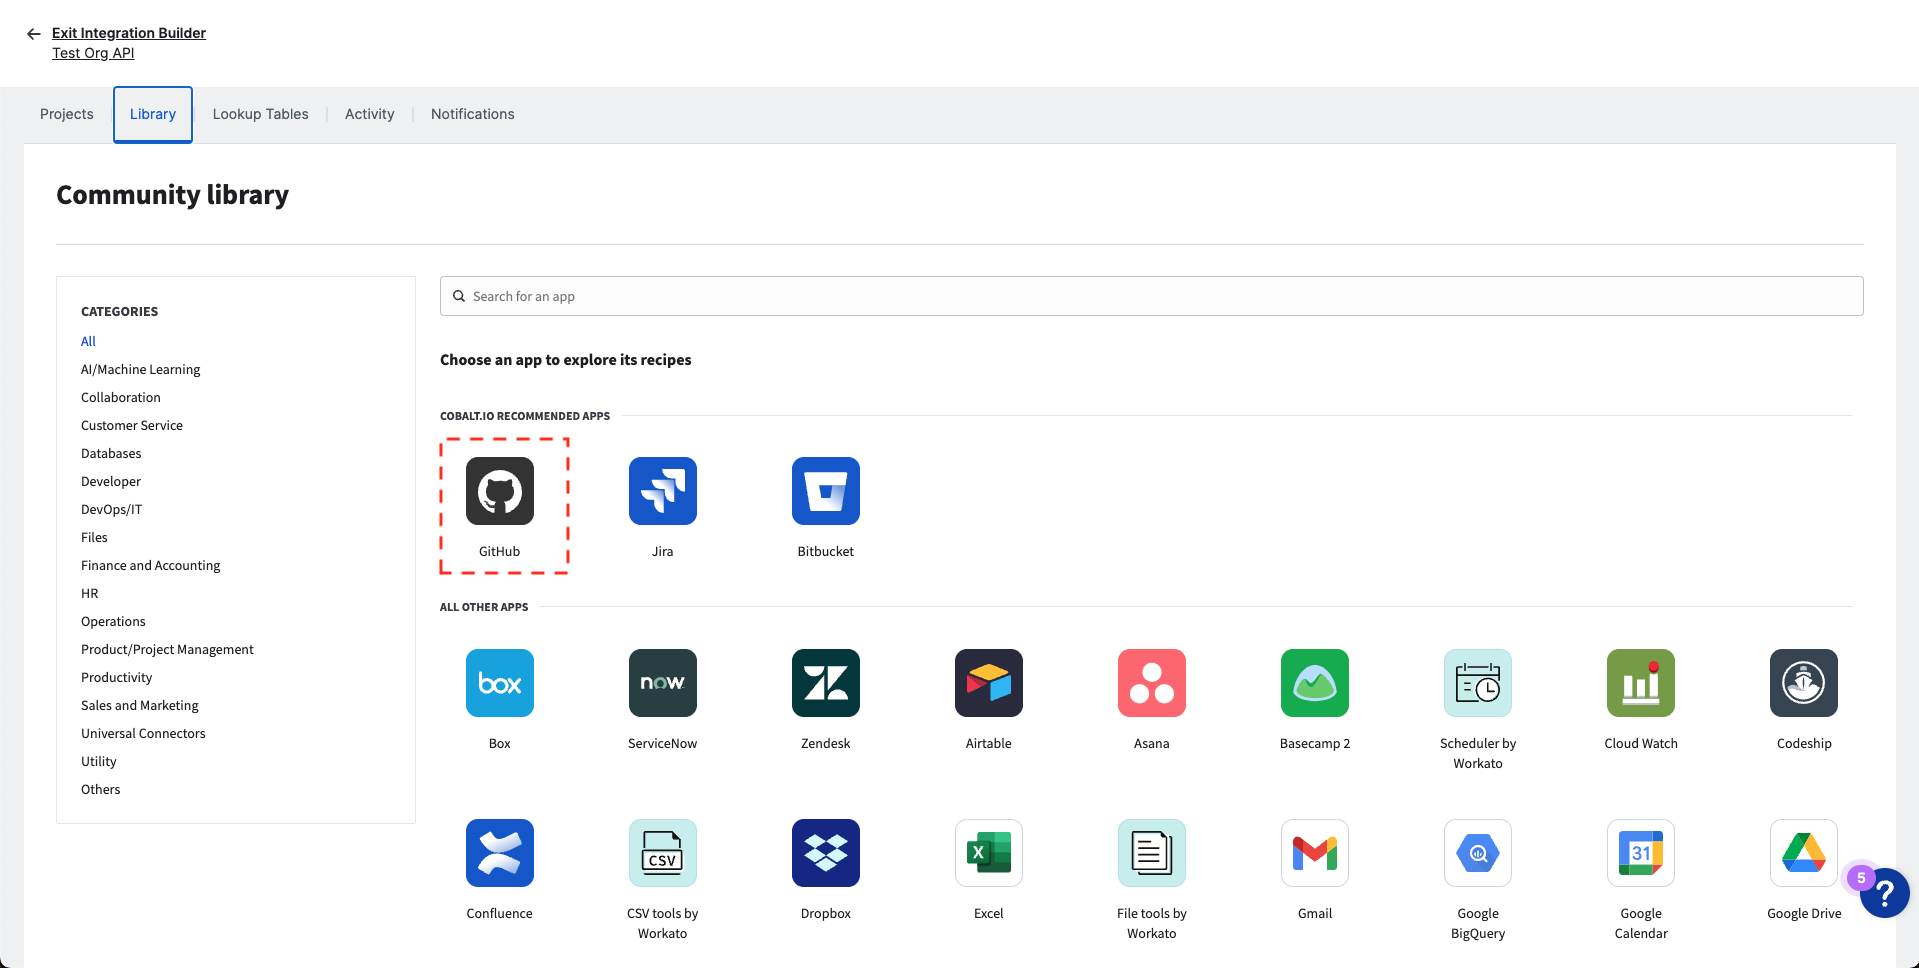
- Navigate to the Library tab and click on GitHub.
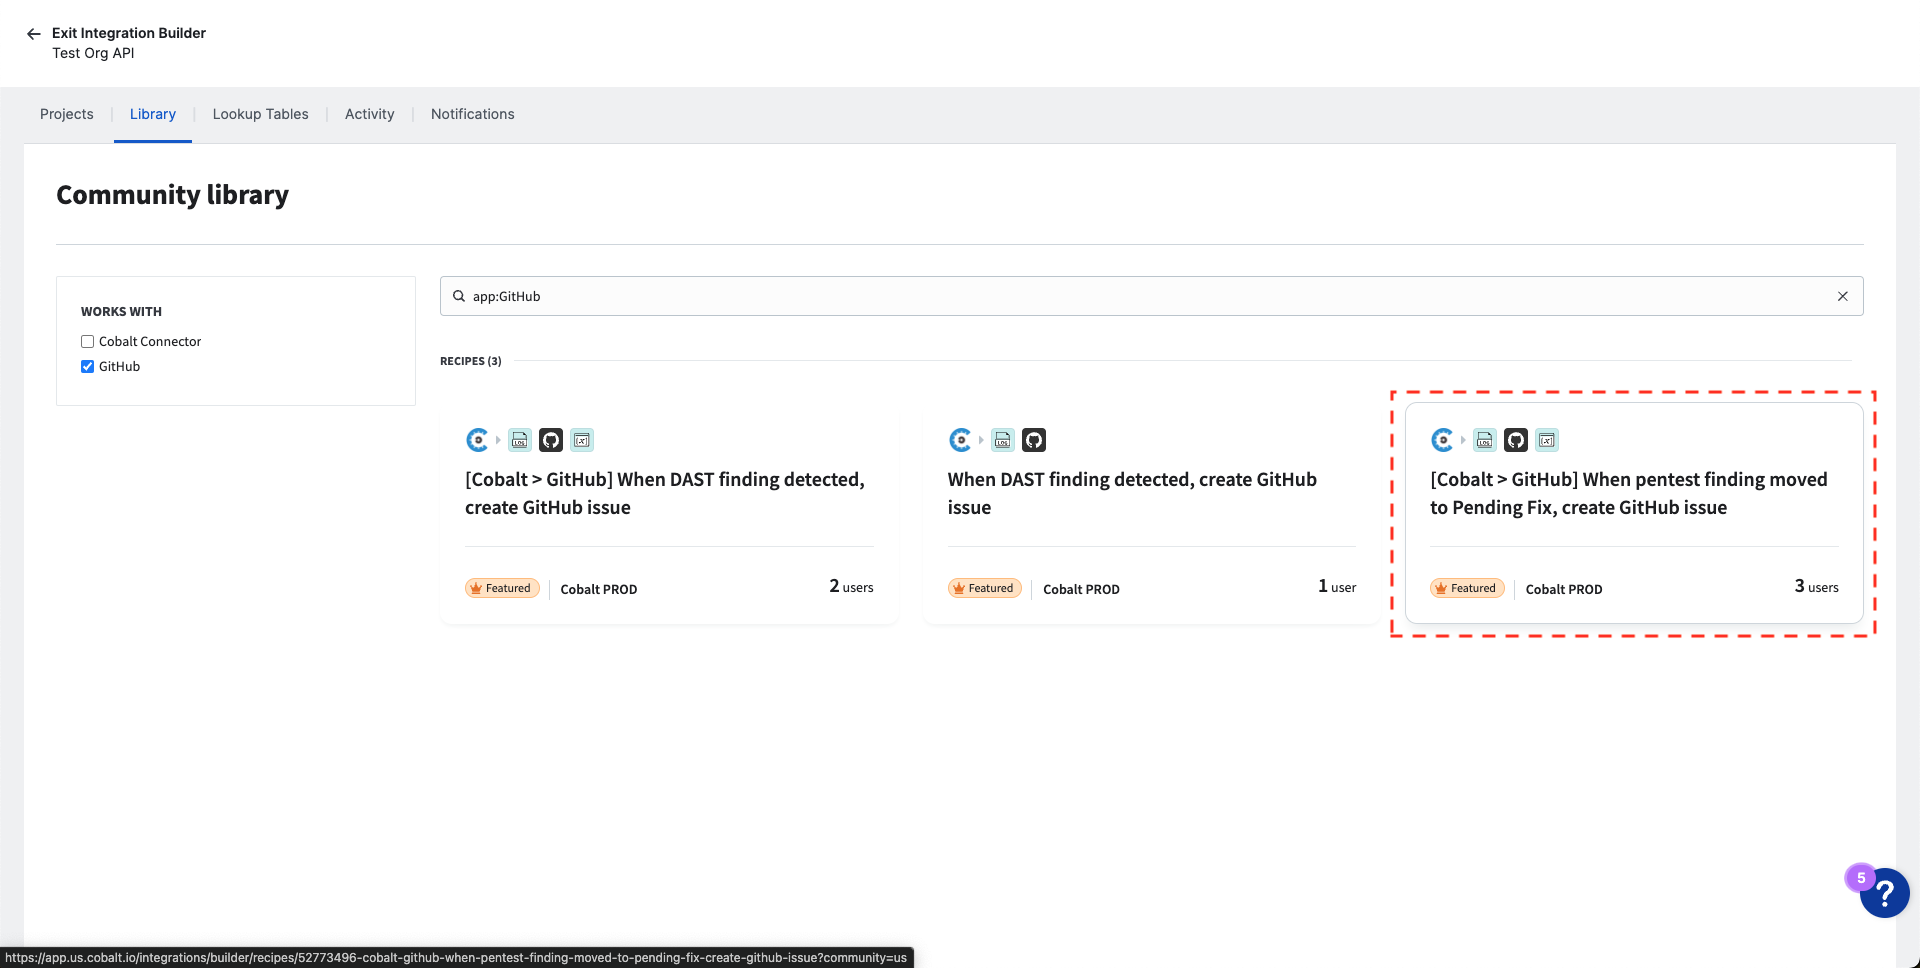
- Click on the recipe you want to use, then click “Use recipe.”
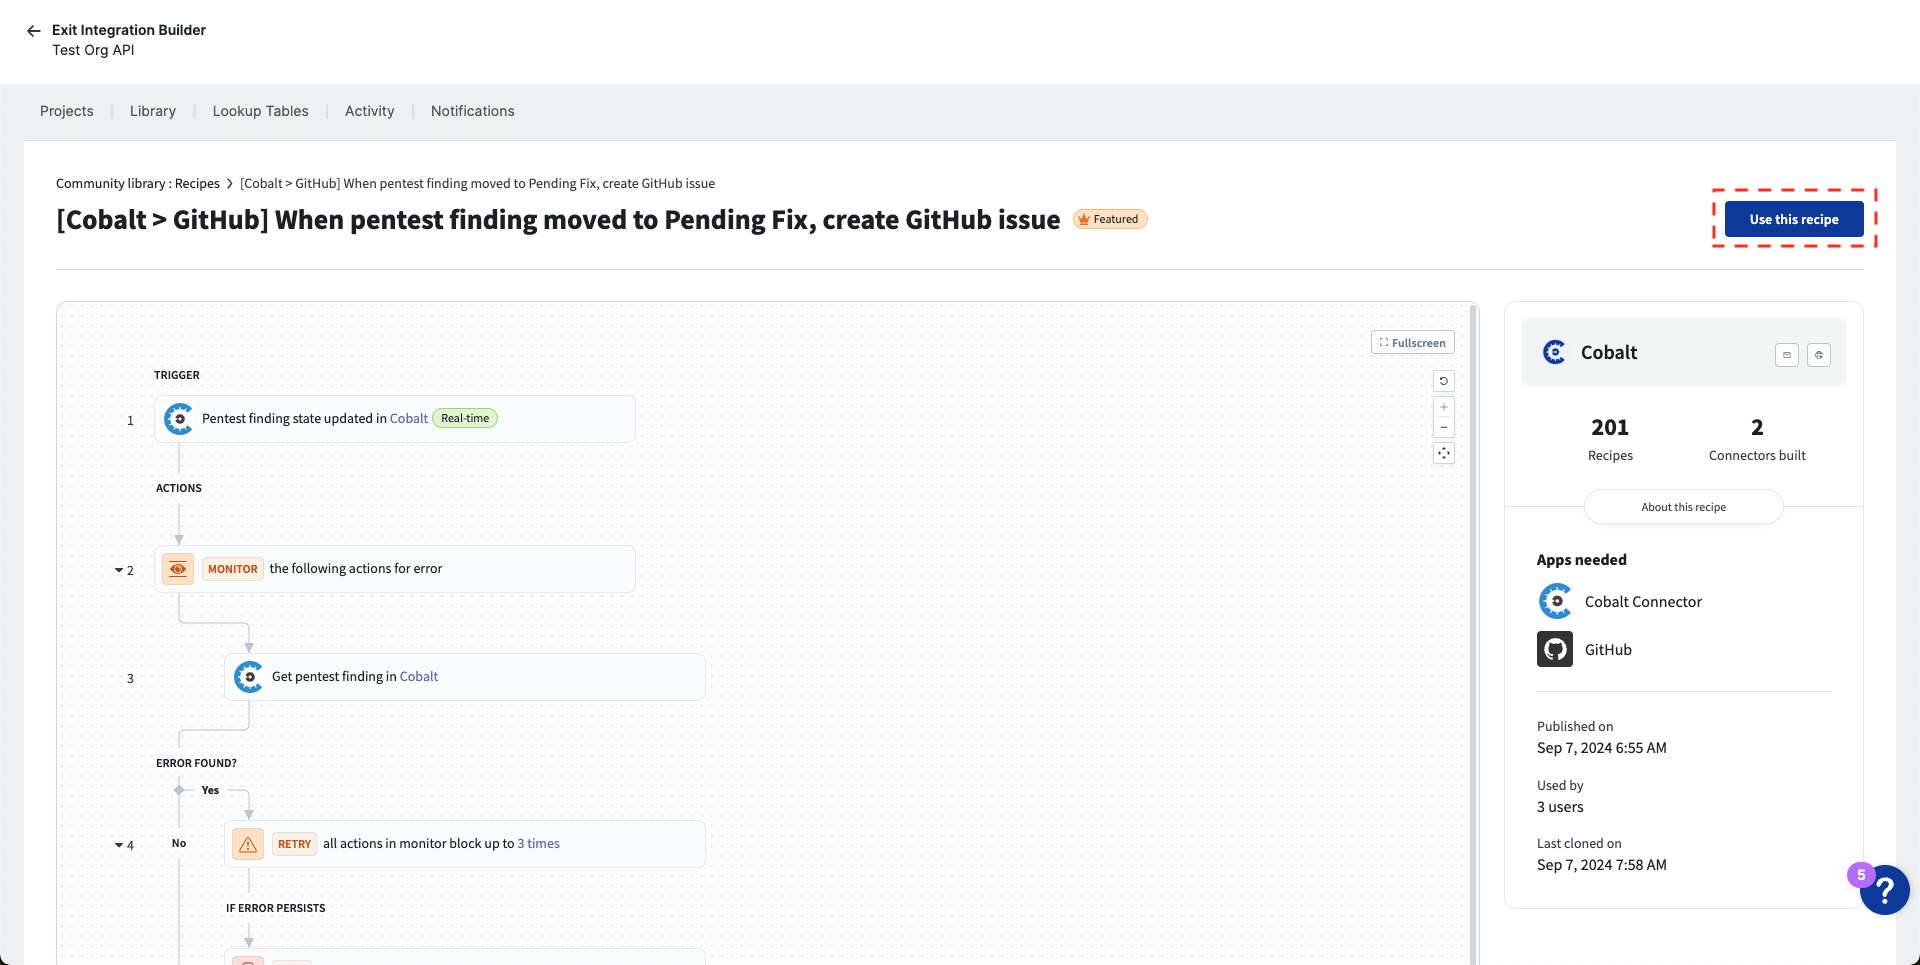
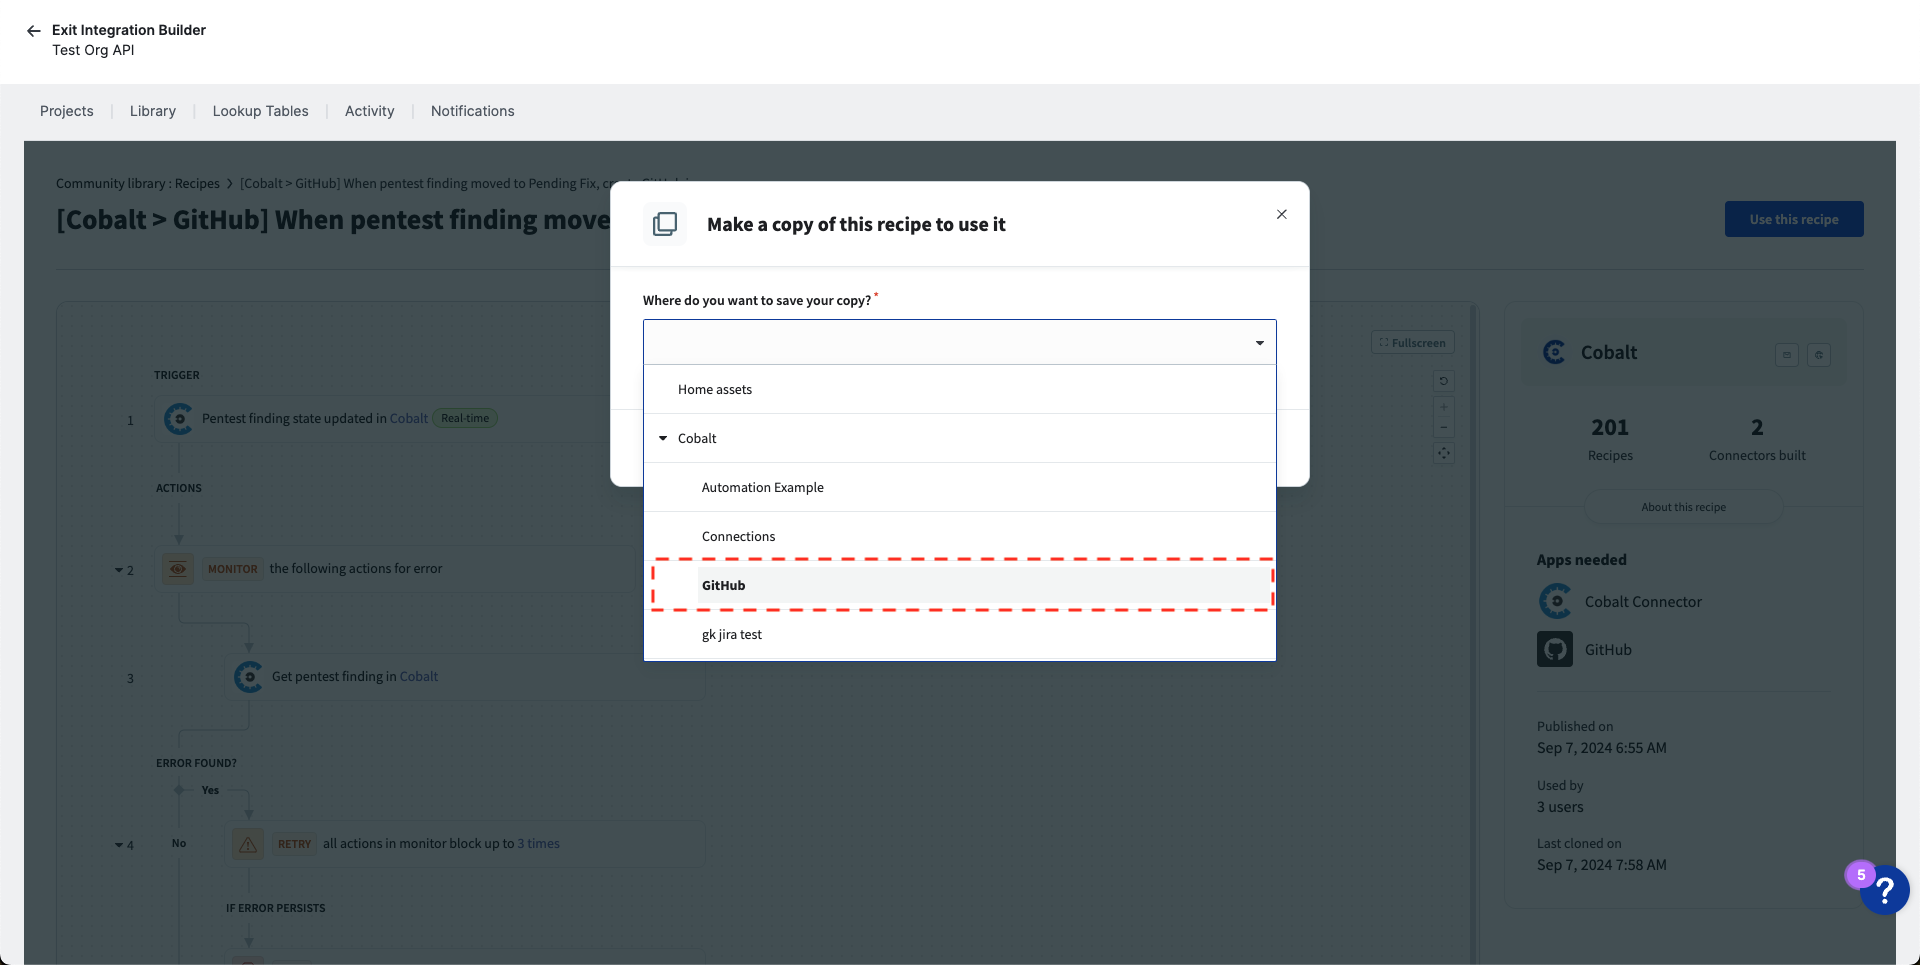
- Select the folder you created and click “Copy and save.”

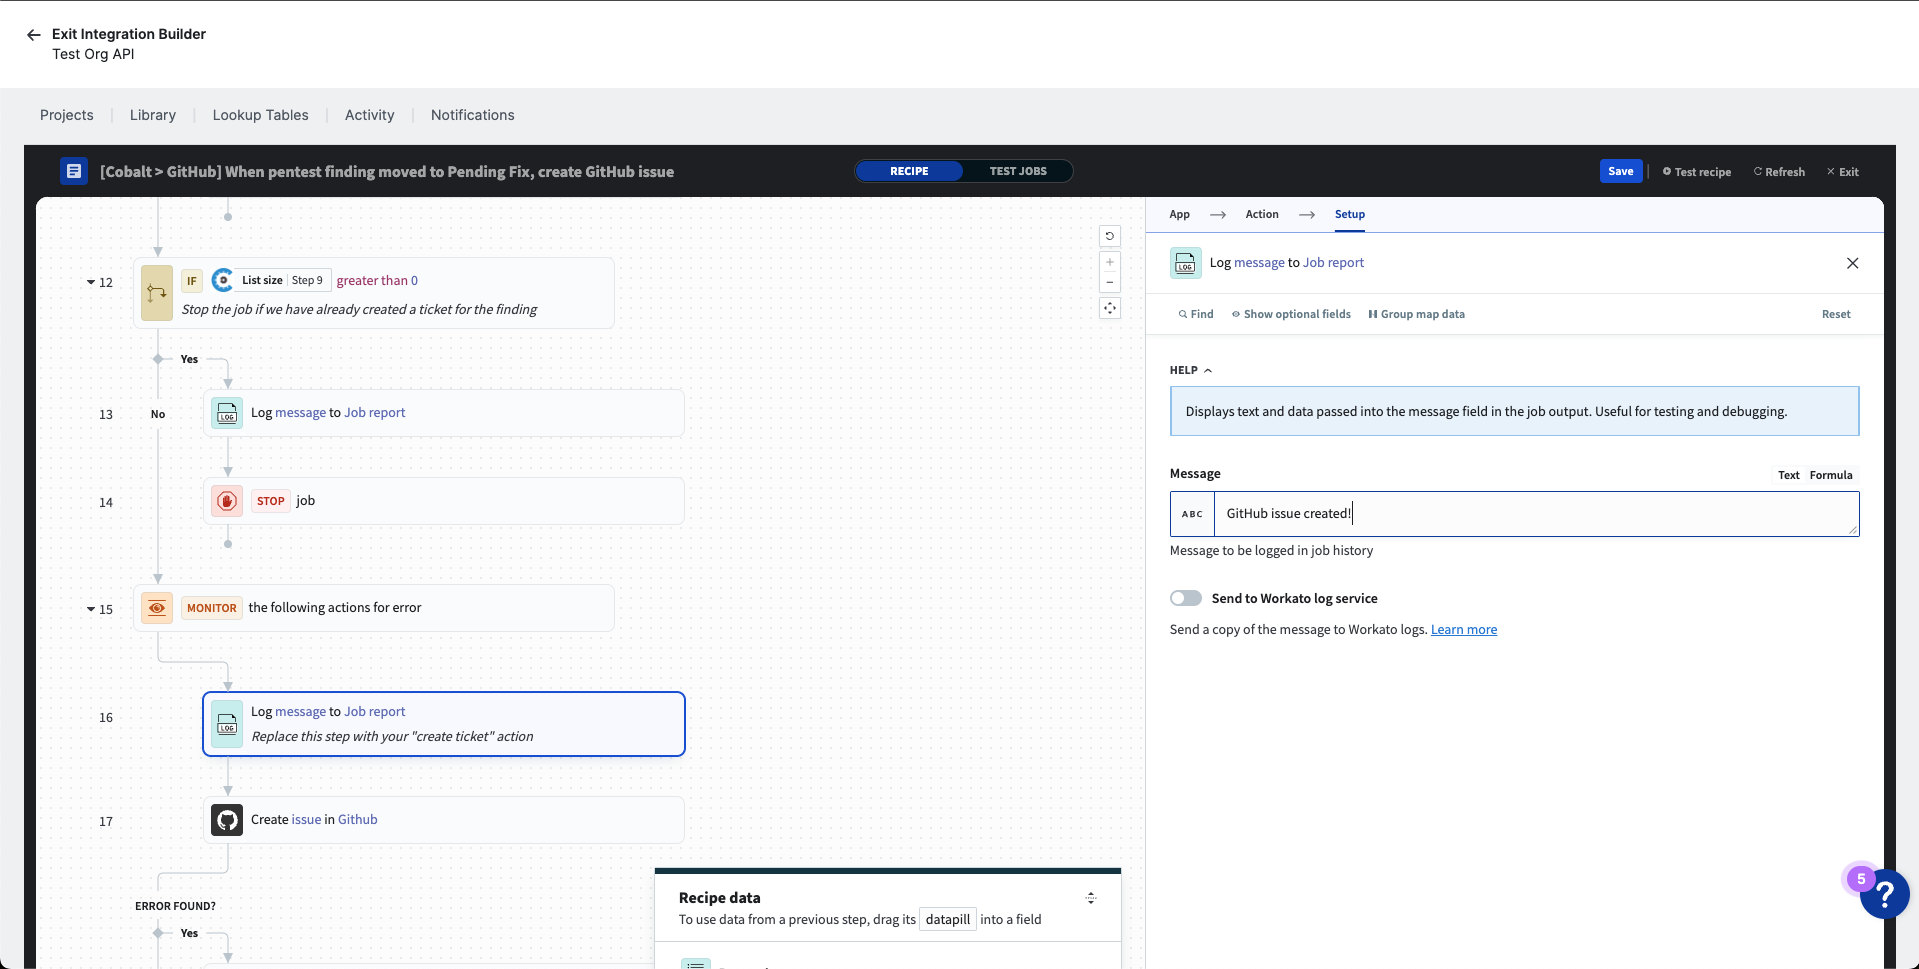
Customize the recipe
You will need to customize the recipe to use your GitHub organization and repository. You can optionally customize the content of the GitHub issues that the recipe creates.
- Click the “Customize recipe” button to open the recipe editor.

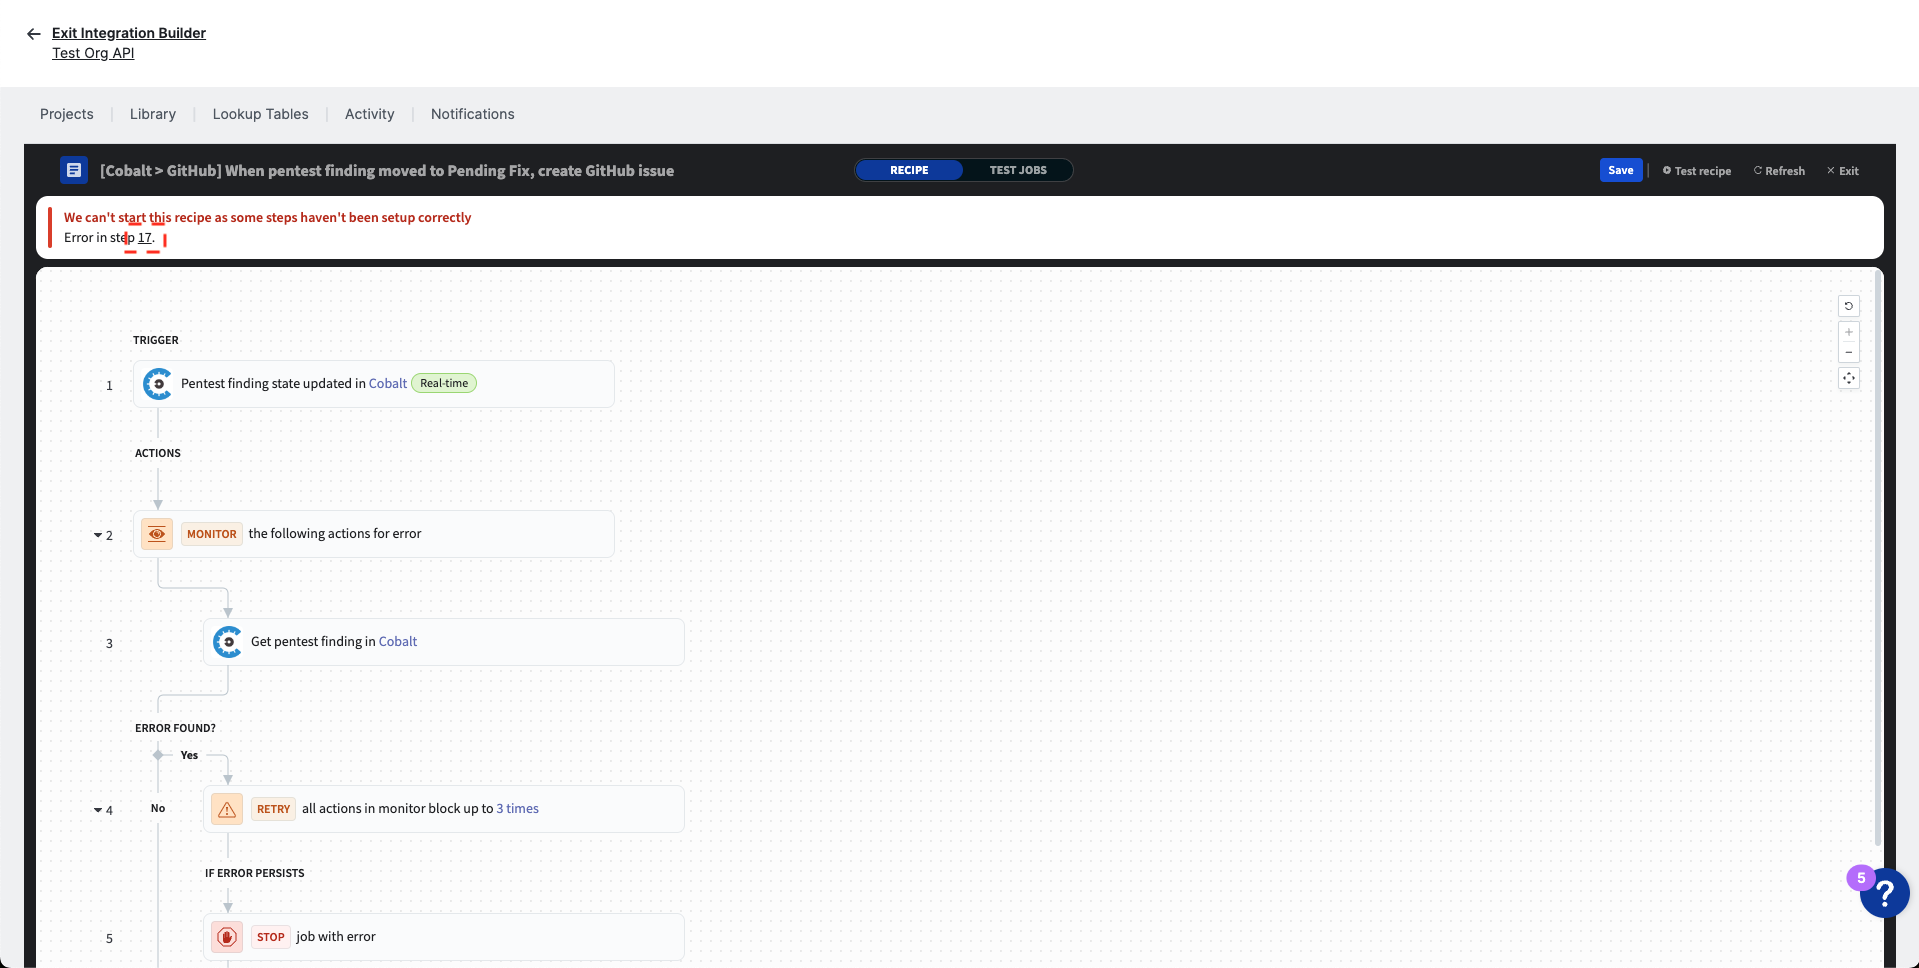
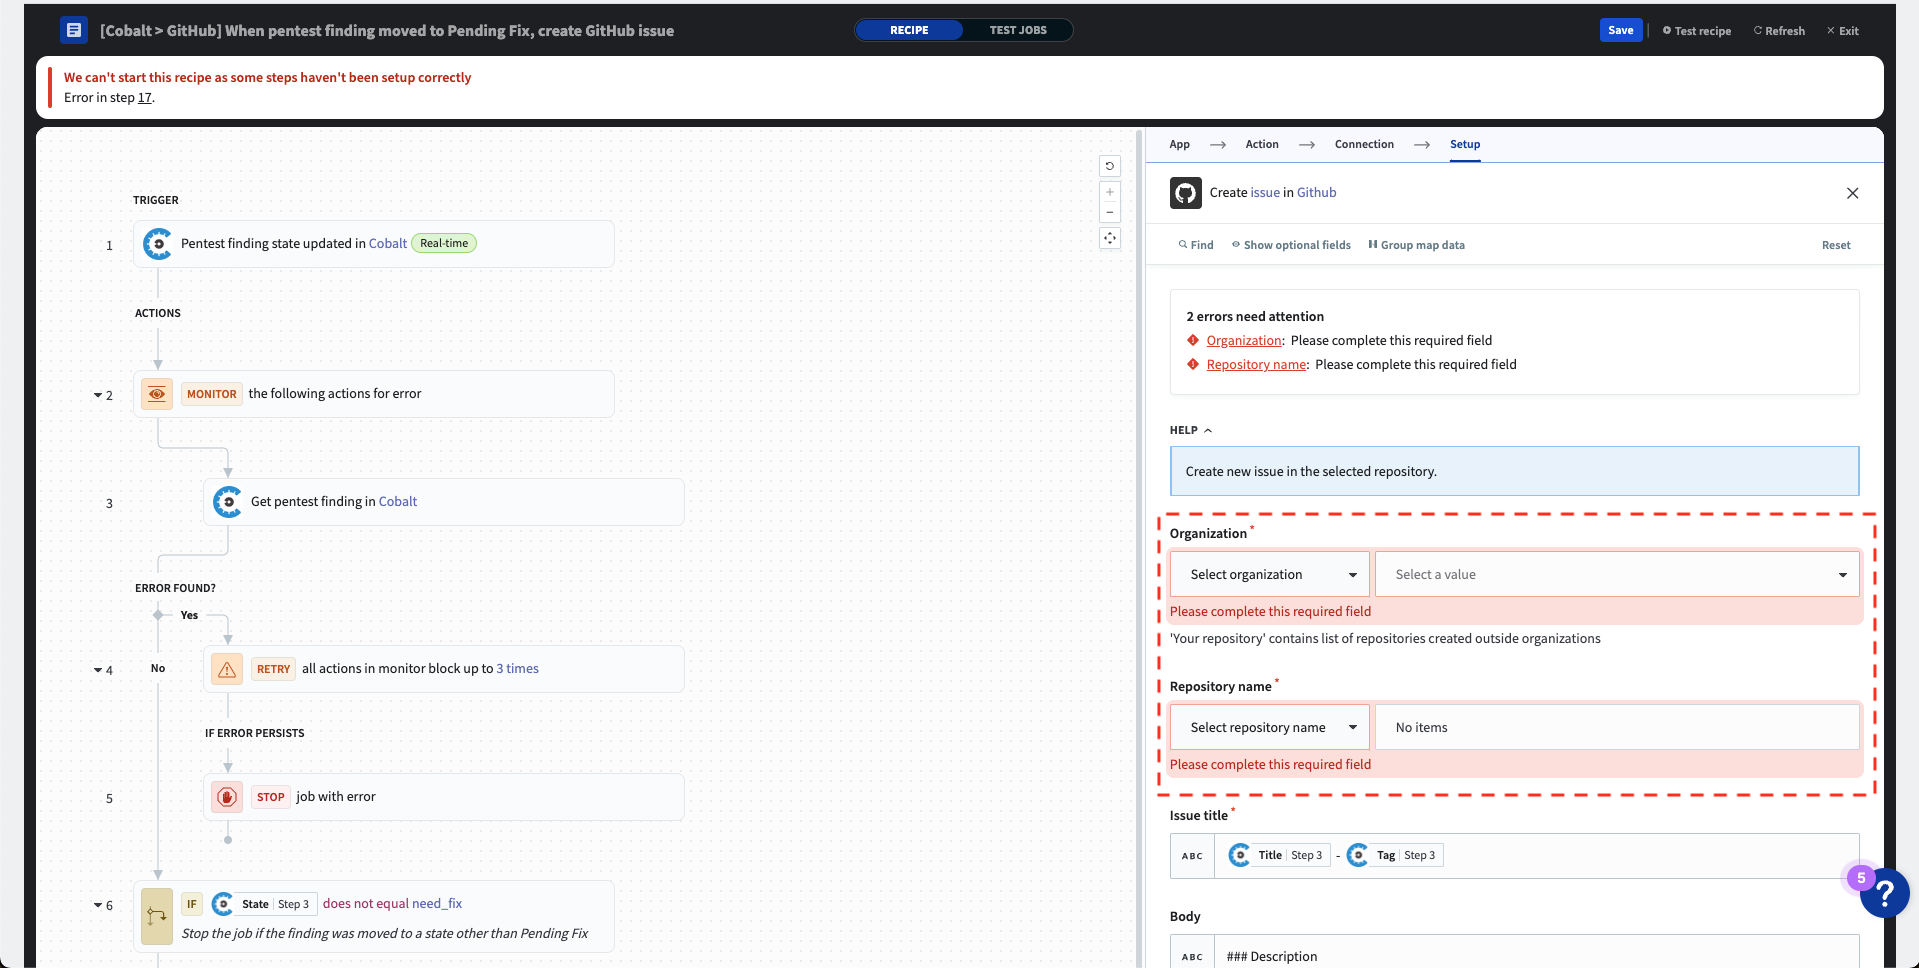
- Click the link for step 17 in the error message at the top of the editor.
- Select or input your GitHub Organization and Repository name required fields.
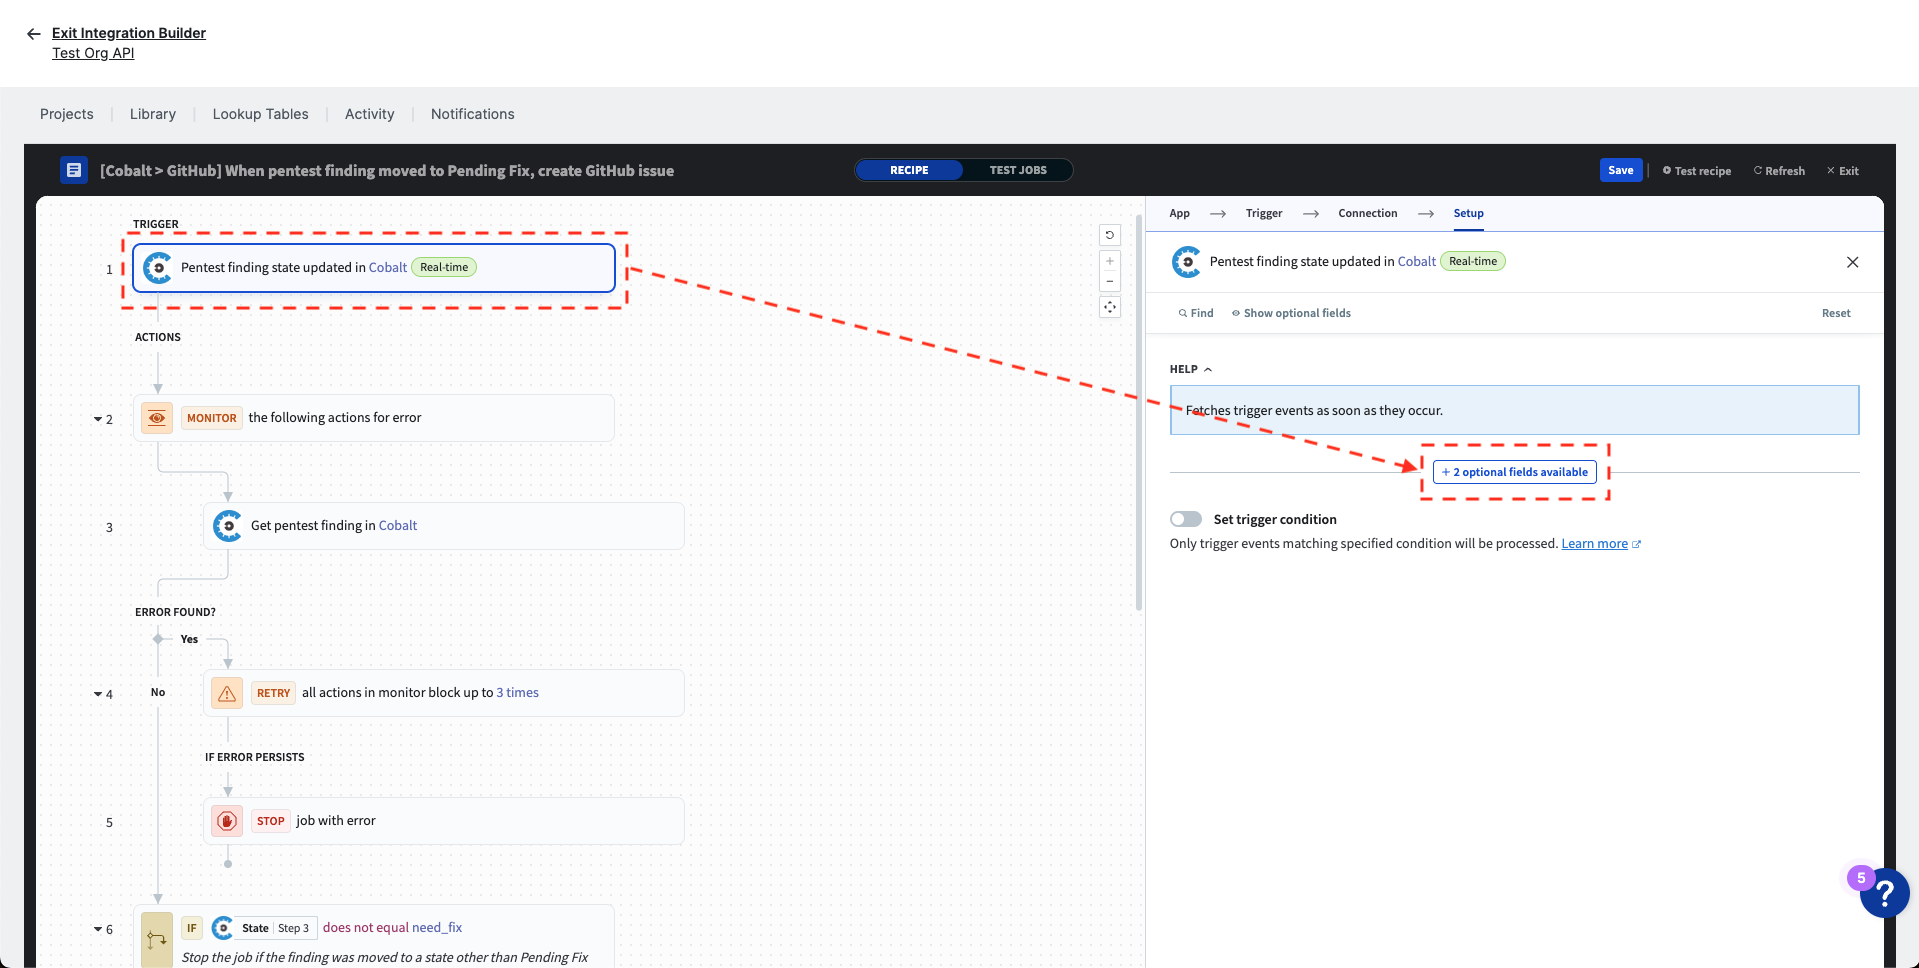
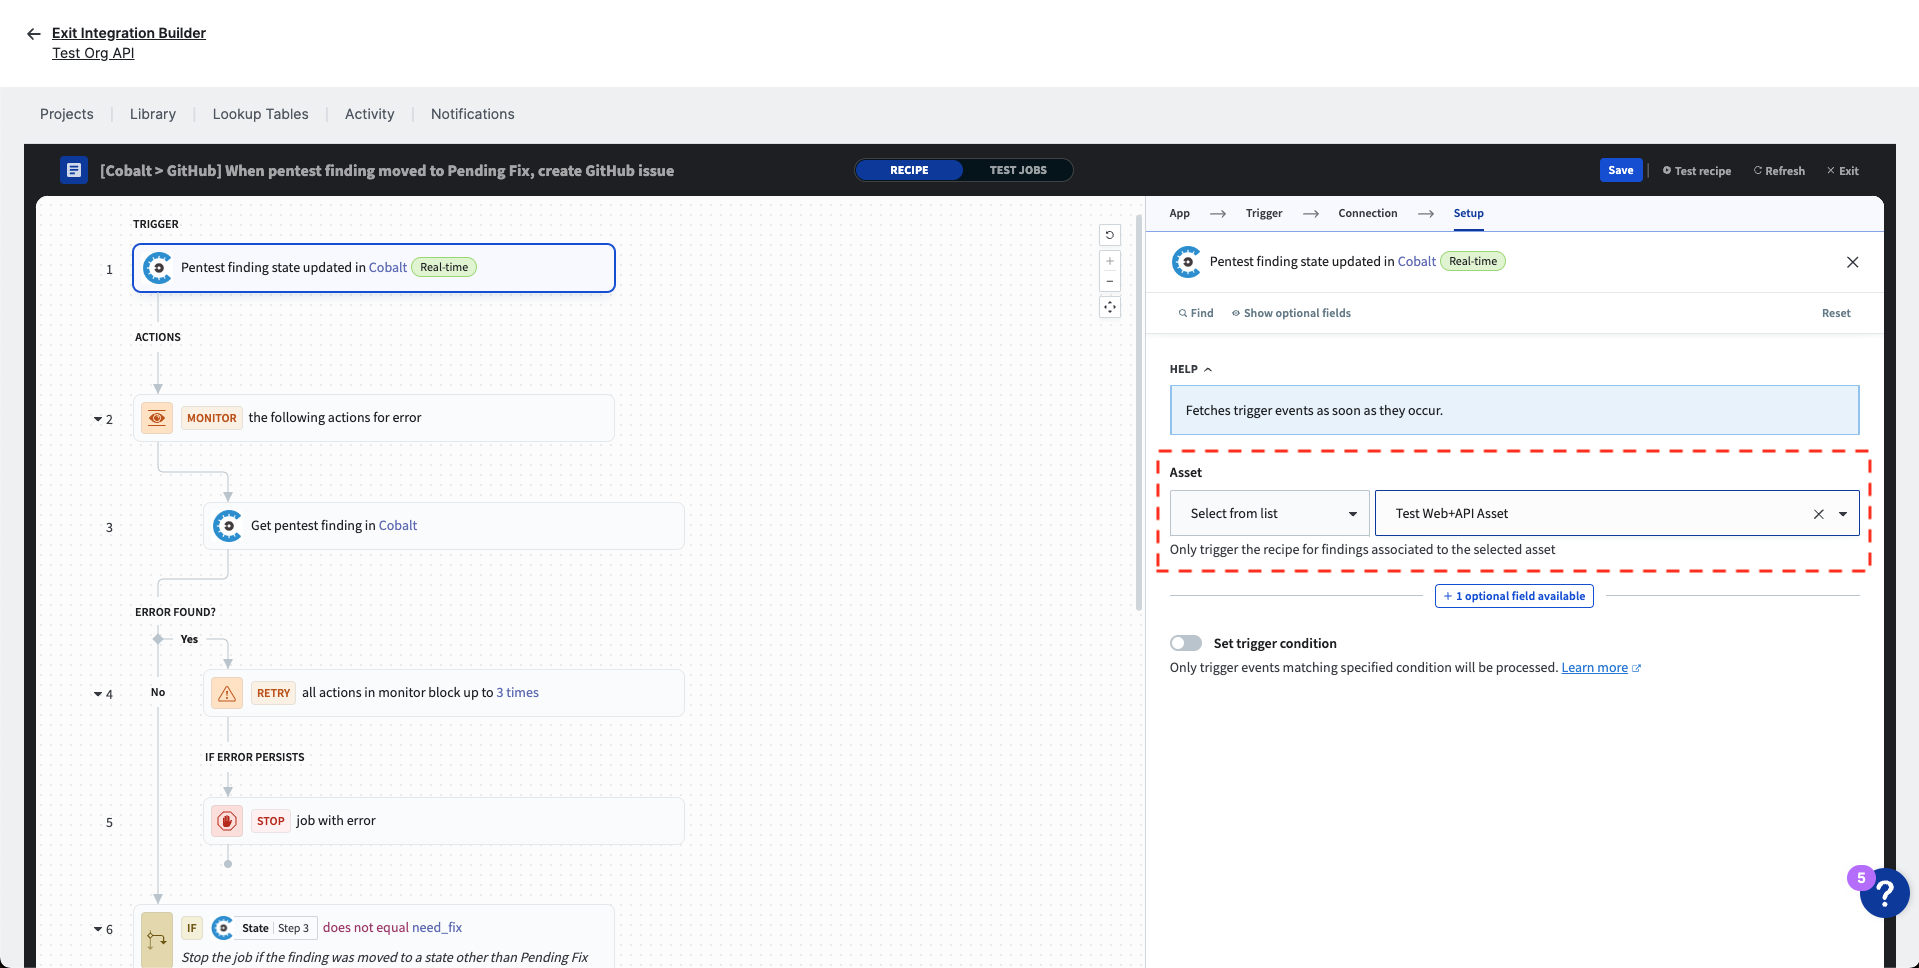
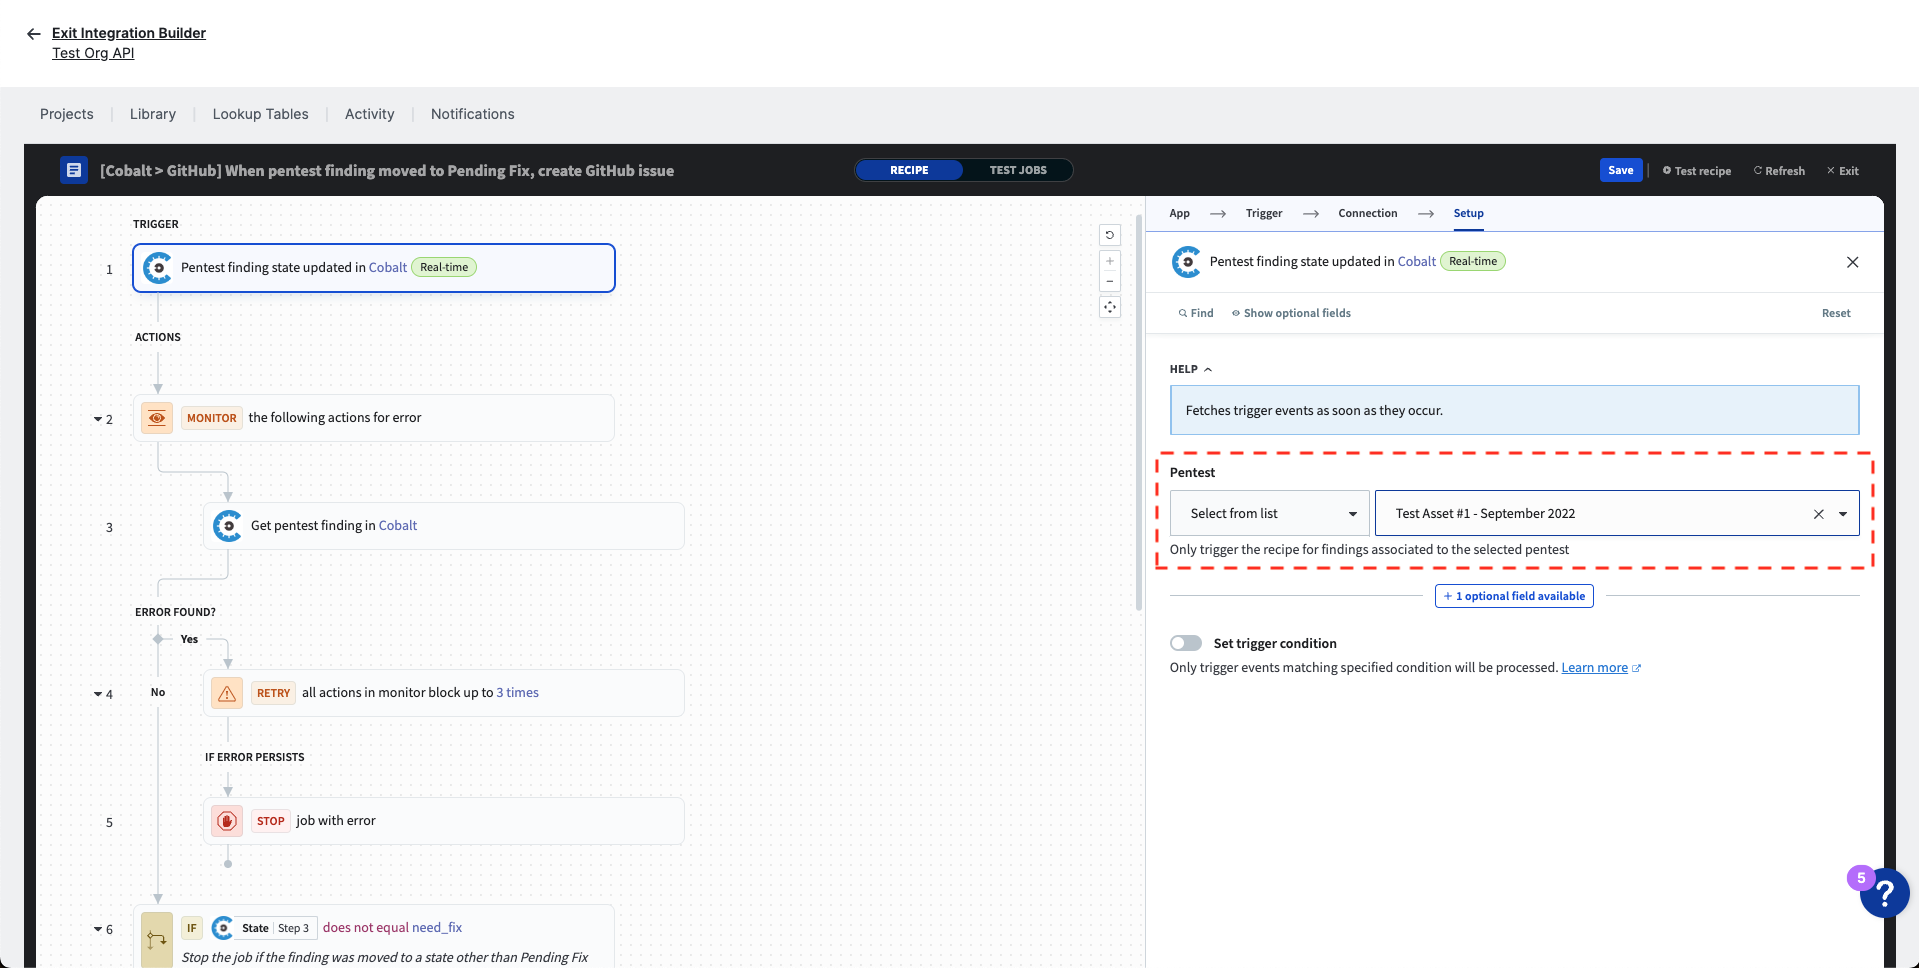
Optional: You can update the recipe trigger to run it for a specific asset or pentest. By default, the recipe will be triggered for all pentests within your org. (Note: If you are using the DAST recipe, you can select a Target instead of an Asset or Pentest.)
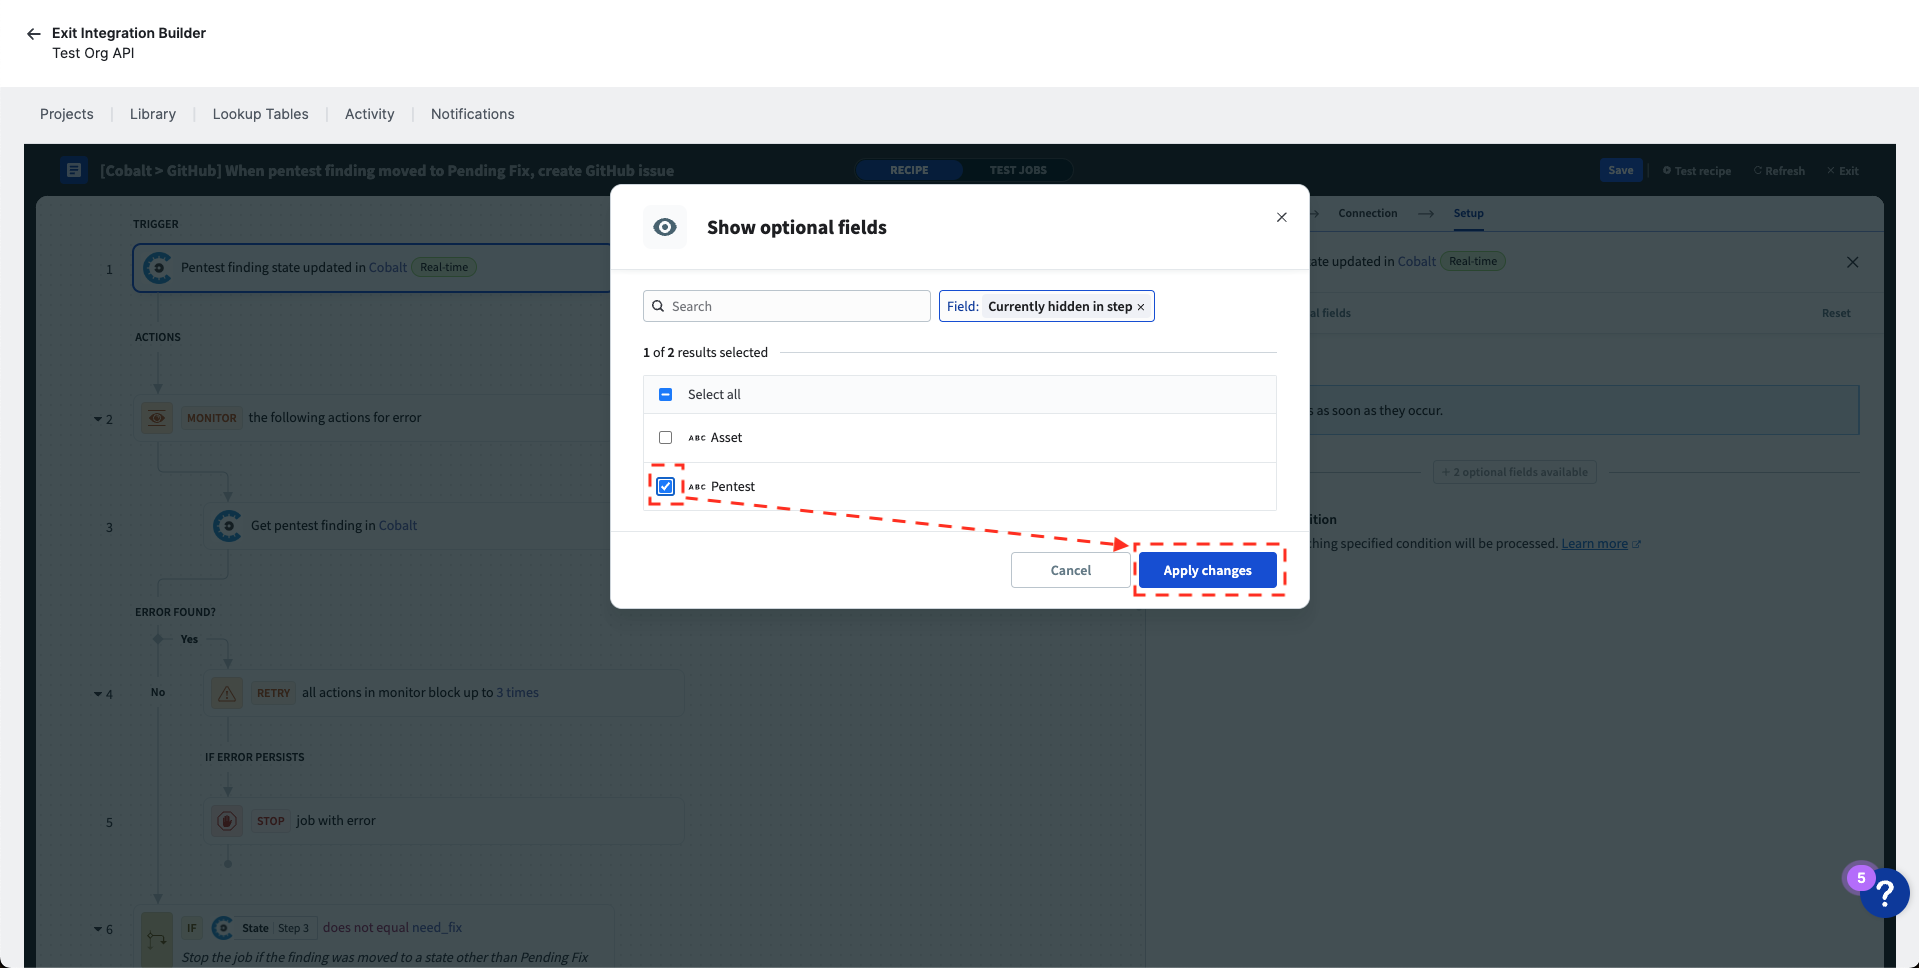
- Click on the trigger to open the trigger editor, then click the button to view optional fields.
- To specify an asset, select the checkbox for “Asset” then select an asset from the list.
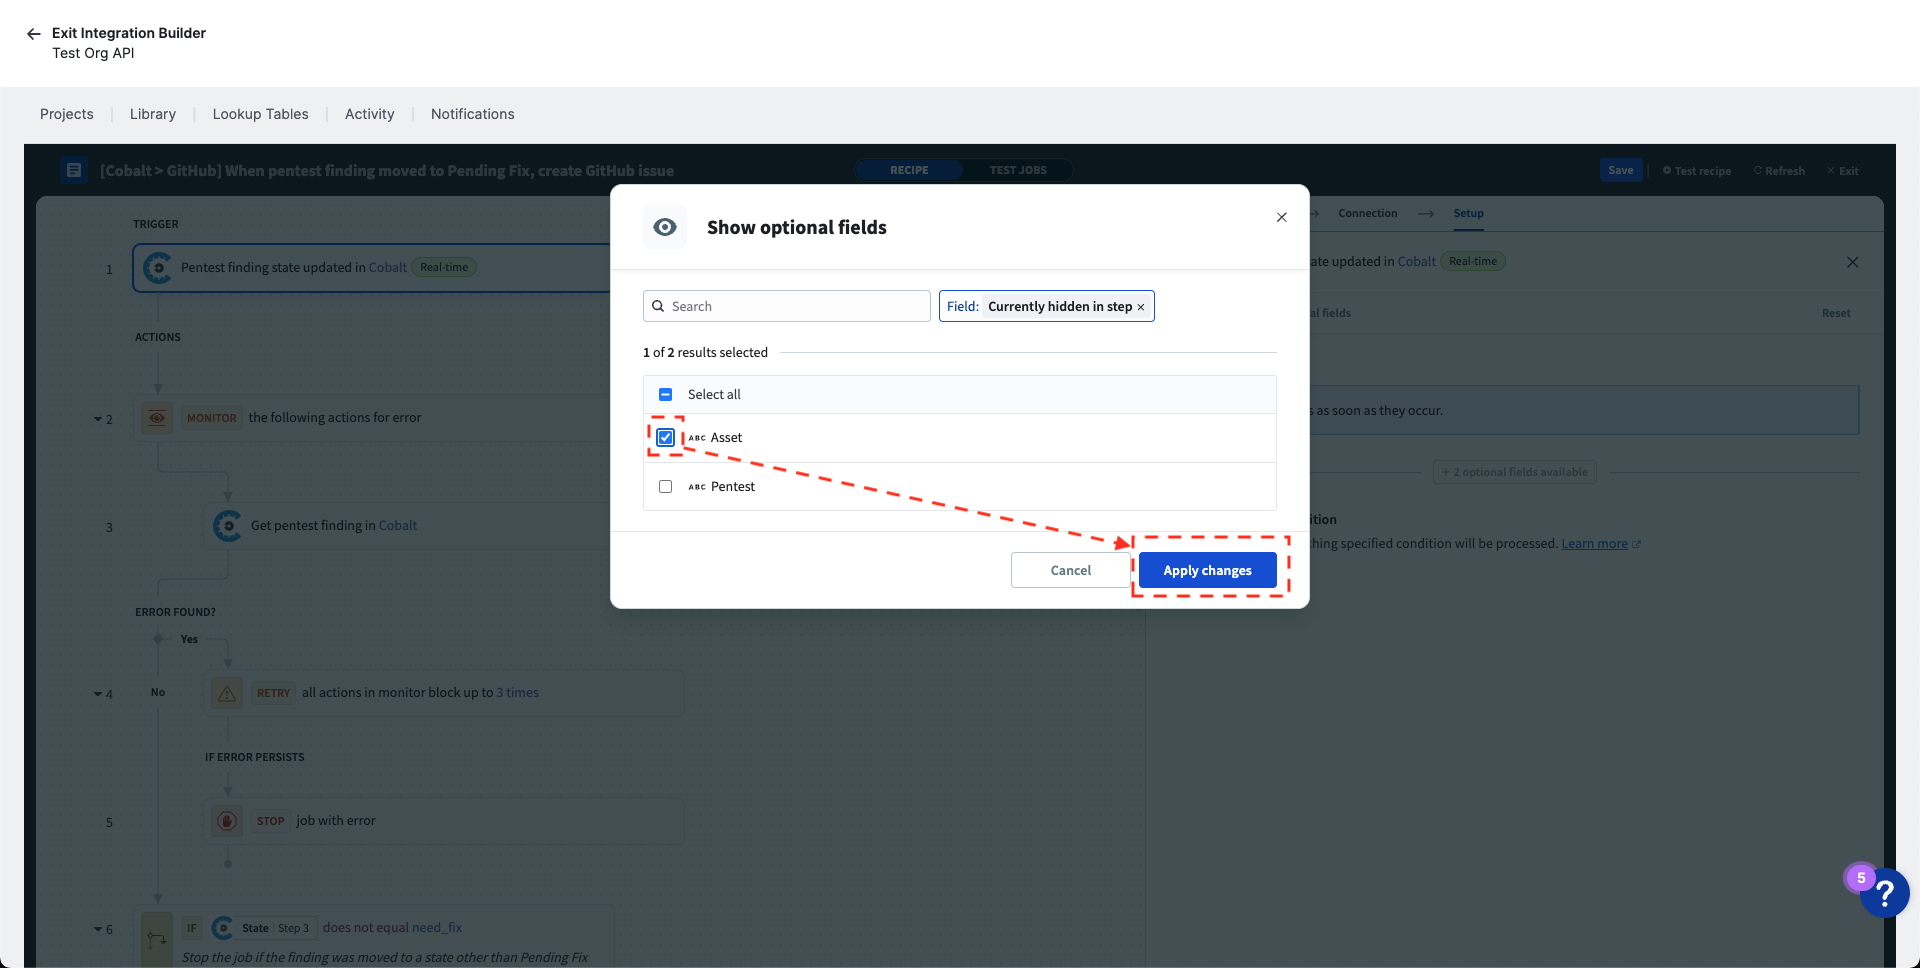
- To specify a pentest, select the checkbox for “Pentest” then select a pentest from the list.
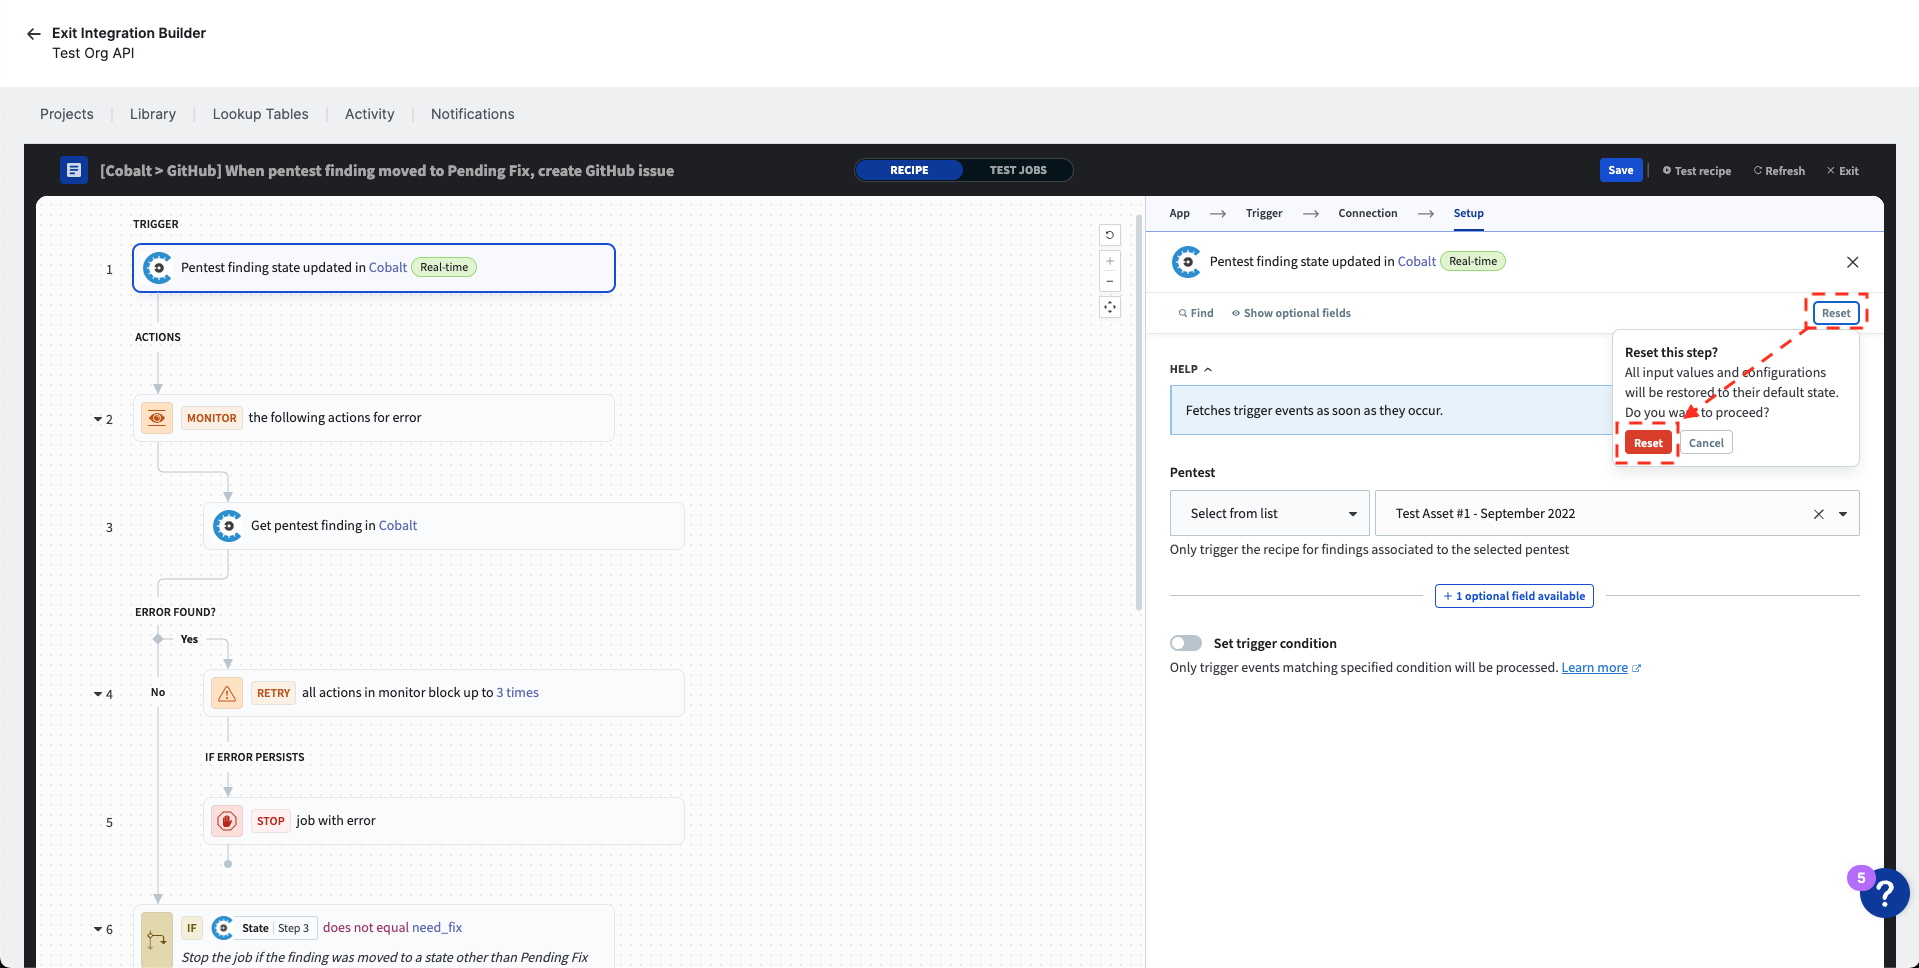
- To undo your changes, click the “Reset” button to return to the default state.
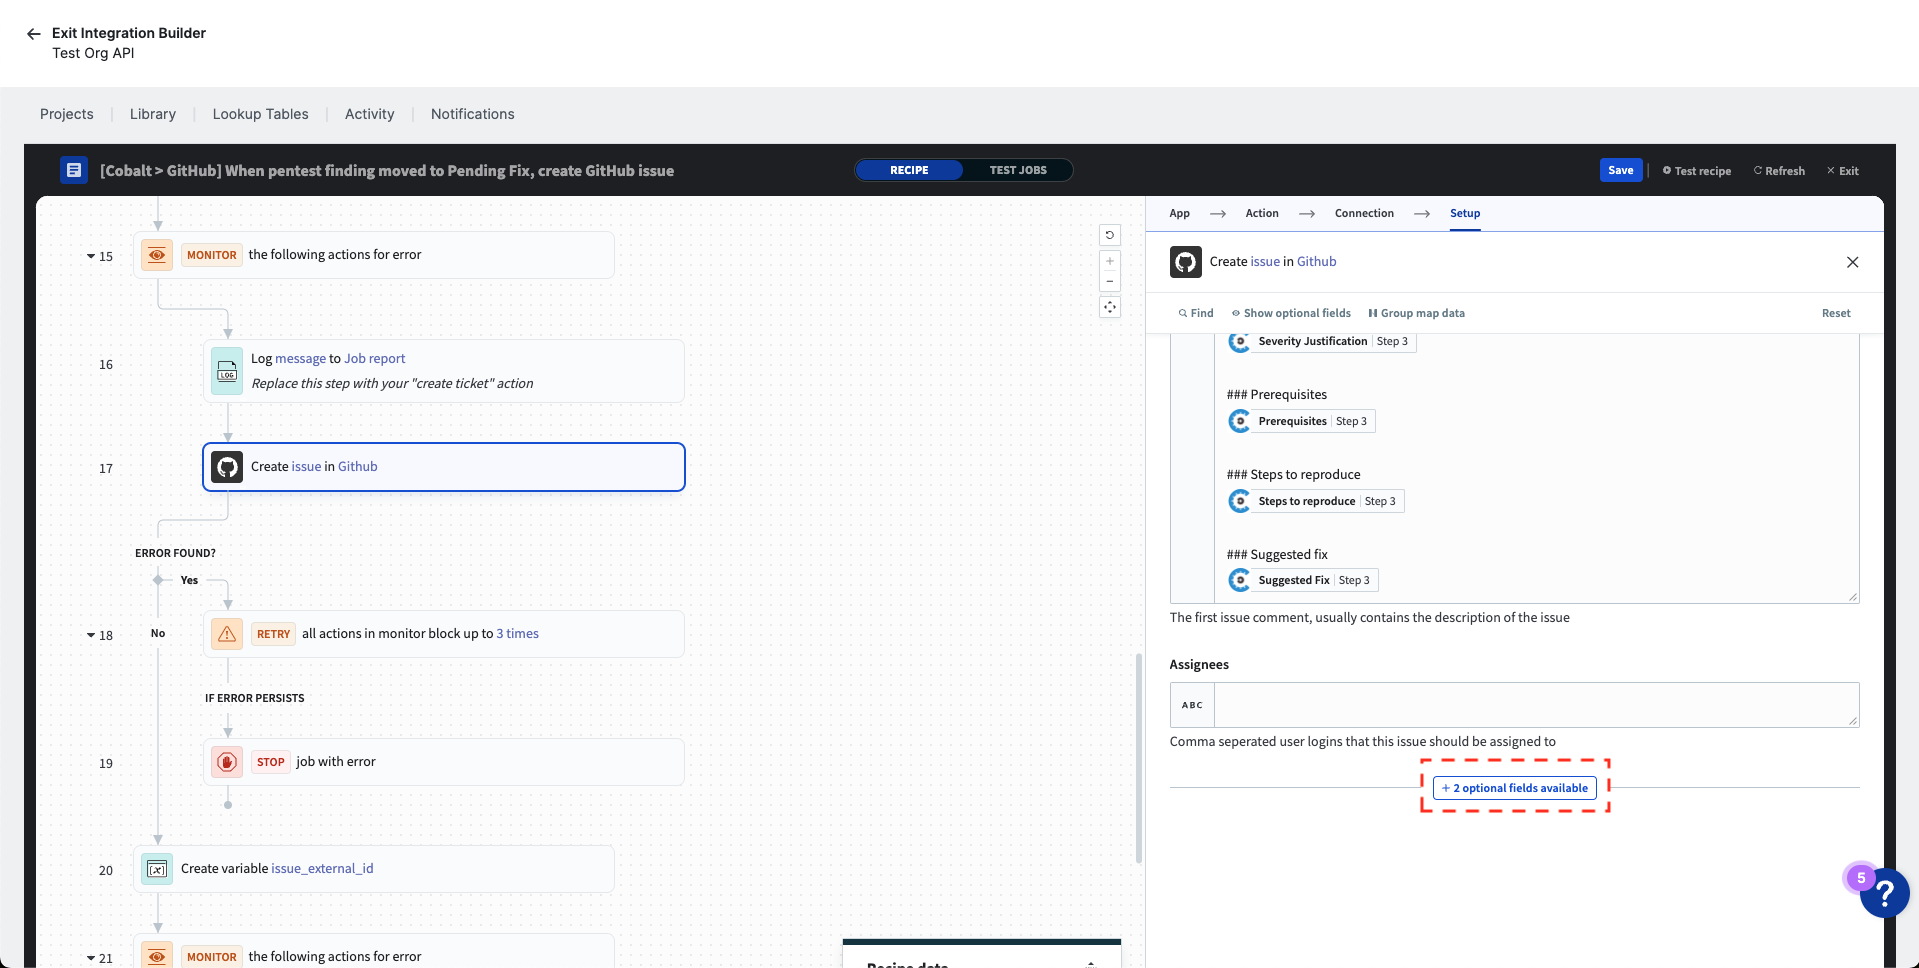
Optional: Customize the content of the GitHub issues that the recipe creates.
- You can use datapills to populate the fields with dynamic values.
- You can type into the input fields to set static values.
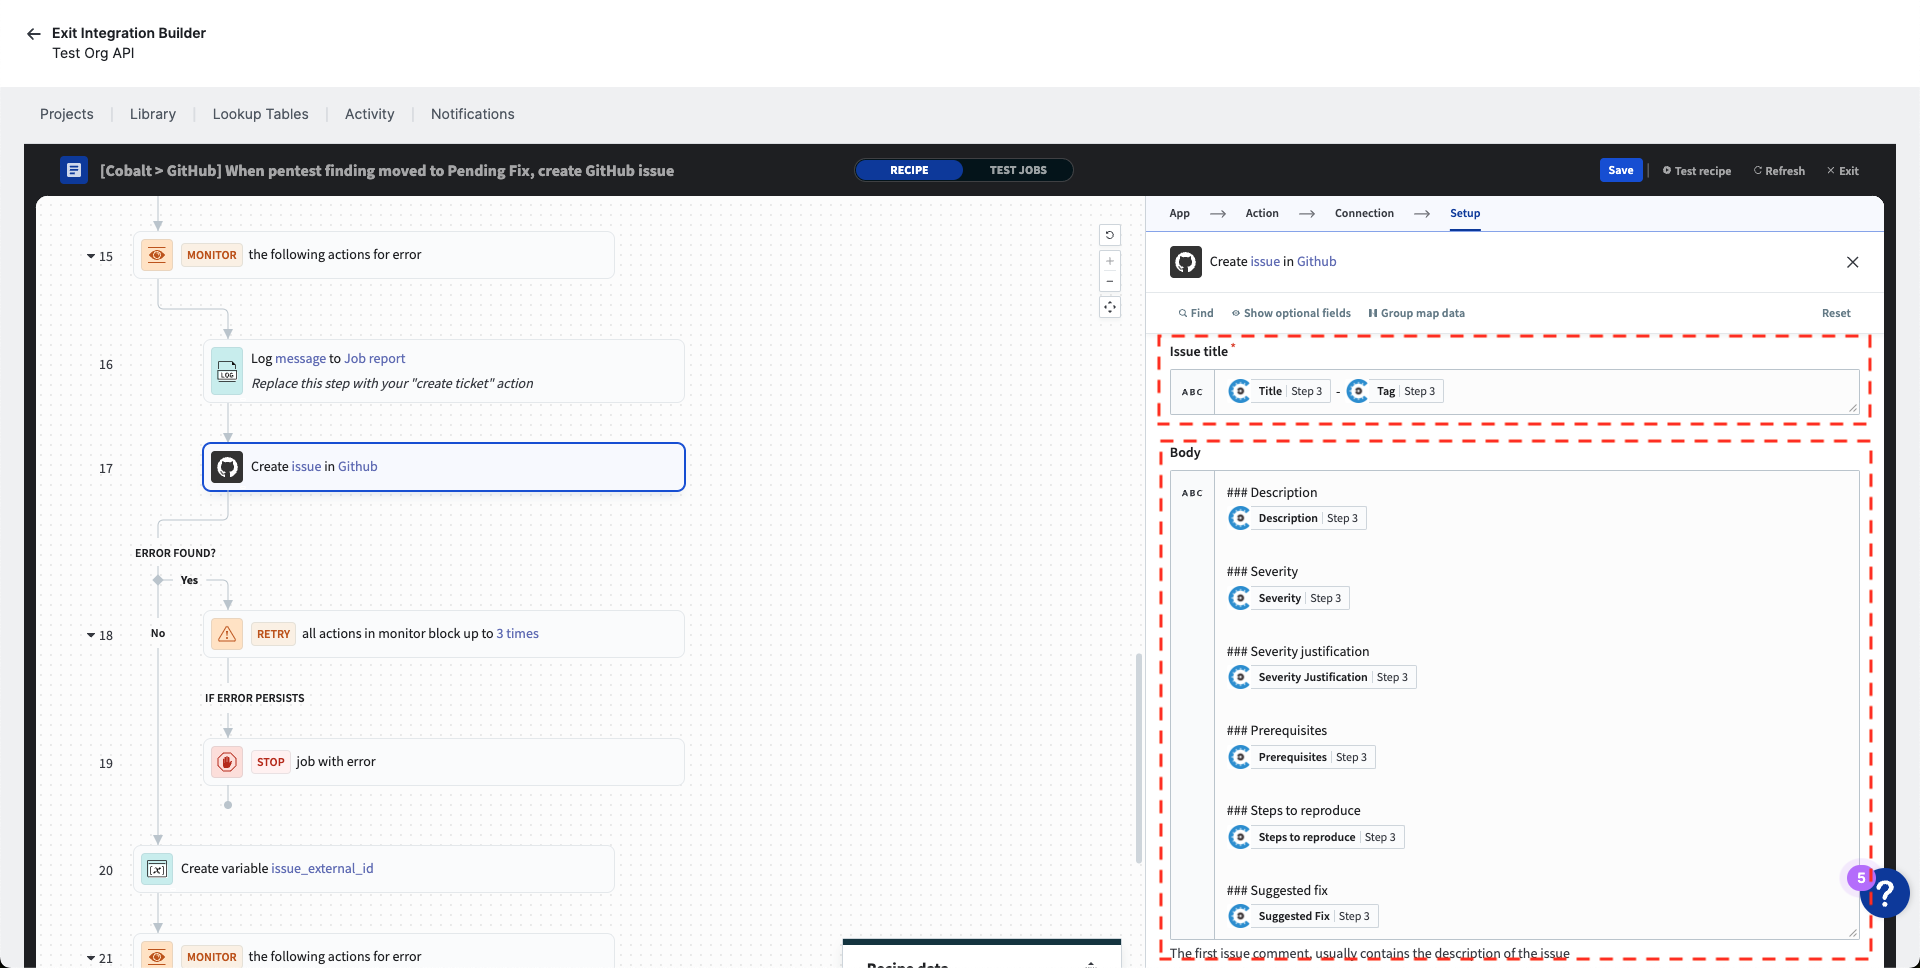
Available fields:
- Issue title
- Body
- Assignees
- Labels (optional field, see below)
- Milestone ID (optional field, see below)

- Click the “Save” button to save your changes.
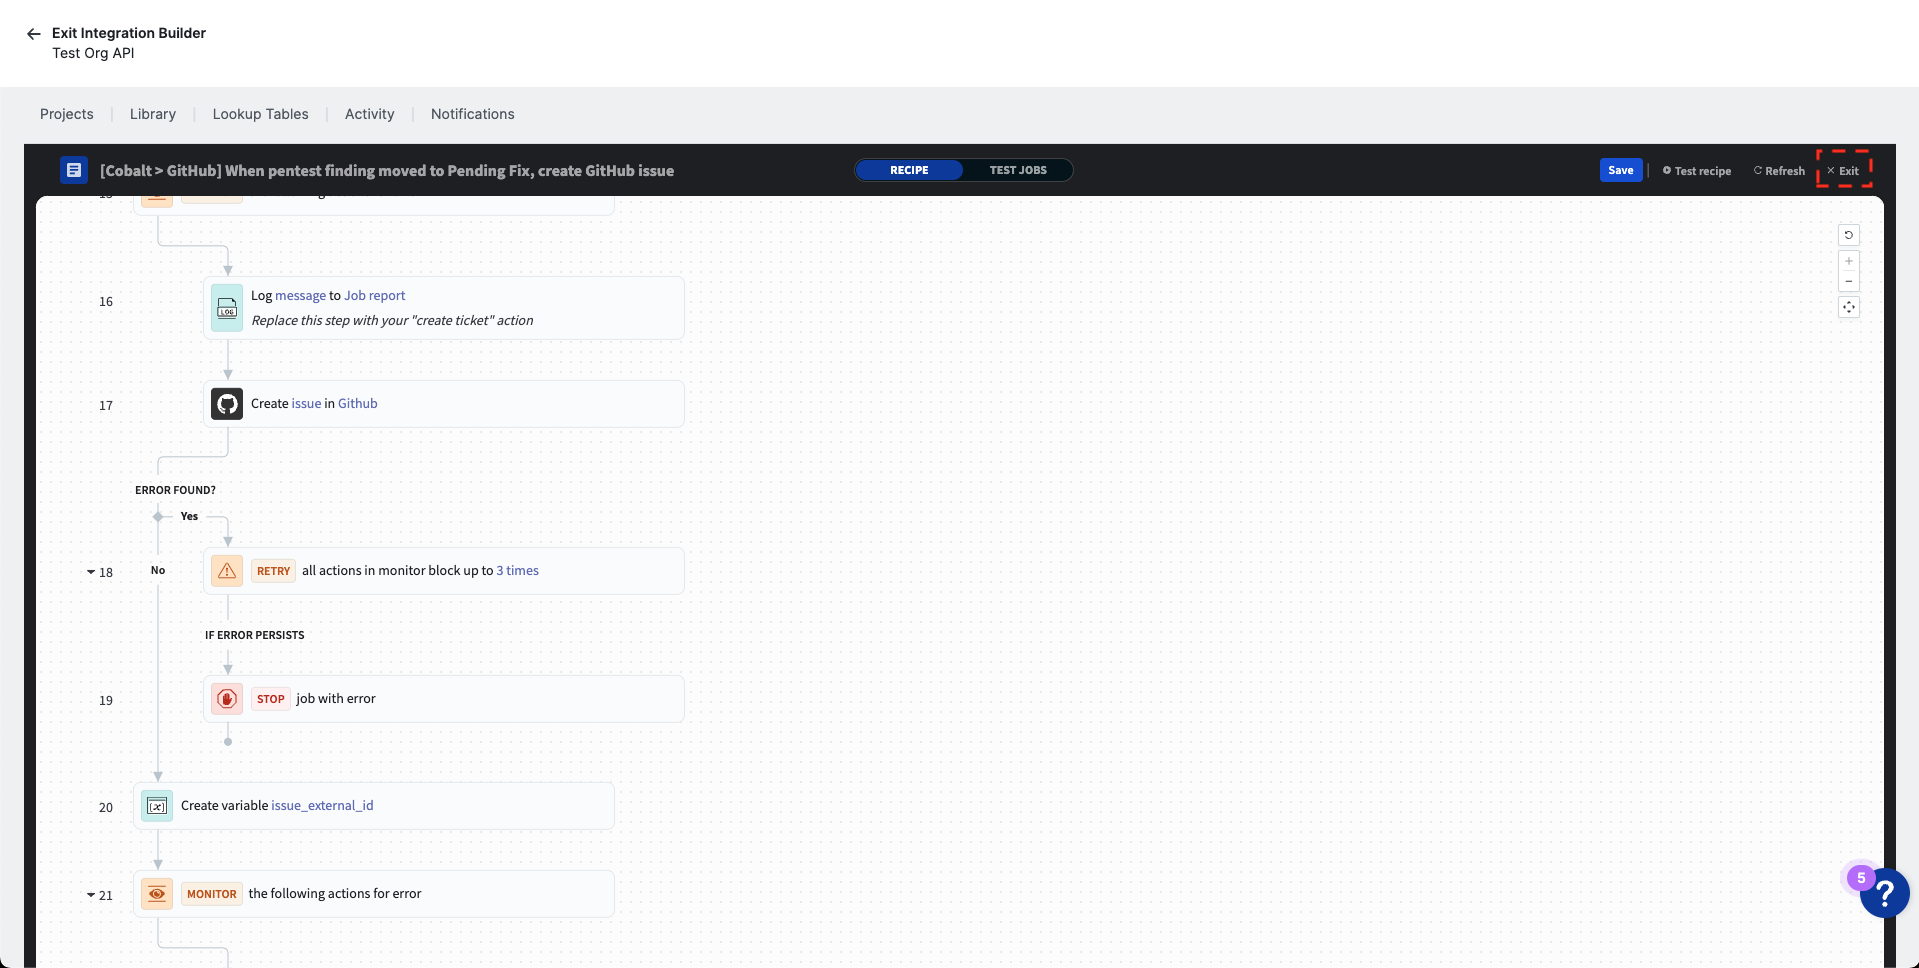
- Click the “Exit” button to close the recipe editor.
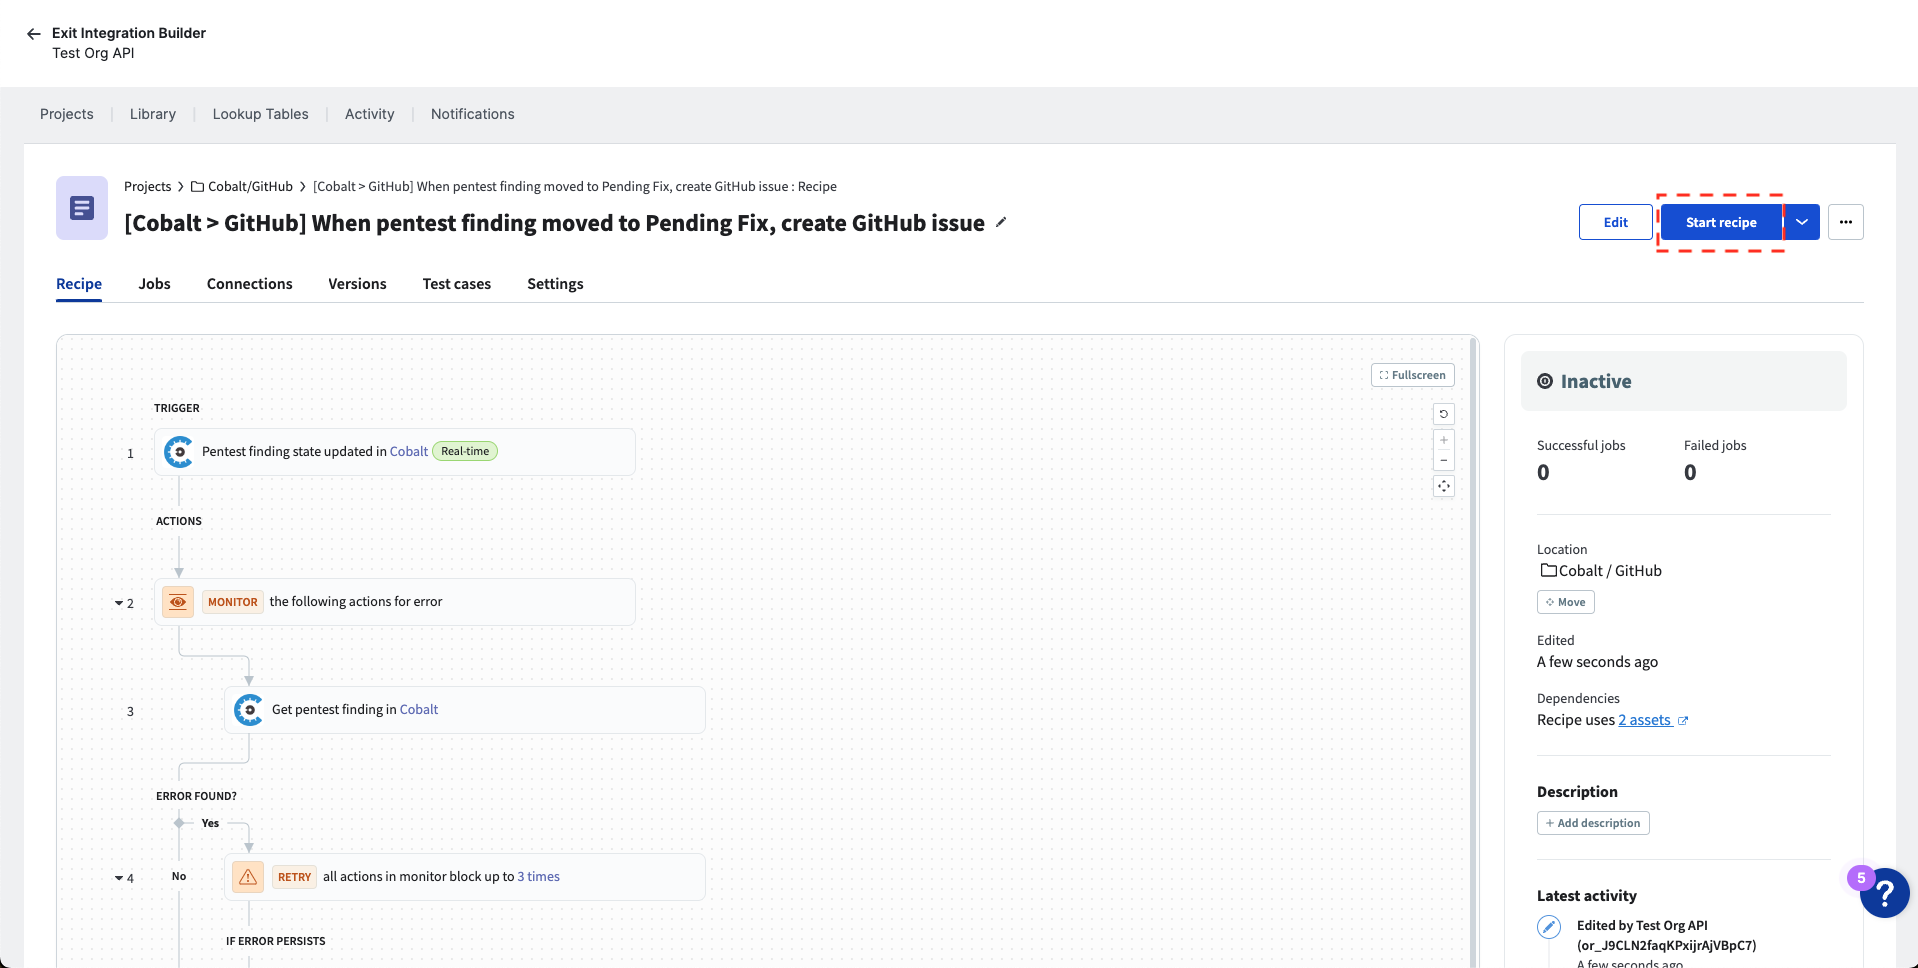
- By default, the recipe will be in an inactive state. To start pushing your findings to GitHub issues, click the “Start recipe” button.
Test the recipe
To test the recipe with pentest findings, follow the guide for creating a test finding.
To test the recipe with DAST scan
findings, run a scan against the target https://brokencrystals.com and wait
for the scan to complete.
Edit the recipe
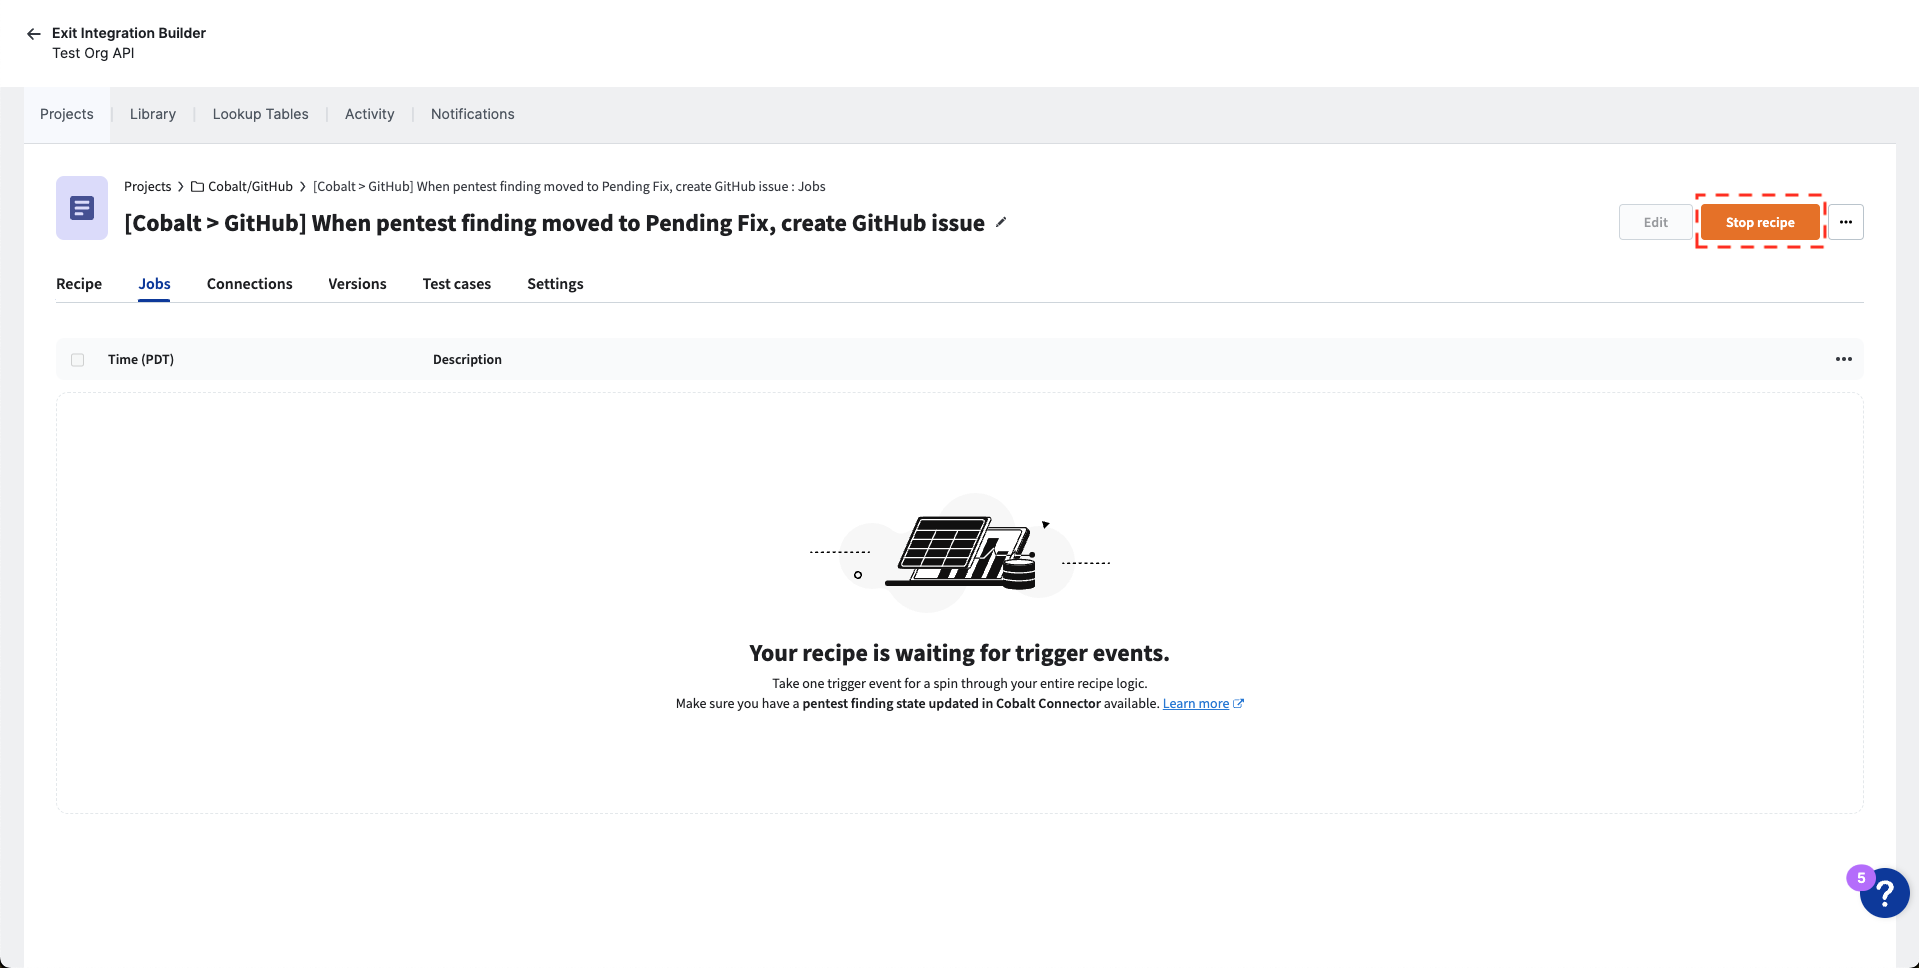
- To edit the recipe, you need to stop it first. Click the “Stop recipe” button at the top of the recipe page.
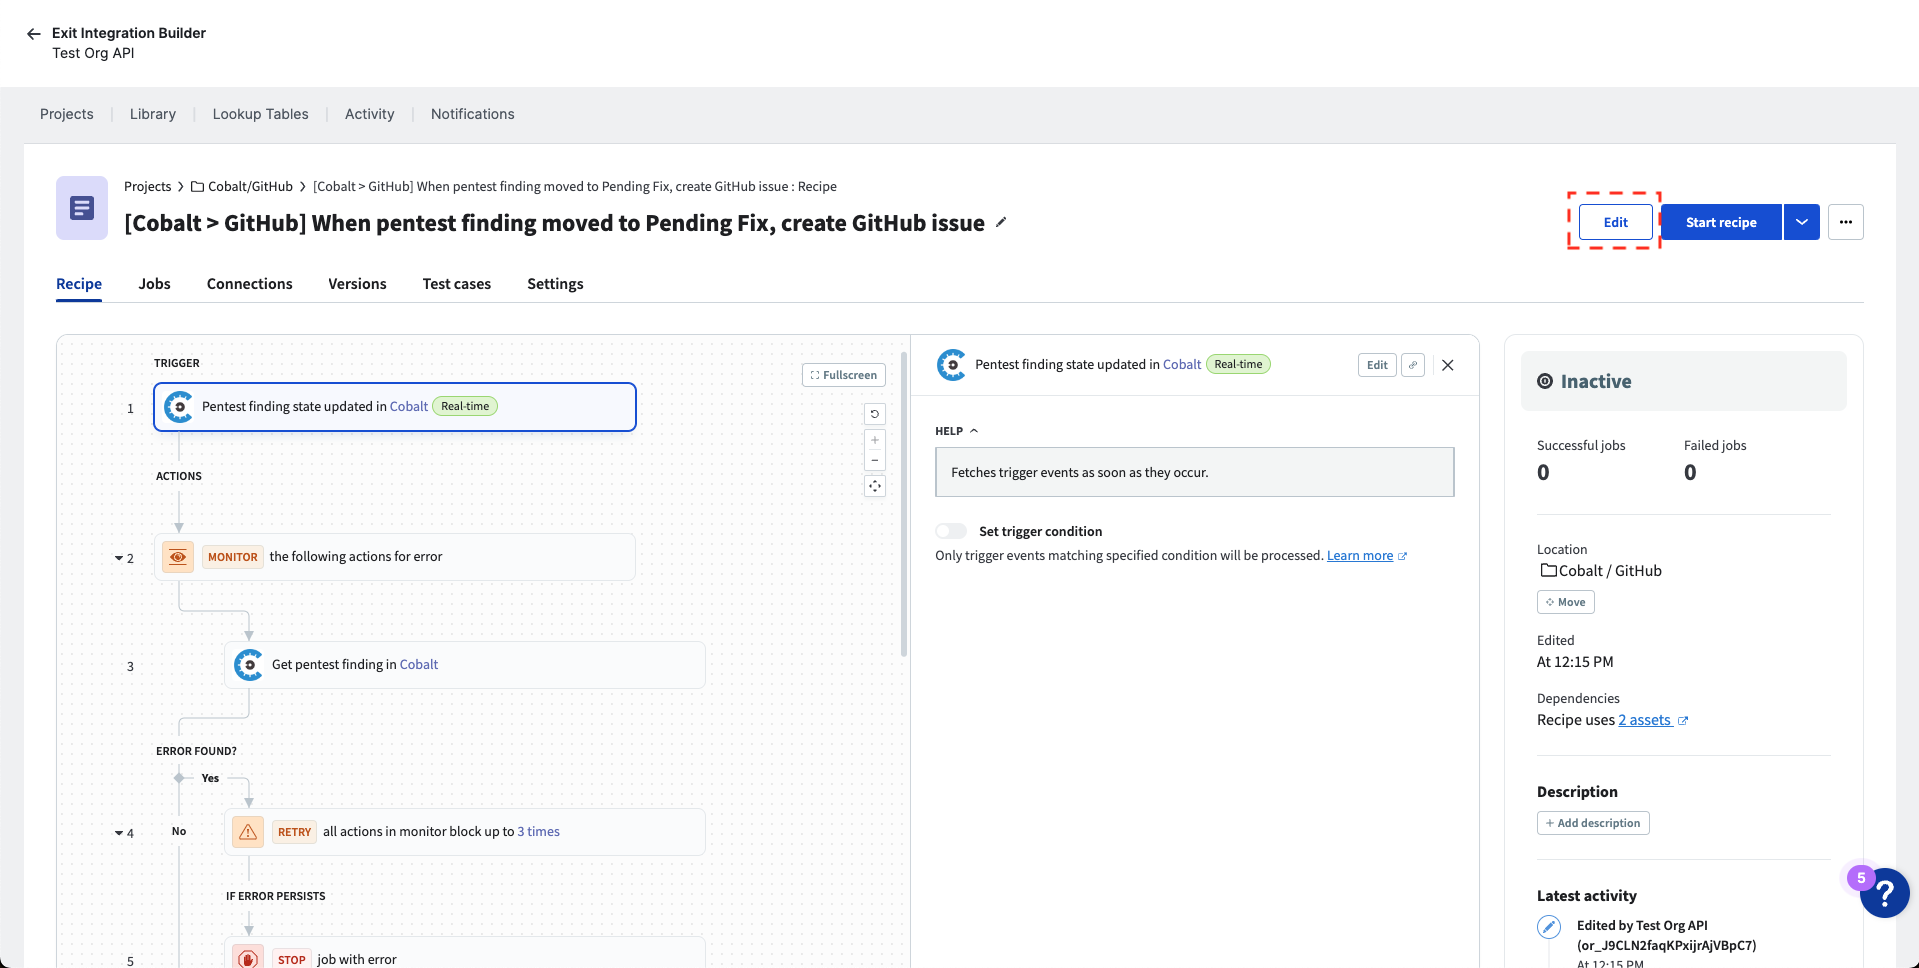
- Click the “Edit” button to open the recipe editor.
- Make your changes in the recipe editor. Once you’re finished, make sure to click the save button and re-start the recipe as shown in the steps above.
 Last modified November 10, 2025